Ubuntu Server 20.04:从命令行连接到 WiFi
在本教程中,您将学习如何使用 Netplan 在 Ubuntu 上从命令行连接到 WiFi。虽然此方法可以在具有 GUI 的 Ubuntu 桌面系统上使用,但如果您运行的是无头 Ubuntu 20.04 系统(例如 Raspberry Pi)或需要连接到 Ubuntu 服务器上的 Wifi,则该方法特别有用。下面跟随我们一起通过 SSID 和网络密钥在命令行上连接到 WiFi。
在本教程中您将学习:
如何识别无线网络接口的名称
如何配置 Netplan 以连接到无线网络 (SSID)
Ubuntu 20.04:使用 Netplan 从命令行连接到 wifi
Ubuntu 20.04:使用 Netplan 分步说明从命令行连接到 WiFi
第一步是识别您的无线网络接口的名称。为此,请执行:
$ ls /sys/class/net
enp0s25  lo  wlp3s0
接下来,导航到
/etc/netplan目录并找到相应的 Netplan 配置文件。配置文件的名称可能为01-network-manager-all.yaml或50-cloud-init.yaml。$ ls /etc/netplan/编辑 Netplan 配置文件:
$ sudoedit /etc/netplan/50-cloud-init.yaml并插入以下配置节,同时将
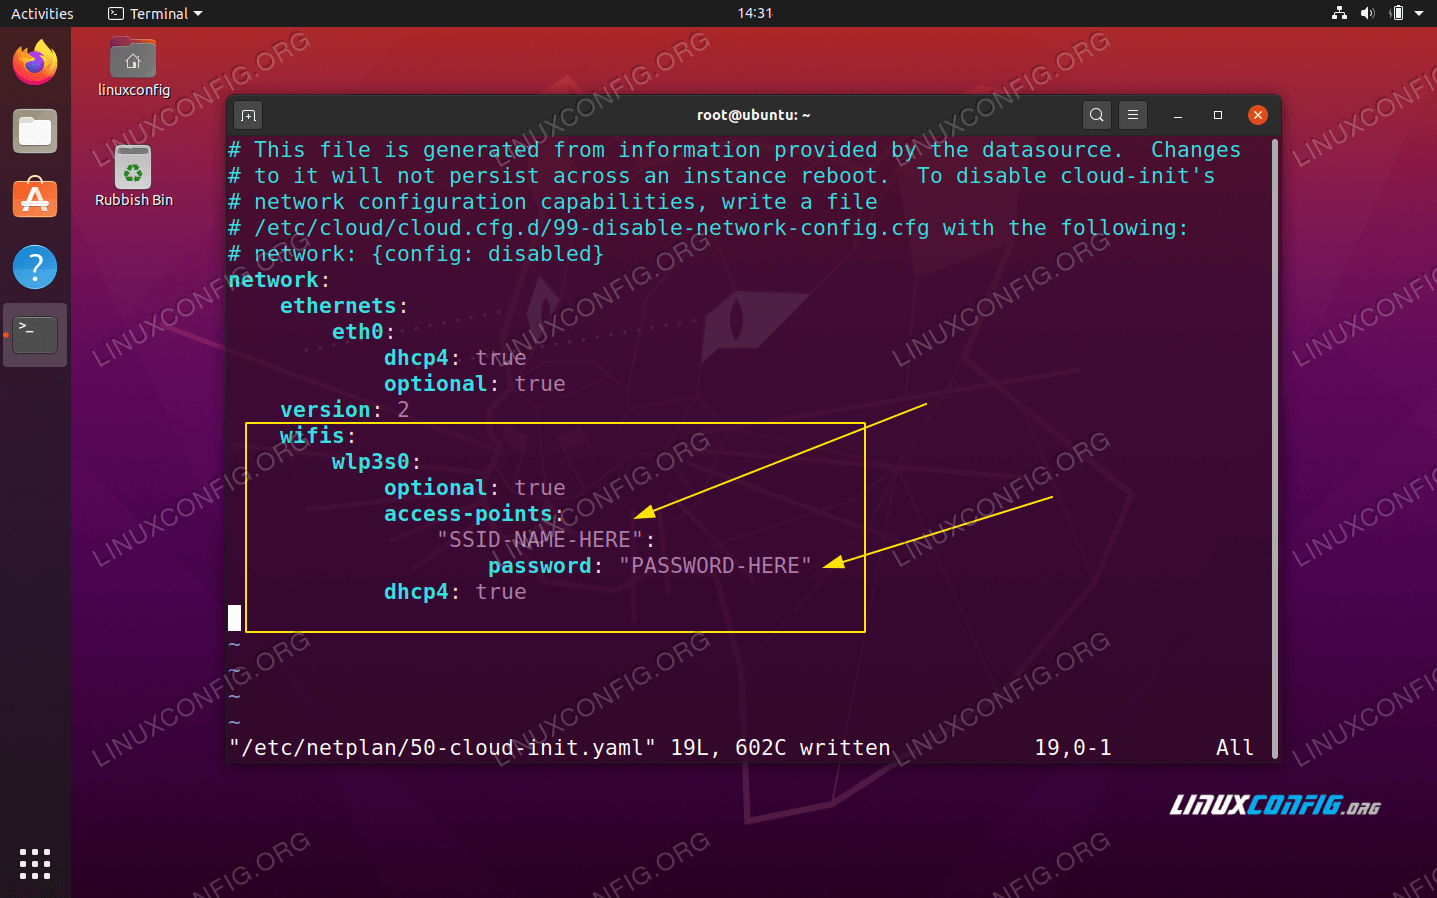
SSID-NAME-HERE和PASSWORD-HERE替换为您的 SSID 网络名称和密码:wifis: wlan0: optional: true access-points: "SSID-NAME-HERE": password: "PASSWORD-HERE" dhcp4: true确保
wifis块与上述ethernets或version块(如果存在)对齐。整个配置文件可能类似于以下内容:# This file is generated from information provided by the datasource. Changes # to it will not persist across an instance reboot. To disable cloud-init's # network configuration capabilities, write a file # /etc/cloud/cloud.cfg.d/99-disable-network-config.cfg with the following: # network: {config: disabled} network: ethernets: eth0: dhcp4: true optional: true version: 2 wifis: wlp3s0: optional: true access-points: "SSID-NAME-HERE": password: "PASSWORD-HERE" dhcp4: true准备就绪后,通过执行以下命令应用更改并连接到您的无线接口:
$ sudo netplan apply或者,如果遇到一些问题,请执行:
$ sudo netplan --debug apply如果一切顺利,您将能够通过执行
ip命令看到您的无线适配器已连接到无线网络:$ ip a
结束语
在本教程中,我们了解了如何在 Ubuntu 上通过命令行连接到 wifi 网络。您现在知道如何将 Ubuntu 服务器连接到 WiFi 或 Raspberry Pi。