如何在 Rocky Linux 9 上安装和配置 JupyterLab 环境
在此页
- 先决条件
- 第 1 步 - 配置防火墙
- 第 2 步 - 安装 Nginx
- 第 3 步 - 安装 JupyterLab
- 第 4 步 - 配置 JupyterLab
- 第 5 步 - 创建 JupyterLab 服务文件
- 第 6 步 - 安装 SSL
- 第 7 步 - 配置 Nginx
- 结论
JupyterLab 是 Project Jupyter 的下一代基于 Web 的开发环境。 Jupyter 项目的开发目标是为跨多种编程语言的交互式计算开发开源、开放标准和服务。 JupyterLab 提供了一个灵活的界面,允许开发人员以灵活、集成和可扩展的方式处理文档和活动,例如 Jupyter 笔记本、文本编辑器、终端和自定义组件。 JupyterLab 是下一代 Jupyter Notebook,并有望最终取代它。它支持 40 多种编程语言,包括 R、Python、Scala 和 Julia。
本教程将教您如何在 Rocky Linux 9 服务器上安装和配置 JupyterLab。
先决条件
-
A server running Rocky Linux 9.
-
A non-root user with sudo privileges.
-
A fully qualified domain name (FQDN) pointing to your server. For our purposes, we will use
jupyterlab.example.comas the domain name. -
SELinux is disabled.
-
Make sure everything is updated.
$ sudo dnf update -
Install basic utility packages. Some of them may already be installed.
$ sudo dnf install wget curl nano unzip yum-utils -y
第 1 步 - 配置防火墙
第一步是配置防火墙。 Rocky Linux 使用 Firewalld 防火墙。检查防火墙状态。
$ sudo firewall-cmd --state
running
防火墙适用于不同的区域,公共区域是我们将使用的默认区域。列出防火墙上所有活动的服务和端口。
$ sudo firewall-cmd --permanent --list-services
它应该显示以下输出。
cockpit dhcpv6-client ssh
Wiki.js 需要 HTTP 和 HTTPS 端口才能运行。打开它们。
$ sudo firewall-cmd --add-service=http --permanent
$ sudo firewall-cmd --add-service=https --permanent
重新加载防火墙以应用更改。
$ sudo firewall-cmd --reload
第 2 步 - 安装 Nginx
Rocky Linux 9 附带了旧版本的 Nginx。您需要下载官方 Nginx 存储库以安装最新版本。
创建并打开 /etc/yum.repos.d/nginx.repo 文件以创建官方 Nginx 存储库。
$ sudo nano /etc/yum.repos.d/nginx.repo
将以下代码粘贴到其中。
[nginx-stable]
name=nginx stable repo
baseurl=http://nginx.org/packages/centos/$releasever/$basearch/
gpgcheck=1
enabled=1
gpgkey=https://nginx.org/keys/nginx_signing.key
module_hotfixes=true

[nginx-mainline]
name=nginx mainline repo
baseurl=http://nginx.org/packages/mainline/centos/$releasever/$basearch/
gpgcheck=1
enabled=0
gpgkey=https://nginx.org/keys/nginx_signing.key
module_hotfixes=true
通过按 Ctrl + X 并在出现提示时输入 Y 来保存文件。
安装 Nginx 服务器。
$ sudo dnf install nginx -y
验证安装。
$ nginx -v
nginx version: nginx/1.22.1
启用并启动 Nginx 服务器。
$ sudo systemctl enable nginx --now
检查服务器的状态。
$ sudo systemctl status nginx
? nginx.service - nginx - high performance web server
     Loaded: loaded (/usr/lib/systemd/system/nginx.service; enabled; vendor preset: disabled)
     Active: active (running) since Tue 2022-12-13 06:07:05 UTC; 31s ago
       Docs: http://nginx.org/en/docs/
    Process: 146475 ExecStart=/usr/sbin/nginx -c /etc/nginx/nginx.conf (code=exited, status=0/SUCCESS)
   Main PID: 146476 (nginx)
      Tasks: 2 (limit: 5911)
     Memory: 1.9M
        CPU: 15ms
     CGroup: /system.slice/nginx.service
             ??146476 "nginx: master process /usr/sbin/nginx -c /etc/nginx/nginx.conf"
             ??146477 "nginx: worker process"
第 3 步 - 安装 JupyterLab
让我们先检查python版本。
$ python -V
Python 3.9.14
安装 PIP 包管理器。
$ sudo dnf install python3-pip
为 JupyterLab 创建一个目录。
$ mkdir jupyterlab
切换到新创建的目录。
$ cd ~/jupyterlab
设置一个名为 jupyterlab_env 的虚拟环境。
$ python3 -m venv --system-site-packages jupyterlab_env
激活环境。
$ source jupyterlab_env/bin/activate
升级 Pip 包管理器。
(jupyterlab_env) $ pip install --upgrade pip
安装 JupyterLab。
(jupyterlab_env) $ pip install jupyterlab
第 4 步 - 配置 JupyterLab
默认情况下,JupyterLab 会在您每次启动它时生成一个新令牌以授予对界面的访问权限。让我们用密码身份验证代替它。
生成密码哈希。将 YOUR_PASSWORD 替换为您选择的强密码。
(jupyterlab_env) $ python3 -c "from jupyter_server.auth import passwd; print(passwd('YOUR_PASSWORD'))"
上面的命令将生成一个长密码哈希。它使用 Argon2 密码哈希函数。记下哈希值。
创建 JupyterLab 配置文件。
(jupyterlab_env) $ jupyter lab --generate-config
上述命令将生成一个具有默认值的配置文件,并将其保存在 ~/.jupyter 目录中。
打开文件进行编辑。
(jupyterlab_env) $ nano ~/.jupyter/jupyter_lab_config.py
找到以下变量,取消对它们的注释,然后如下更改它们的值。将 PASSWORD_HASH 替换为上面生成的哈希值。
c.ServerApp.allow_remote_access = True

c.ServerApp.password = 'PASSWORD_HASH'
通过按 Ctrl + X 并在出现提示时输入 Y 来保存文件。
在防火墙中开放8888端口。
$ sudo firewall-cmd --add-port=8888/tcp --permanent
$ sudo firewall-cmd --reload
运行 JupyterLab 服务器。 --ip 0.0.0.0 参数允许它监听任何 IP 地址而不仅仅是本地主机。
$ jupyter lab --ip 0.0.0.0
上面的命令在我们打开的默认端口 8888 上生成了一个 JupyterLab 服务器。在浏览器中启动 URL http://,您将看到以下屏幕。
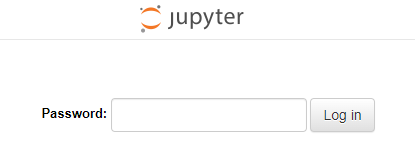
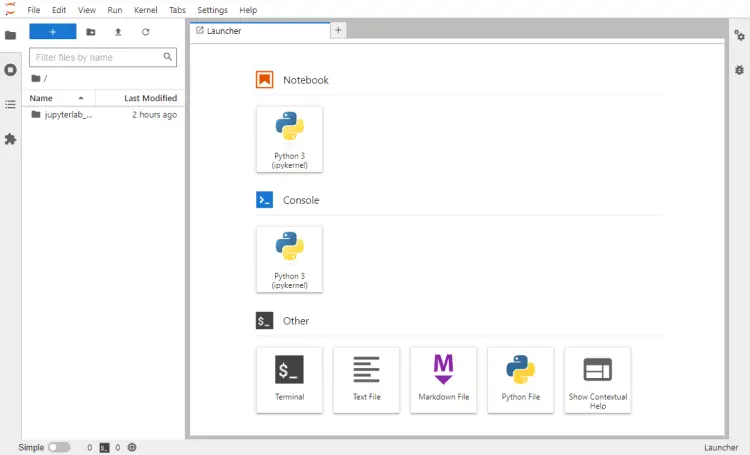
输入您的密码,然后单击“登录”按钮以打开 JupyterLab 界面。
现在确认访问,按 Ctrl + C 停止服务器,并在提示停止时输入 y。
第 5 步 - 创建 JupyterLab 服务文件
退出虚拟环境。
(jupyterlab_env) $ deactivate
为 JupyterLab 创建一个新的服务文件。
$ sudo nano /lib/systemd/system/jupyterlab.service
将以下代码粘贴到其中。
[Unit]
Description=JupyterLab Server

[Service]
User=USER
Group=USER
Type=simple
WorkingDirectory=/home/USER/jupyterlab
ExecStart=/home/USER/jupyterlab/jupyterlab_env/bin/jupyter-lab --config=/home/USER/.jupyter/jupyter_lab_config.py
StandardOutput=null
Restart=always
RestartSec=10

[Install]
WantedBy=multi-user.target
通过按 Ctrl + X 并在出现提示时输入 Y 来保存文件。
将 USER 替换为您的系统当前登录用户。
初始化 JupyterLab 服务。
$ sudo systemctl daemon-reload
启用并启动 JupyterLab 服务。
$ sudo systemctl enable jupyterlab --now
检查服务的状态。
$ sudo systemctl status jupyterlab
? jupyterlab.service - JupyterLab Server
     Loaded: loaded (/usr/lib/systemd/system/jupyterlab.service; disabled; vendor preset: disabled)
     Active: active (running) since Tue 2022-12-13 11:45:26 UTC; 5s ago
   Main PID: 151675 (jupyter-lab)
      Tasks: 1 (limit: 5911)
     Memory: 59.0M
        CPU: 1.943s
     CGroup: /system.slice/jupyterlab.service
             ??151675 /home/navjot/jupyterlab/jupyterlab_env/bin/python3 /home/navjot/jupyterlab/jupyterlab_env/bin/jupyter-lab --config=/home/navjot/.jupyter/jupyter_lab_config.py

Dec 13 11:45:26 jupyter.example.com systemd[1]: Started JupyterLab Server.
第 6 步 - 安装 SSL
在继续之前,我们需要为我们的域安装 Certbot 工具和 SSL 证书。
要安装 Certbot,我们将使用 Snapd 包安装程序。 Snapd 始终带有最新稳定版本的 Certbot,您应该使用它。
Snapd 工具需要 Epel 存储库才能工作。
$ sudo dnf install epel-release -y
我们将使用 Snapd 安装 Certbot。安装快照。
$ sudo dnf install snapd -y
启用并启动 Snap 服务。
$ sudo systemctl enable snapd.socket --now
为 Snapd 工作创建必要的链接。
$ sudo ln -s /var/lib/snapd/snap /snap
$ echo 'export PATH=$PATH:/var/lib/snapd/snap/bin' | sudo tee -a /etc/profile.d/snapd.sh
确保您的 snapd 版本是最新的。
$ sudo snap install core
$ sudo snap refresh core
安装 Certbot。
$ sudo snap install --classic certbot
使用以下命令通过创建指向 /usr/bin 目录的符号链接来确保可以运行 Certbot 命令。
$ sudo ln -s /snap/bin/certbot /usr/bin/certbot
生成 SSL 证书。
$ sudo certbot certonly --nginx --agree-tos --no-eff-email --staple-ocsp --preferred-challenges http -m -d jupyterlab.example.com
上面的命令会将证书下载到服务器上的 /etc/letsencrypt/live/jupyterlab.example.com 目录。
生成 Diffie-Hellman 组证书。
$ sudo openssl dhparam -dsaparam -out /etc/ssl/certs/dhparam.pem 4096
试运行该过程以检查 SSL 续订是否正常工作。
$ sudo certbot renew --dry-run
如果您没有看到任何错误,则一切就绪。您的证书将自动更新。
第 7 步 - 配置 Nginx
创建并打开文件 /etc/nginx/conf.d/jupyterlab.conf 进行编辑。
$ sudo nano /etc/nginx/conf.d/jupyterlab.conf
将以下代码粘贴到 jupyterlab.conf 文件中。将 jupyterlab.example.com 的所有实例替换为您的域。
## enforce HTTPS
server {
  listen 80;
  listen [::]:80;
  server_name jupyterlab.example.com;
  return 301 https://$server_name$request_uri;
}

server {
  listen 443 ssl http2;
  listen [::]:443 ssl http2;
  server_name jupyterlab.example.com;

  access_log /var/log/nginx/jupyterlab.access.log;
  error_log /var/log/nginx/jupyterlab.error.log;
  client_max_body_size 20m;

  http2_push_preload on; # Enable HTTP/2 Server Push

  ssl_certificate     /etc/letsencrypt/live/jupyterlab.example.com/fullchain.pem;
  ssl_certificate_key /etc/letsencrypt/live/jupyterlab.example.com/privkey.pem;
  ssl_trusted_certificate /etc/letsencrypt/live/jupyterlab.example.com/chain.pem;
  ssl_session_timeout 1d;

  # Enable TLS versions (TLSv1.3 is required upcoming HTTP/3 QUIC).
  ssl_protocols TLSv1.2 TLSv1.3;

  # Enable TLSv1.3's 0-RTT. Use $ssl_early_data when reverse proxying to
  # prevent replay attacks.
  #
  # @see: https://nginx.org/en/docs/http/ngx_http_ssl_module.html#ssl_early_data
  ssl_early_data on;

  ssl_ciphers 'ECDHE-ECDSA-AES256-GCM-SHA384:ECDHE-RSA-AES256-GCM-SHA384:ECDHE-ECDSA-CHACHA20-POLY1305:ECDHE-RSA-CHACHA20-POLY1305:ECDHE-ECDSA-AES256-SHA384:ECDHE-RSA-AES256-SHA384';
  ssl_prefer_server_ciphers on;
  ssl_ecdh_curve X25519:prime256v1:secp384r1:secp521r1;
  ssl_session_cache shared:SSL:50m;
  ssl_session_tickets off;

  # OCSP Stapling ---
  # fetch OCSP records from URL in ssl_certificate and cache them
  ssl_stapling on;
  ssl_stapling_verify on;
  ssl_dhparam /etc/ssl/certs/dhparam.pem;

  add_header X-Early-Data $tls1_3_early_data;

  location / {
    proxy_set_header Host $http_host;
    proxy_set_header X-Real-IP $remote_addr;
    proxy_set_header Host $host;
    proxy_http_version 1.1;
    proxy_set_header Upgrade $http_upgrade;
    proxy_set_header Connection $connection_upgrade;
    proxy_set_header X-Scheme $scheme;
    proxy_buffering off;
    proxy_set_header X-Forwarded-Proto https;
    proxy_set_header X-Forwarded-For $proxy_add_x_forwarded_for;
    proxy_pass http://127.0.0.1:8888;
  }
}

# This block is useful for debugging TLS v1.3. Please feel free to remove this
# and use the `$ssl_early_data` variable exposed by NGINX directly should you
# wish to do so.
map $ssl_early_data $tls1_3_early_data {
  "~." $ssl_early_data;
  default "";
}
map $http_upgrade $connection_upgrade {
  default upgrade;
  '' close;
}
上述配置会将所有 HTTP 请求重定向到 HTTPS,并将作为 JupyterLab 服务的代理通过您的域为其提供服务。
通过按 Ctrl + X 并在出现提示时输入 Y 来保存文件。
打开文件 /etc/nginx/nginx.conf 进行编辑。
$ sudo nano /etc/nginx/nginx.conf
在行 include /etc/nginx/conf.d/*.conf; 之前添加以下行。
server_names_hash_bucket_size 64;
通过按 Ctrl + X 并在出现提示时输入 Y 来保存文件。
验证您的 Nginx 配置。
$ sudo nginx -t
如果您没有看到任何错误,则表示您可以开始了。重新加载 Nginx 服务器。
$ sudo systemctl reload nginx
您现在可以通过在浏览器中访问 URL https://jupyterlab.example.com 来访问 JupyterLab。
结论
我们关于在 Rocky Linux 9 服务器上安装和配置 JupyterLab 并使用 Nginx 代理服务器为其提供服务的教程到此结束。如果您有任何问题,请在下面的评论中发表。