如何在您自己的服务器上设置 WordPress 站点(使用 Ubuntu 和 NGINX)

虽然您总是可以按月向其他人支付费用来管理您的 WordPress 实例,但对于许多拥有现有硬件的人来说,自托管非常有意义,或者只是想要一个有趣的项目来设置他们的博客。我们将展示如何使用 NGINX 在 Ubuntu Linux 上设置和配置基本的 WordPress 站点。
安装依赖
首先,我们需要安装 NGINX。更新 apt 并安装它:
sudo apt update
sudo apt install nginx
如果你启用了防火墙,比如 UFW,你需要打开它:
sudo ufw allow 'Nginx HTTP'一旦安装了 WordPress,我们将配置 NGINX。同时,我们需要创建一个 MySQL 数据库供 WordPress 使用。
如果您没有安装 MySQL,您可以从 apt 获取它。确保在安装后运行 mysql_secure_installation 以将其锁定。您可以阅读我们关于一般数据库安全性的指南以获取更多信息,但只要 MySQL 在 localhost 上运行,您就应该没问题。
sudo apt install mysql-server
sudo mysql_secure_installation
创建一个数据库供 WordPress 使用。您不需要设置表或任何东西,只需一个空白数据库即可:
CREATE DATABASE wordpress DEFAULT CHARACTER SET utf8 COLLATE utf8_unicode_ci;然后创建一个名为 wordpressuser 的用户,并授予它访问数据库的权限。 确保更改密码。
CREATE USER 'wordpressuser'@'localhost' IDENTIFIED BY 'password';
GRANT ALL PRIVILEGES ON * . * TO 'wordpressuser'@'localhost';
FLUSH PRIVILEGES;
WordPress 在 PHP 上运行,因此需要安装 PHP 才能运行。将它与以下扩展一起安装:
sudo apt install php-fpm php-mysql
sudo apt install php-curl php-gd php-intl php-mbstring php-soap php-xml php-xmlrpc php-zip
并重新启动 PHP 服务以确保它与新扩展保持同步。请注意,您可能需要在此处更改版本号。
sudo systemctl restart php7.4-fpm.service安装 WordPress
从他们的站点下载最新版本的 WordPress:
cd /tmp
curl -LO https://wordpress.org/latest.tar.gz
tar xzvf latest.tar.gz
然后将示例配置复制到 WordPress 实际读取的位置:
cp /tmp/wordpress/wp-config-sample.php /tmp/wordpress/wp-config.php将临时目录移动到正确的安装位置,然后chown 数据:
sudo cp -a /tmp/wordpress/. /var/www/wordpress
sudo chown -R www-data:www-data /var/www/wordpress
您需要设置用于安全和密码管理的盐。您可以从 WordPress 的 API 获取一组新的盐:
curl -s https://api.wordpress.org/secret-key/1.1/salt/然后,打开 WordPress 的配置文件,并将值粘贴到:
sudo nano /var/www/wordpress/wp-config.php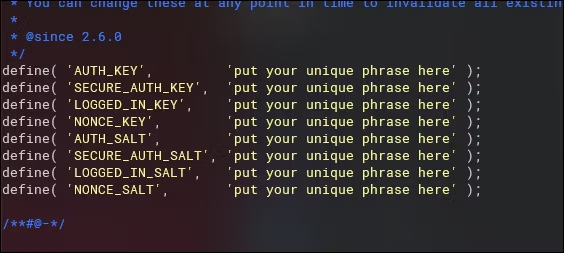
当您在此文件中时,您需要配置数据库设置。
define('DB_NAME', 'wordpress');

/** MySQL database username */
define('DB_USER', 'wordpressuser');

/** MySQL database password */
define('DB_PASSWORD', 'password');

define('FS_METHOD', 'direct');
完成后,应该配置 WordPress,我们需要配置 NGINX 来提供内容。
配置 NGINX
NGINX 使用 /etc/nginx/sites-available/ 中的配置文件来配置不同的端点。在此文件夹中为您的站点创建一个新文件夹,并粘贴以下内容:
# Upstream to abstract backend connection(s) for php
upstream php {
        server unix:/var/run/php/php7.4-fpm.sock;
        server 127.0.0.1:9000;
}

server {
        ## Your website name goes here.
        server_name domain.tld;
        ## Your only path reference.
        root /var/www/wordpress;
        ## This should be in your http block and if it is, it's not needed here.
        index index.php;

        location = /favicon.ico {
                log_not_found off;
                access_log off;
        }

        location = /robots.txt {
                allow all;
                log_not_found off;
                access_log off;
        }

        location / {
                # This is cool because no php is touched for static content.
                # include the "?$args" part so non-default permalinks doesn't break when using query string
                try_files $uri $uri/ /index.php?$args;
        }

        location ~ .php$ {
                #NOTE: You should have "cgi.fix_pathinfo = 0;" in php.ini
                include fastcgi_params;
                fastcgi_intercept_errors on;
                fastcgi_pass php;
                #The following parameter can be also included in fastcgi_params file
                fastcgi_param  SCRIPT_FILENAME $document_root$fastcgi_script_name;
        }

        location ~* .(js|css|png|jpg|jpeg|gif|ico)$ {
                expires max;
                log_not_found off;
        }
}
请注意,您需要输入主机名和其他设置的信息,如果您使用的是较新版本,还需要更新 PHP 版本。您需要将其保存在 sites-available 中,然后将其符号链接到 sites-enabled 以将其打开。
sudo ln -s /etc/nginx/sites-available/example.com /etc/nginx/sites-enabled/启用后,重新启动 NGINX,如果您在浏览器中访问该站点,您将看到 WordPress。您需要进行首次设置演练。
sudo service nginx restart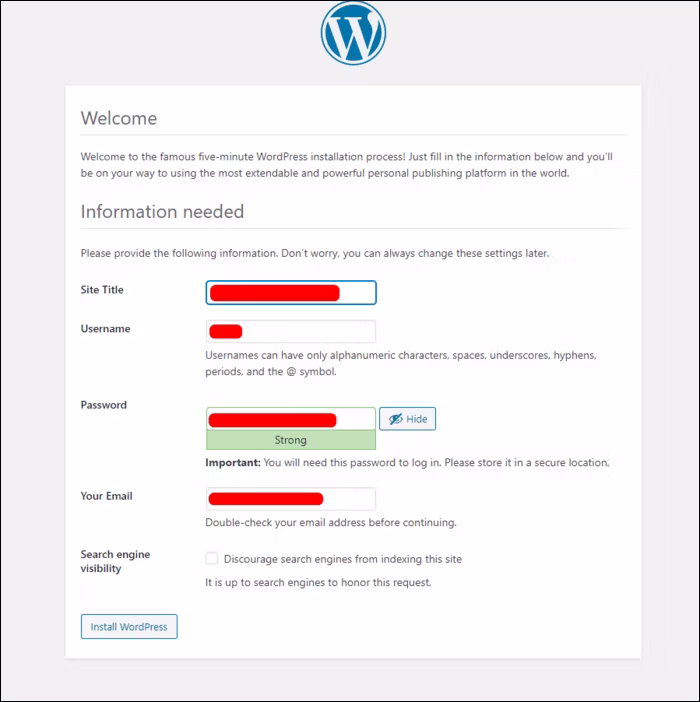
您现在可以随时在 https://example.com/wp-admin/ 查看您的仪表板。
接下来,您需要配置 SSL 以保护您网站上的连接。您可以使用 certbot 免费执行此操作,这是 LetsEncrypt 免费证书的 CLI 前端。
sudo apt-get install certbot

sudo apt install python3-certbot-nginx
然后,运行 certbot:
sudo certbot nginx -certonly之后,您将需要重新启动 NGINX。
sudo 服务 nginx 重启
设置您的站点
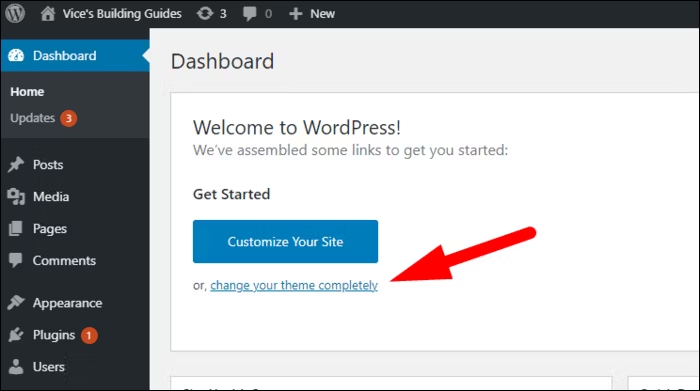
恭喜!您有一个正在运行的 WordPress 站点。默认主题可能看起来很糟糕。您要做的第一件事是更改主题,您可以从仪表板执行此操作:
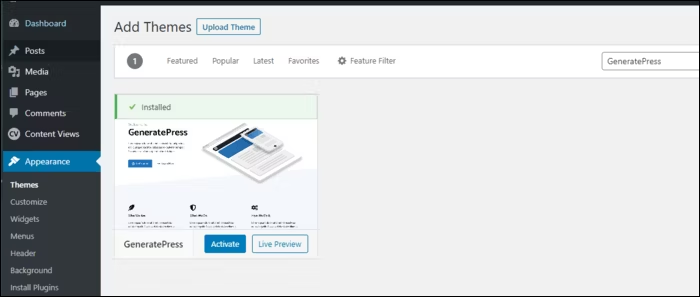
无论您选择什么主题,您都需要从外观选项卡中激活它。
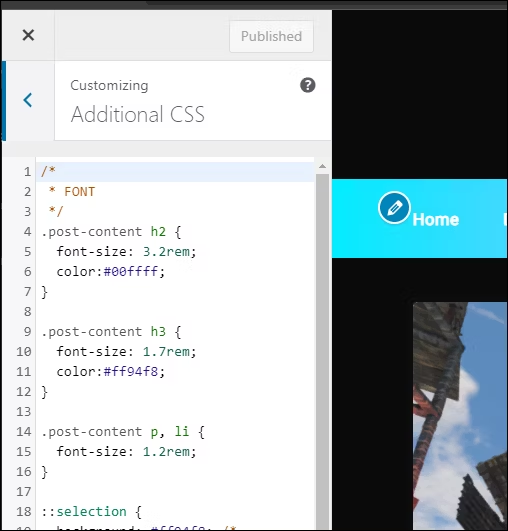
然后,您可以通过访问该站点并单击标题中的“自定义”来配置设置和样式。您可以做的最好的事情之一就是向站点添加完全自定义的 CSS,它可以更改页面上的任何元素。
如果你想在主题中编辑一些东西,而且你不介意在 PHP 中乱搞,你可以直接编辑你的主题文件。例如,我编辑了我的主题文件来布局一个有两个帖子边的网格,而不仅仅是一个帖子列表。
cd /var/www/wordpress/wp-content/themes/dark-press/
sudo nano index.php