如何在 Ubuntu 22.04 上安装和配置 Graphite 监控系统
在此页
- 先决条件
- 第 1 步 - 配置防火墙
- 第 2 步 - 安装所需的软件包
- 第 3 步 - 安装 Graphite 和 Graphite Web
- 第 4 步 - 安装和配置 PostgreSQL
- 第 5 步 - 配置 Graphite Carbon 和 Web
- 配置 Carbon
- 配置 Graphite Web
Graphite 是一种开源工具,用于跟踪和绘制计算机系统性能图。您可以使用它来跟踪网站、应用程序、业务服务和联网服务器的性能。它非常灵活并且可以进行配置,以便您可以获得所跟踪指标的性能和健康状况的详细表示和广泛概述的好处。
Graphite 由几个组件组成:Web 应用程序、称为 Carbon 的存储后端和称为 whisper 的数据库库。在本教程中,您将学习在 Ubuntu 22.04 服务器上安装和配置 Graphite。
先决条件
-
A server running Ubuntu 22.04.
-
A Fully Qualified domain name (FQDN) pointing to the server. For our tutorial, we will use the
graphite.example.comdomain. -
A non-root user with sudo privileges.
-
The uncomplicated Firewall(UFW) is enabled and running.
-
Make sure everything is updated.
$ sudo apt update && sudo apt upgrade -
Install basic utility packages. Some of them may already be installed.
$ sudo apt install wget curl nano unzip -y
第 1 步 - 配置防火墙
在安装任何包之前,第一步是配置防火墙以允许 HTTP 和 HTTPS 连接。
检查防火墙的状态。
$ sudo ufw status您应该会看到如下内容。
Status: active

To                         Action      From
--                         ------      ----
OpenSSH                    ALLOW       Anywhere
OpenSSH (v6)               ALLOW       Anywhere (v6)
允许 HTTP 和 HTTPs 端口。
$ sudo ufw allow http
$ sudo ufw allow https
再次检查状态以确认。
$ sudo ufw status
Status: active

To                         Action      From
--                         ------      ----
OpenSSH                    ALLOW       Anywhere
80/tcp                     ALLOW       Anywhere
443                        ALLOW       Anywhere
OpenSSH (v6)               ALLOW       Anywhere (v6)
80/tcp (v6)                ALLOW       Anywhere (v6)
443 (v6)                   ALLOW       Anywhere (v6)
第 2 步 - 安装所需的软件包
我们将使用 PIP Python 包管理器安装 Graphite。第一步是安装安装所需的包。
$ sudo apt install vim python3-dev python3-pip libcairo2-dev libffi-dev build-essential第 3 步 - 安装 Graphite 和 Graphite Web
我们将在
/opt/graphite目录中安装 Graphite。$ export PYTHONPATH="/opt/graphite/lib/:/opt/graphite/webapp/" $ sudo pip install --no-binary=:all: https://github.com/graphite-project/whisper/tarball/master $ sudo pip install --no-binary=:all: https://github.com/graphite-project/carbon/tarball/master $ sudo pip install --no-binary=:all: https://github.com/graphite-project/graphite-web/tarball/master第 4 步 - 安装和配置 PostgreSQL
我们将使用 PostgreSQL 的官方 APT 存储库进行安装。运行以下命令以添加 PostgreSQL GPG 密钥。
$ curl https://www.postgresql.org/media/keys/ACCC4CF8.asc | gpg --dearmor | sudo tee /usr/share/keyrings/postgresql-key.gpg >/dev/null将 APT 存储库添加到您的源列表中。
$ sudo sh -c 'echo "deb [signed-by=/usr/share/keyrings/postgresql-key.gpg arch=amd64] http://apt.postgresql.org/pub/repos/apt $(lsb_release -cs)-pgdg main" > /etc/apt/sources.list.d/pgdg.list'更新系统存储库。
$ sudo apt update现在,您可以使用以下命令安装 PostgreSQL 和帮助程序包。
$ sudo apt install postgresql postgresql-contrib libpq-dev检查 PostgreSQL 服务的状态。
$ sudo systemctl status postgresql
? postgresql.service - PostgreSQL RDBMS
     Loaded: loaded (/lib/systemd/system/postgresql.service; enabled; vendor preset: enabled)
     Active: active (exited) since Tue 2022-09-27 10:09:35 UTC; 4s ago
    Process: 4456 ExecStart=/bin/true (code=exited, status=0/SUCCESS)
   Main PID: 4456 (code=exited, status=0/SUCCESS)
        CPU: 1ms

Sep 27 10:09:35 matrix systemd[1]: Starting PostgreSQL RDBMS...
Sep 27 10:09:35 matrix systemd[1]: Finished PostgreSQL RDBMS.
您可以看到该服务已默认启用并运行。
登录到 PostgreSQL shell。
$ sudo -su postgres psql为 Graphite 创建一个数据库用户。
postgres=# CREATE USER graphite WITH PASSWORD 'your_password';为 Graphite 创建一个数据库并将所有权授予 Graphite 用户。
postgres=# CREATE DATABASE graphitedb WITH OWNER graphite;退出 PostgreSQL shell。
postgres=# \q第 5 步 - 配置 Graphite Carbon 和 Web
下一步是配置 Graphite Carbon 和 Graphite web。
配置碳
Carbon 包含三种服务:
- carbon-cache:接受指标并将它们写入磁盘。
- carbon-relay:复制数据。
- carbon-aggregator:在 carbon-cache 服务前面运行,以在将指标转发到 Whisper 之前缓冲指标。
配置carbon-cache是必须的,carbon-relay和carbon-aggregator是可选的。
使用给定的示例文件创建
carbon.conf文件。$ sudo cp /opt/graphite/conf/carbon.conf.example /opt/graphite/conf/carbon.conf接下来,创建存储架构配置。
$ sudo cp /opt/graphite/conf/storage-schemas.conf.example /opt/graphite/conf/storage-schemas.conf打开存储架构配置文件。
$ sudo nano /opt/graphite/conf/storage-schemas.conf在里面,你会发现像这样的条目
[carbon]
pattern = ^carbon\.
retentions = 60:90d
这意味着匹配正则表达式
^carbon\.的模式应该保留保留策略为 60:90d 的数据,这意味着- 记录指标的频率:60 秒
- 存储这些值的时间长度:90 天
您可以添加自己的条目。让我们举个例子
test即监控数据点,我们的数据点条目将以字符串test开头。应将此条目添加到文件底部提到的默认条目之前。[test] pattern = ^test\. retentions = 10s:10m,1m:1h这将匹配以
test开头的任何指标。它将以不同的细节存储两次收集的数据。第一个定义 (1s:10m) 将每十秒创建一个数据点。它只会存储十分钟的数据。第二个定义将每分钟创建一个数据点。它将收集过去一分钟的所有数据(六个点,因为之前的定义每十秒创建一个点)并将其聚合以创建点。它将此详细级别的数据存储一小时。通过按 Ctrl + X 并在出现提示时输入 Y 来保存文件。
启动
carbon-cache服务。$ sudo /opt/graphite/bin/carbon-cache.py start配置石墨网
下一步是配置 Graphite Web 应用程序。
为 Graphite 应用程序生成密钥。复制显示的密钥以备后用。
$ python3 -c 'from django.core.management.utils import get_random_secret_key; print(get_random_secret_key())'
sp%71)6b$%^bc(7xpz1d!)x3(azog01&k^8l02*!y0#)72p07y
创建 Web 应用程序设置文件。
$ sudo cp /opt/graphite/webapp/graphite/local_settings.py.example /opt/graphite/webapp/graphite/local_settings.py您需要使用数据库设置来配置 Graphite Web 应用程序。打开
local_settings.py进行编辑。$ sudo nano /opt/graphite/webapp/graphite/local_settings.py取消注释
SECRET_KEY变量并为其输入一个随机值。SECRET_KEY = 'your-secret-key'取消注释
ALLOWED_HOSTS变量。ALLOWED_HOSTS = [ '*' ]取消注释
TIME_ZONE变量并将其设置为适当的值。TIME_ZONE = 'Asia/Kolkata'取消注释
USE_REMOTE_USER_AUTHENTICATION变量并将其设置为TRUE以便远程用户在进行任何数据库更改之前获得身份验证。USE_REMOTE_USER_AUTHENTICATION = True更改数据库设置。
DATABASES = {
    'default': {
        'NAME': 'graphitedb',
        'ENGINE': 'django.db.backends.postgresql_psycopg2',
        'USER': 'graphite',
        'PASSWORD': 'your_password',
        'HOST': '127.0.0.1',
        'PORT': ''
    }
}
通过按 Ctrl + X 并在出现提示时输入 Y 来保存文件。
安装 Pythons PostgreSQL 包装器的一些先决条件。
$ sudo pip install psycopg2-binary运行以下命令以导入数据库架构。
$ sudo PYTHONPATH=/opt/graphite/webapp/ django-admin.py migrate --settings=graphite.settings您将获得以下输出。
Operations to perform:
  Apply all migrations: account, admin, auth, contenttypes, dashboard, events, sessions, tagging, tags, url_shortener
Running migrations:
  Applying contenttypes.0001_initial... OK
  Applying auth.0001_initial... OK
  Applying account.0001_initial... OK
  Applying admin.0001_initial... OK
  Applying admin.0002_logentry_remove_auto_add... OK
  Applying admin.0003_logentry_add_action_flag_choices... OK
  Applying contenttypes.0002_remove_content_type_name... OK
  Applying auth.0002_alter_permission_name_max_length... OK
  Applying auth.0003_alter_user_email_max_length... OK
  Applying auth.0004_alter_user_username_opts... OK
  Applying auth.0005_alter_user_last_login_null... OK
  Applying auth.0006_require_contenttypes_0002... OK
  Applying auth.0007_alter_validators_add_error_messages... OK
  Applying auth.0008_alter_user_username_max_length... OK
  Applying auth.0009_alter_user_last_name_max_length... OK
  Applying auth.0010_alter_group_name_max_length... OK
  Applying auth.0011_update_proxy_permissions... OK
  Applying auth.0012_alter_user_first_name_max_length... OK
  Applying dashboard.0001_initial... OK
  Applying events.0001_initial... OK
  Applying sessions.0001_initial... OK
  Applying tagging.0001_initial... OK
  Applying tagging.0002_on_delete... OK
  Applying tags.0001_initial... OK
  Applying url_shortener.0001_initial... OK
接下来,收集静态文件。
$ sudo PYTHONPATH=/opt/graphite/webapp/ django-admin.py collectstatic --settings=graphite.settings设置正确的所有权设置。
$ sudo chown -R www-data:www-data /opt/graphite/storage/
$ sudo chown -R www-data:www-data /opt/graphite/static/
$ sudo chown -R www-data:www-data /opt/graphite/webapp/
创建一个root用户用于登录。
$ sudo PYTHONPATH=/opt/graphite/webapp/ django-admin.py createsuperuser --settings=graphite.settings
Username (leave blank to use 'root'): navjot
Email address:
Password:
Password (again):
Superuser created successfully.
它会要求你创建一个超级用户。稍后将使用此用户连接到 Graphite 应用程序。
第 6 步 - 配置 Apache
默认情况下,Graphite 附带 Apache 配置文件。安装 Apache 服务器。
$ sudo apt install apache2 libapache2-mod-wsgi-py3创建
mod_wsgi文件。$ sudo cp /opt/graphite/conf/graphite.wsgi.example /opt/graphite/conf/graphite.wsgi将石墨示例配置文件复制到 Apache 位置。
$ sudo cp /opt/graphite/examples/example-graphite-vhost.conf /etc/apache2/sites-available/graphite.conf打开 Graphite 配置文件进行编辑。
$ sudo nano /etc/apache2/sites-available/graphite.conf将第一行中的端口号从
80更改为127.0.0.1:8080。将127.0.0.1放在它前面会限制它无法通过网络访问。<VirtualHost 127.0.0.1:8080>添加您的域名。
ServerName graphite.example.com #Replace with your domain在
Alias /static/ /opt/graphite/static/行下方添加以下行。#Add below lines <Directory /opt/graphite/static/> Require all granted </Directory>通过按 Ctrl + X 并在出现提示时输入 Y 来保存文件。
禁用默认虚拟主机并启用 Graphite 虚拟主机文件。
$ sudo a2dissite 000-default
$ sudo a2ensite graphite
我们还需要告诉 Apache 监听端口 8080 并停止监听端口 80,因为我们将使用 Nginx 作为代理服务器。
打开文件
/etc/apache2/ports.conf进行编辑。$ sudo nano /etc/apache2/ports.conf找到行
Listen 80并将其替换为以下内容。Listen 127.0.0.1:8080通过按 Ctrl + X 并在出现提示时输入 Y 来保存文件。
重新启动 Apache 服务器。
$ sudo systemctl restart apache2要验证 Graphite 是否正常工作并且可以访问,请运行以下命令。
$ curl 127.0.0.1:8080您将获得以下输出。
<!DOCTYPE HTML PUBLIC "-//W3C//DTD HTML 4.01 Frameset//EN" "http://www.w3.org/TR/html4/frameset.dtd">
<!-- Copyright 2008 Orbitz WorldWide

Licensed under the Apache License, Version 2.0 (the "License");
you may not use this file except in compliance with the License.
You may obtain a copy of the License at

   http://www.apache.org/licenses/LICENSE-2.0

Unless required by applicable law or agreed to in writing, software
distributed under the License is distributed on an "AS IS" BASIS,
WITHOUT WARRANTIES OR CONDITIONS OF ANY KIND, either express or implied.
See the License for the specific language governing permissions and
limitations under the License. -->

<html>
  <head>
    <title>Graphite Browser</title>
  </head>


<frameset rows="80,*" frameborder="1" border="1">
  <frame src="/browser/header" name="Header" id='header' scrolling="no" noresize="true" />

    <frame src="/composer?" name="content" id="composerFrame"/>

</frameset>
</html>
这证实它工作正常。
第 7 步 - 安装 Nginx
我们将使用 Nginx 作为 Apache 的代理服务器。这样我们就可以在使用 Graphite 提供的现有配置的同时获得安全性和隐蔽性的好处。
Ubuntu 22.04 附带旧版本的 Nginx。要安装最新版本,您需要下载官方 Nginx 存储库。
导入 Nginx 签名密钥。
$ curl https://nginx.org/keys/nginx_signing.key | gpg --dearmor \
| sudo tee /usr/share/keyrings/nginx-archive-keyring.gpg >/dev/null
添加 Nginx 稳定版本的存储库。
$ echo "deb [signed-by=/usr/share/keyrings/nginx-archive-keyring.gpg arch=amd64] \
http://nginx.org/packages/ubuntu `lsb_release -cs` nginx" \
| sudo tee /etc/apt/sources.list.d/nginx.list
更新系统存储库。
$ sudo apt update安装 Nginx。
$ sudo apt install nginx验证安装。
$ nginx -v
nginx version: nginx/1.22.0
启动 Nginx 服务器。
$ sudo systemctl start nginx第 8 步 - 安装 SSL
我们需要安装 Certbot 来生成 SSL 证书。您可以使用 Ubuntu 存储库安装 Certbot,也可以使用 Snapd 工具获取最新版本。我们将使用 Snapd 版本。
Ubuntu 22.04 默认安装了 Snapd。运行以下命令以确保您的 Snapd 版本是最新的。
$ sudo snap install core
$ sudo snap refresh core
安装 Certbot。
$ sudo snap install --classic certbot使用以下命令通过创建指向
/usr/bin目录的符号链接来确保可以运行 Certbot 命令。$ sudo ln -s /snap/bin/certbot /usr/bin/certbot运行以下命令以生成 SSL 证书。
$ sudo certbot certonly --nginx --agree-tos --no-eff-email --staple-ocsp --preferred-challenges http -m -d graphite.example.com上面的命令会将证书下载到服务器上的
/etc/letsencrypt/live/graphite.example.com目录。生成 Diffie-Hellman 组证书。
$ sudo openssl dhparam -dsaparam -out /etc/ssl/certs/dhparam.pem 4096检查 Certbot 更新计划程序服务。
$ sudo systemctl list-timers您会发现
snap.certbot.renew.service作为计划运行的服务之一。NEXT LEFT LAST PASSED UNIT ACTIVATES ................................................................................................................................. Wed 2022-09-28 00:00:00 UTC 7h left Tue 2022-09-27 00:00:01 UTC 16h ago logrotate.timer logrotate.service Wed 2022-09-28 02:39:09 UTC 10h left Tue 2022-09-27 09:42:42 UTC 6h ago apt-daily.timer apt-daily.service Wed 2022-09-28 06:02:00 UTC 13h left n/a n/a snap.certbot.renew.timer snap.certbot.renew.service要检查 SSL 续订是否正常工作,请试运行该过程。
$ sudo certbot renew --dry-run如果您没有看到任何错误,则一切就绪。您的证书将自动更新。
第 9 步 - 配置 Nginx
打开文件
/etc/nginx/nginx.conf进行编辑。$ sudo nano /etc/nginx/nginx.conf在行
include /etc/nginx/conf.d/*.conf;之前添加以下行。server_names_hash_bucket_size 64;通过按 Ctrl + X 并在出现提示时输入 Y 来保存文件。
创建并打开文件
/etc/nginx/conf.d/uvdesk.conf进行编辑。$ sudo nano /etc/nginx/conf.d/graphite.conf将以下代码粘贴到其中。
server {
    listen       443 ssl http2;
    listen       [::]:443 ssl http2;
    server_name  graphite.example.com;

    access_log  /var/log/nginx/graphite.access.log;
    error_log   /var/log/nginx/graphite.error.log;

	# SSL
    ssl_certificate      /etc/letsencrypt/live/graphite.example.com/fullchain.pem;
    ssl_certificate_key  /etc/letsencrypt/live/graphite.example.com/privkey.pem;
    ssl_trusted_certificate /etc/letsencrypt/live/graphite.example.com/chain.pem;
    ssl_session_timeout  5m;
    ssl_session_cache shared:MozSSL:10m;
    ssl_session_tickets off;
    ssl_protocols TLSv1.2 TLSv1.3;
    ssl_prefer_server_ciphers on;
    ssl_ciphers ECDHE-ECDSA-AES128-GCM-SHA256:ECDHE-RSA-AES128-GCM-SHA256:ECDHE-ECDSA-AES256-GCM-SHA384:ECDHE-RSA-AES256-GCM-SHA384:ECDHE-ECDSA-CHACHA20-POLY1305:ECDHE-RSA-CHACHA20-POLY1305:DHE-RSA-AES128-GCM-SHA256:DHE-RSA-AES256-GCM-SHA384;
    ssl_ecdh_curve X25519:prime256v1:secp384r1:secp521r1;
    ssl_stapling on;
    ssl_stapling_verify on;
    ssl_dhparam /etc/ssl/certs/dhparam.pem;
    resolver 8.8.8.8;

    location / {
       proxy_set_header Connection "upgrade";
       proxy_set_header Upgrade $http_upgrade;
       proxy_http_version 1.1;

       proxy_set_header Host $http_host;
       proxy_set_header X-Real-IP $remote_addr;
       proxy_set_header X-Forwarded-For $proxy_add_x_forwarded_for;
       proxy_set_header X-Forwarded-Proto $scheme;
       proxy_set_header X-NginX-Proxy true;

       proxy_pass http://127.0.0.1:8080;
       proxy_redirect off;
    }
}

# enforce HTTPS
server {
    listen       80;
    listen       [::]:80;
    server_name  graphite.example.com;
    return 301   https://$host$request_uri;
}
完成后按 Ctrl + X 并在出现提示时输入 Y 来保存文件。
验证 Nginx 配置文件语法。
$ sudo nginx -t
nginx: the configuration file /etc/nginx/nginx.conf syntax is ok
nginx: configuration file /etc/nginx/nginx.conf test is successful
重启 Nginx 服务。
$ sudo systemctl restart nginx第 10 步 - 访问和使用 Graphite
在浏览器中访问 URL
https://graphite.example.com,您将看到以下屏幕。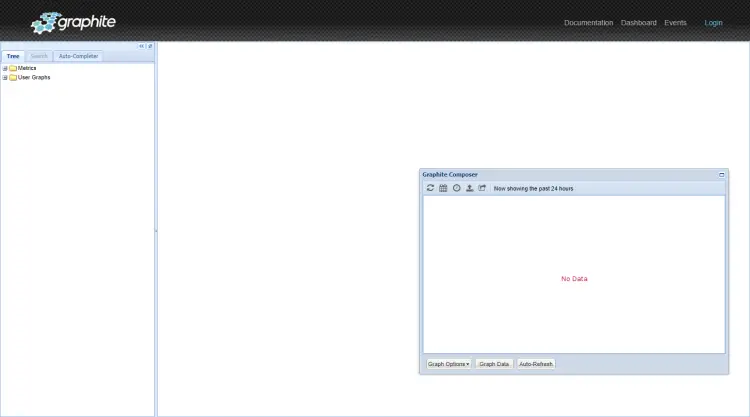
点击右上角的登录链接,打开登录页面。输入您在第 5 步中创建的超级用户凭据,然后按登录按钮继续。
有几种方法可以将数据提供给 Graphite。我们在存储架构中添加了一个模式匹配器,根据该匹配器,以测试开头的任何模式都将被记录为我们的模式。让我们使用以下命令添加一些随机数据。
$ echo "test.count 9 `date +%s`" | nc -q0 127.0.0.1 2003;这将向系统添加一个值为 9 的数据度量。让我们通过遍历值来添加更多数据。
$ for i in 4 6 8 16 2; do echo "test.count $i `date +%s`" | nc -q0 127.0.0.1 2003; sleep 6; done返回 Graphite 仪表板并从左侧栏打开 Metrics >> test >> count。您应该会看到如下内容。
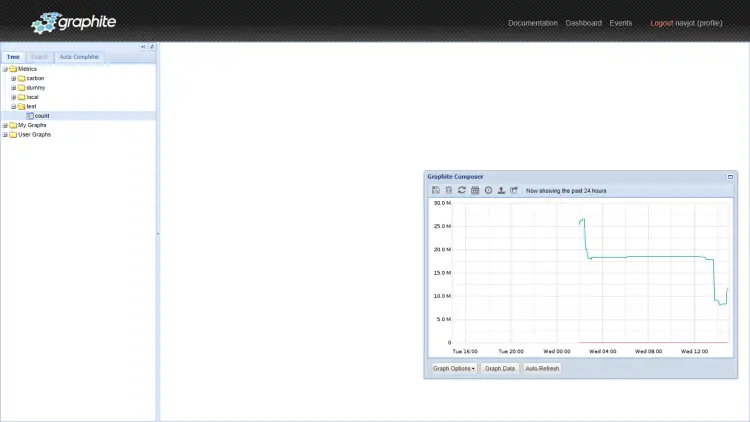
您现在可以开始使用它进行监控。您还可以将其与 Grafana 结合使用以获得高水平的定制化。
结论
我们关于在 Ubuntu 22.04 服务器上安装和配置 Graphite 以及 Nginx 作为代理服务器的教程到此结束。如果您有任何问题,请在下面的评论中发表。