如何在 Ubuntu 18.04 LTS 上安装 Attendize 活动管理软件
在此页
- 要求
- 安装 Nginx、MariaDB 和 PHP
- 配置数据库
- 安装出席
- 为 Attendize 配置 Nginx
- 访问参加
Attendize 是在 Laravel 框架之上用 PHP 编写的免费开源票务销售和活动管理工具。 Attendize 为管理一般入场活动提供了一个简单的解决方案,无需支付额外费用。使用 Attendize,您可以轻松管理多个组织者/事件和实时事件统计数据。 Attendize 支持多种支付网关,如 Stripe、PayPal 等。 Attendize 使您能够将售票小部件嵌入到现有的 WordPress 博客中。
在本教程中,我们将解释如何在 Ubuntu 18.04 LTS 服务器上安装 Attendize。
要求
- 一台运行 Ubuntu 18.04 的服务器。
- PHP 版本 7.1.3 或更高版本,带有 OpenSSL、PDO、Mbstring、Fileinfo、GD 和 Tokenizer 扩展。
- 在您的服务器上配置了根密码。
安装 Nginx、MariaDB 和 PHP
Attendize 在网络服务器上运行,用 PHP 编写并使用 MariaDB 来存储他们的数据。因此,您需要在服务器上安装 Nginx、MariaDB、PHP 和所需的 PHP 扩展。您可以通过运行以下命令来安装所有这些:
apt-get install apache2 mariadb-server php7.2 php7.2-cli php7.2-fpm php7.2-common php7.2-mysql php7.2-curl php7.2-json php7.2-zip php7.2-gd php7.2-xml php7.2-mbstring php7.2-opcache php7.2-pgsql curl git unzip -y安装所有必需的包后,启动 Nginx 和 MariaDB 服务,并使用以下命令使它们能够在系统重启时启动:
systemctl start nginx
 systemctl enable nginx
 systemctl start mariadb
 systemctl enable mariadb
完成后,您可以继续下一步。
配置数据库
默认情况下,MariaDB 是不安全的。所以你需要先确保它。您可以使用以下脚本保护 MariaDB:
mysql_secure_installation如下图所示回答所有问题:
In order to log into MariaDB to secure it, we'll need the current
password for the root user.  If you've just installed MariaDB, and
you haven't set the root password yet, the password will be blank,
so you should just press enter here.

Enter current password for root (enter for none):
OK, successfully used password, moving on...

Setting the root password ensures that nobody can log into the MariaDB
root user without the proper authorisation.

You already have a root password set, so you can safely answer 'n'.

Change the root password? [Y/n] n
 ... skipping.

By default, a MariaDB installation has an anonymous user, allowing anyone
to log into MariaDB without having to have a user account created for
them.  This is intended only for testing, and to make the installation
go a bit smoother.  You should remove them before moving into a
production environment.

Remove anonymous users? [Y/n] Y
 ... Success!

Normally, root should only be allowed to connect from 'localhost'.  This
ensures that someone cannot guess at the root password from the network.

Disallow root login remotely? [Y/n] Y
 ... Success!

By default, MariaDB comes with a database named 'test' that anyone can
access.  This is also intended only for testing, and should be removed
before moving into a production environment.

Remove test database and access to it? [Y/n] Y
 - Dropping test database...
 ... Success!
 - Removing privileges on test database...
 ... Success!

Reloading the privilege tables will ensure that all changes made so far
will take effect immediately.

Reload privilege tables now? [Y/n] Y
 ... Success!

Cleaning up...

All done!  If you've completed all of the above steps, your MariaDB
installation should now be secure.

Thanks for using MariaDB!
MariaDB 安全后,使用以下命令登录 MariaDB shell:
mysql -u root -p出现提示时提供您的根密码。然后,使用以下命令为 Attendize 创建数据库和用户:
MariaDB [(none)]> CREATE DATABASE attendizedb;
 MariaDB [(none)]> GRANT ALL PRIVILEGES ON attendizedb.* TO 'attendize'@'localhost' IDENTIFIED BY "password";
接下来,使用以下命令刷新权限并退出 MariaDB shell:
MariaDB [(none)]> FLUSH PRIVILEGES;
 MariaDB [(none)]> EXIT;
创建数据库后,您可以继续下一步。
安装参加
在下载 Attendize 之前,您需要将 Composer 安装到您的系统中。您只需运行以下命令即可安装 Composer:
curl -sS https://getcomposer.org/installer -o composer-setup.php
 php composer-setup.php --install-dir=/usr/local/bin --filename=composer
安装 Composer 后,可以通过以下命令查看 Composer 的版本:
composer --version输出应类似于以下内容:
Composer version 1.8.6 2019-06-11 15:03:05
接下来,使用以下命令将最新版本的 Attendize 从 Git 存储库下载到 Nginx Web 根目录:
cd /var/www/html/
 git clone https://github.com/Attendize/Attendize attendize
接下来,更改目录以参加并重命名 .env.example 文件:
cd attendize
 mv .env.example .env
接下来,使用您喜欢的文本编辑器打开 .env 文件:
nano .env定义您的数据库设置,如下所示:
DB_TYPE=mysql
DB_HOST=db
DB_PORT=3306
DB_DATABASE=attendizedb
DB_USERNAME=attendize
DB_PASSWORD=password
完成后保存并关闭文件。然后,使用以下命令为 attendize 目录授予适当的权限:
chown -R www-data:www-data /var/www/html/attendize
 chmod -R 755 /var/www/html/attendize
完成后,您可以继续下一步。
为 Attendize 配置 Nginx
接下来,为 Attendize 创建一个 Nginx 虚拟主机文件。
nano /etc/nginx/sites-available/attendize.conf添加以下行:
server {
    listen 80;
    listen [::]:80;

    server_name example.com;
    root /var/www/html/attendize/public;

    index index.php;

    location / {
        try_files $uri $uri/ /index.php$is_args$args;
    }

    location ~ \.php$ {
        try_files $uri =404;
        fastcgi_pass unix:/var/run/php/php7.2-fpm.sock; # Check this
        fastcgi_param SCRIPT_FILENAME $document_root$fastcgi_script_name;
        include fastcgi_params;
    }
}
保存并关闭文件。然后,使用以下命令启用虚拟主机文件:
ln -s /etc/nginx/sites-available/attendize.conf /etc/nginx/sites-enabled/接下来,使用以下命令检查 Nginx 是否存在任何语法错误:
nginx -t输出应类似于以下内容:
nginx: the configuration file /etc/nginx/nginx.conf syntax is ok
nginx: configuration file /etc/nginx/nginx.conf test is successful
最后,重新加载 Nginx 和 PHP-FPM 服务以应用所有配置更改:
systemctl reload nginx
 systemctl restart php7.2-fpm
您可以使用以下命令验证 Nginx 的状态:
systemctl status nginx您应该看到以下输出:
? nginx.service - A high performance web server and a reverse proxy server
   Loaded: loaded (/lib/systemd/system/nginx.service; enabled; vendor preset: enabled)
   Active: active (running) since Mon 2019-07-22 05:07:19 UTC; 3s ago
     Docs: man:nginx(8)
  Process: 17781 ExecStop=/sbin/start-stop-daemon --quiet --stop --retry QUIT/5 --pidfile /run/nginx.pid (code=exited, status=0/SUCCESS)
  Process: 17793 ExecStart=/usr/sbin/nginx -g daemon on; master_process on; (code=exited, status=0/SUCCESS)
  Process: 17783 ExecStartPre=/usr/sbin/nginx -t -q -g daemon on; master_process on; (code=exited, status=0/SUCCESS)
 Main PID: 17794 (nginx)
    Tasks: 2 (limit: 1114)
   CGroup: /system.slice/nginx.service
           ??17794 nginx: master process /usr/sbin/nginx -g daemon on; master_process on;
           ??17796 nginx: worker process

Jul 22 05:07:19 ubuntu1804 systemd[1]: Stopped A high performance web server and a reverse proxy server.
Jul 22 05:07:19 ubuntu1804 systemd[1]: Starting A high performance web server and a reverse proxy server...
Jul 22 05:07:19 ubuntu1804 systemd[1]: nginx.service: Failed to parse PID from file /run/nginx.pid: Invalid argument
Jul 22 05:07:19 ubuntu1804 systemd[1]: Started A high performance web server and a reverse proxy server.
完成后,您可以继续下一步。
访问参加
现在,打开您的 Web 浏览器并输入 URL http://example.com。您将被重定向到以下页面:
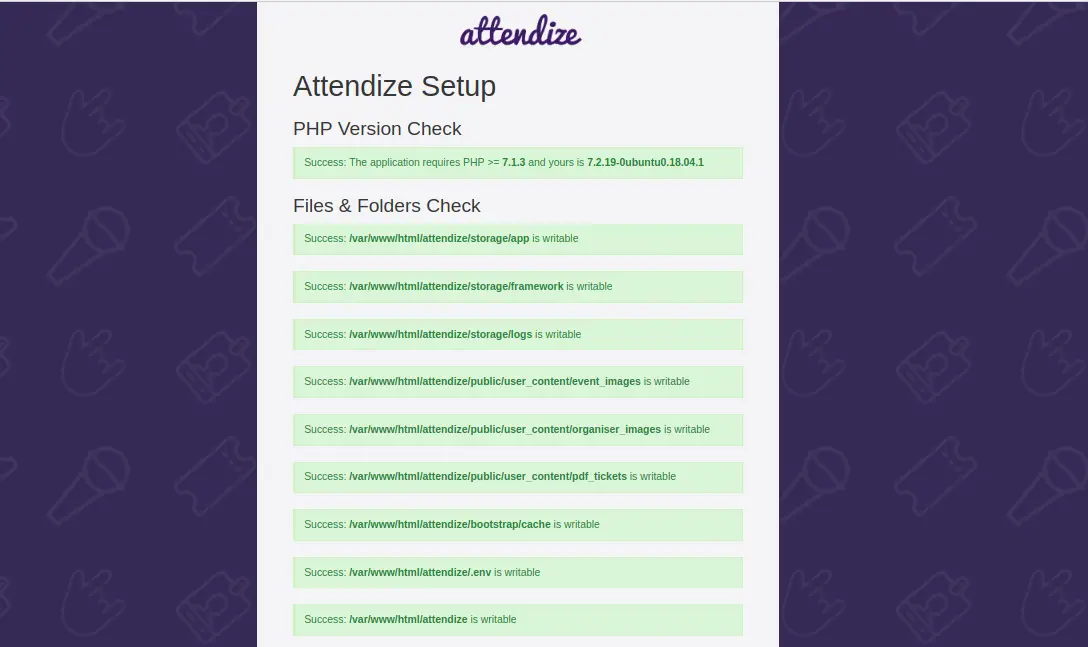
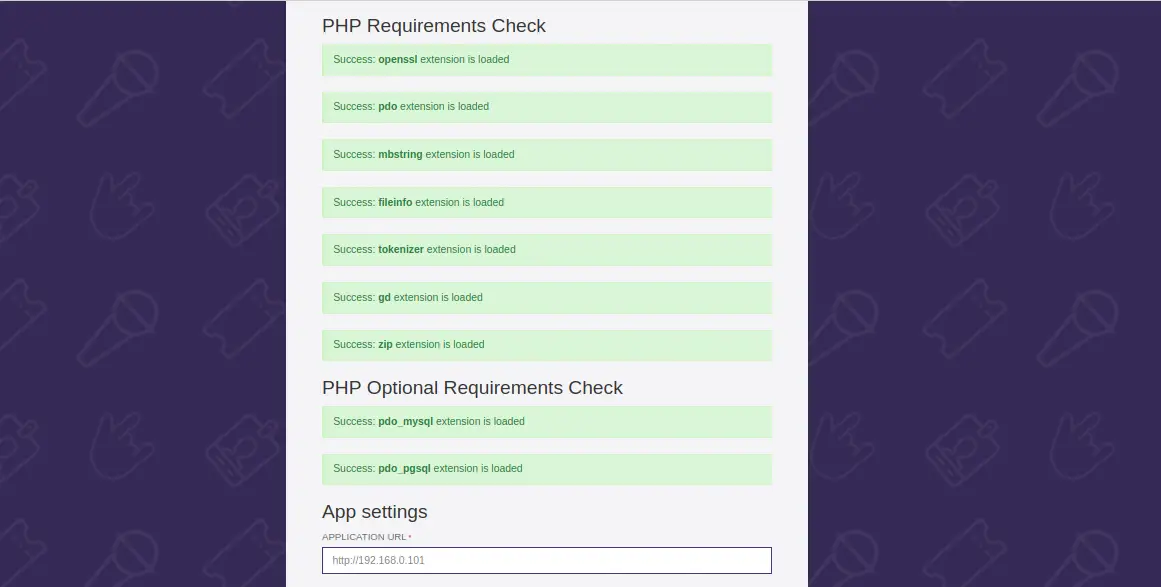
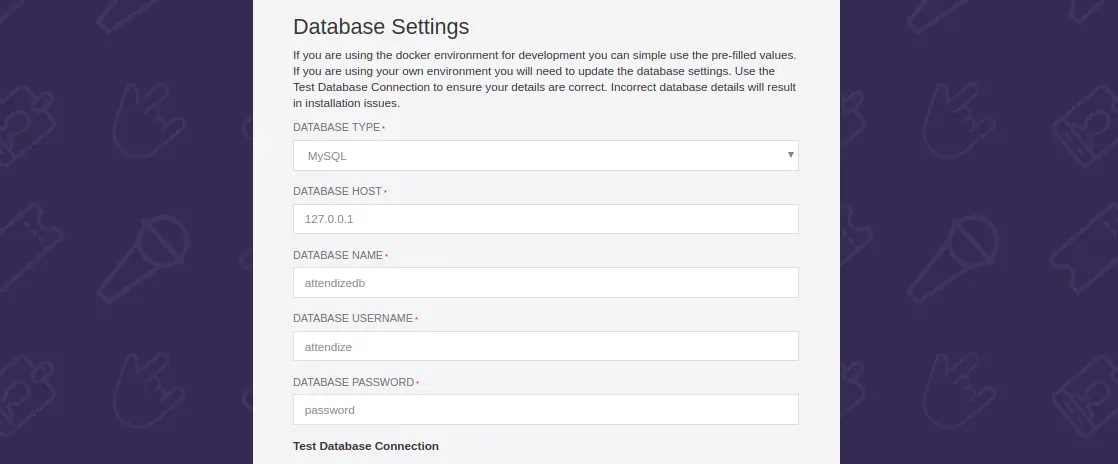
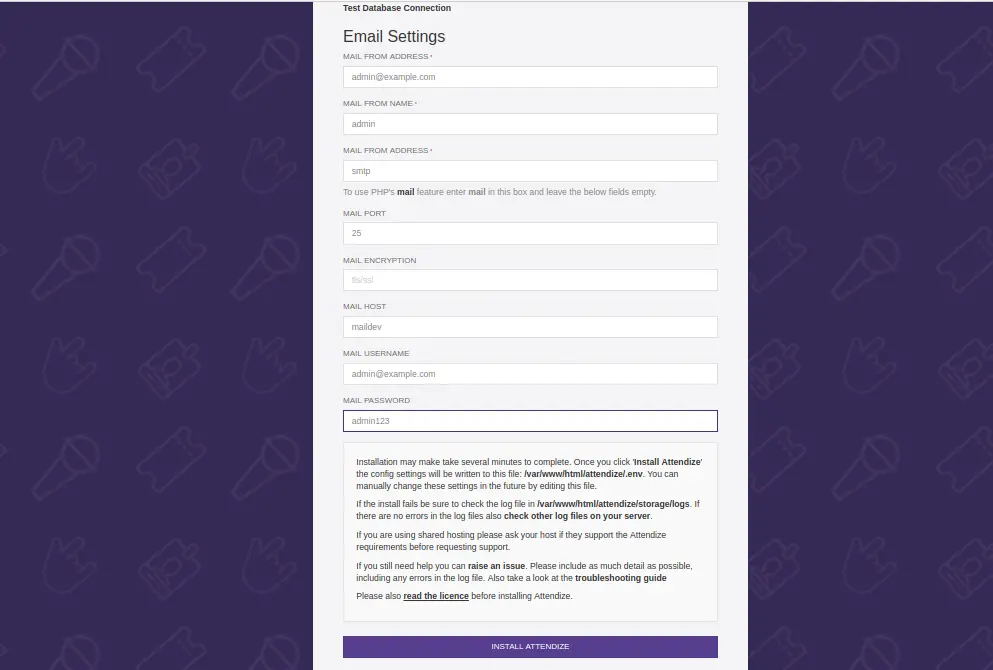
确保安装了所有必需的扩展。然后,提供您的数据库信息、电子邮件信息并单击“安装出席”按钮。您应该会看到以下页面:

提供您的姓名、电子邮件地址和密码。然后,单击“注册”按钮。您应该会看到以下页面:
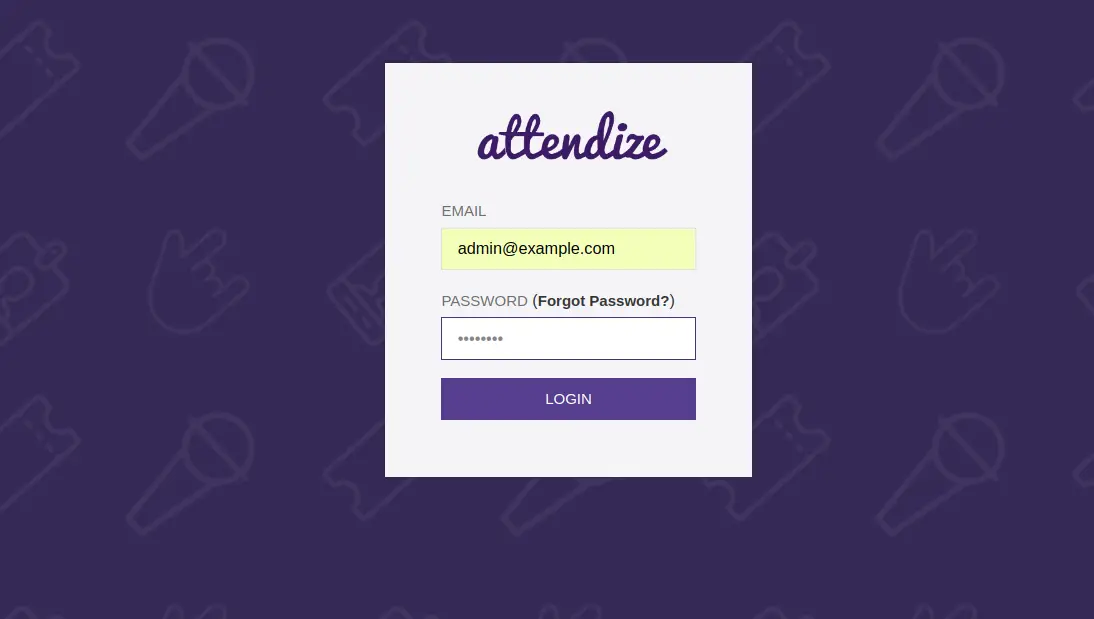
现在,提供您的登录详细信息并单击“登录”按钮。您应该会看到以下页面:
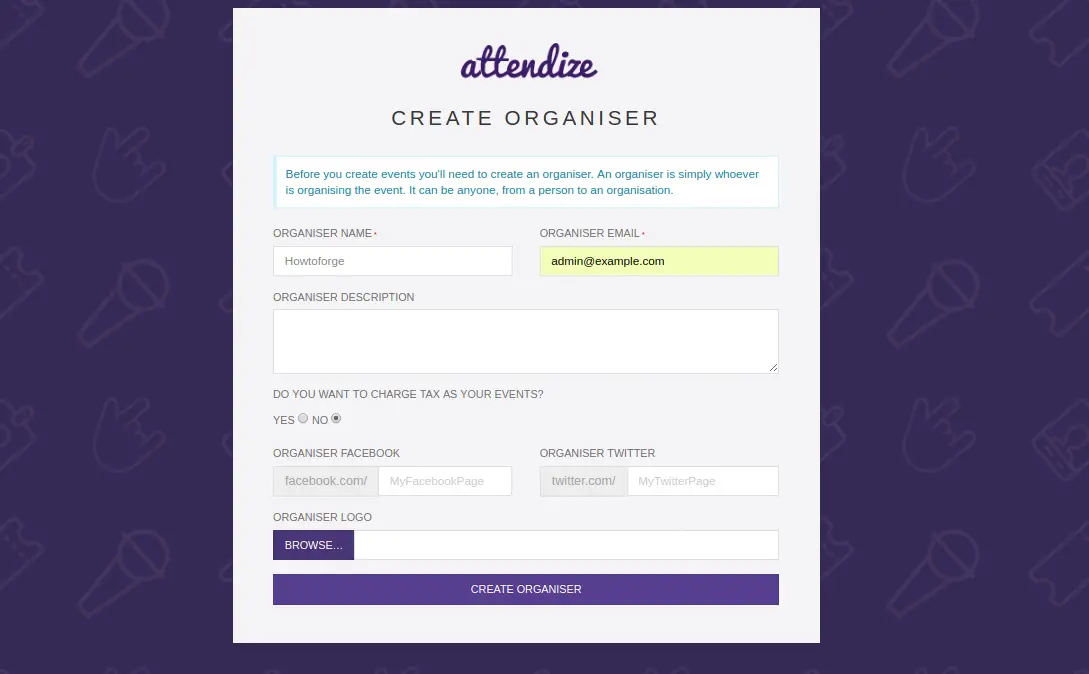
现在,提供您的组织者姓名、电子邮件、描述,然后单击“创建组织者”按钮。您应该会看到以下页面:
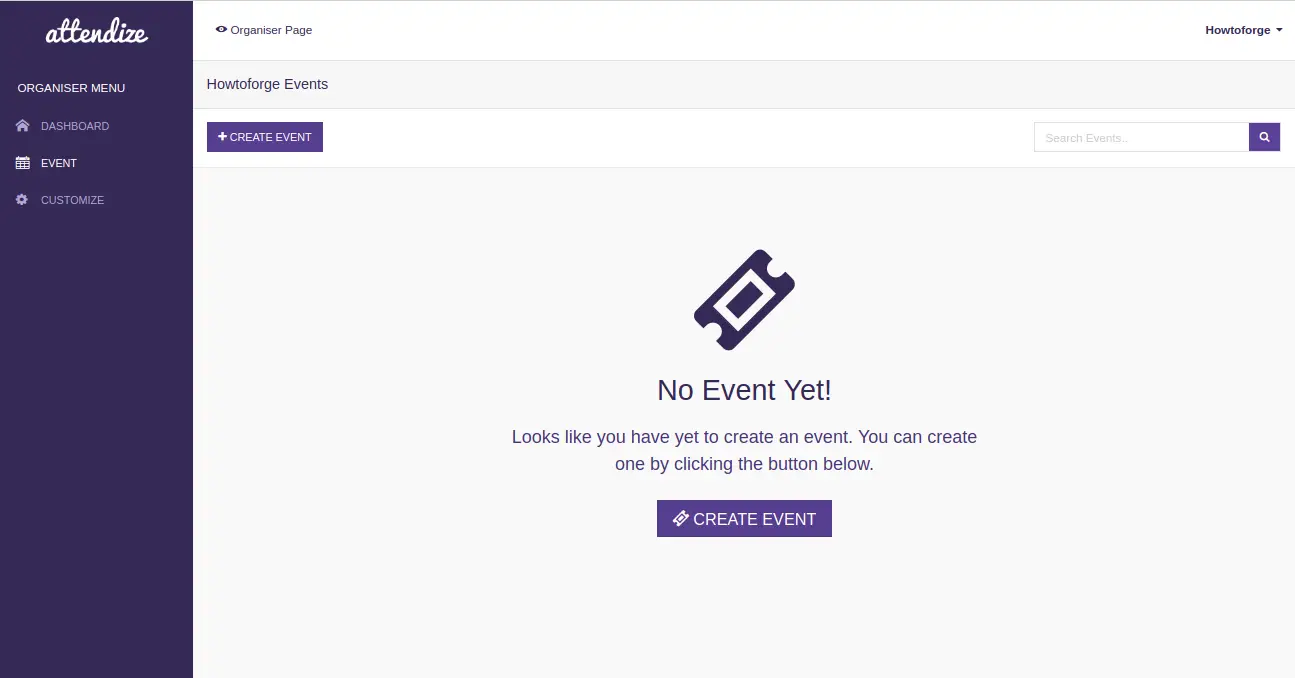
恭喜!您已在 Ubuntu 18.04 服务器中成功安装 Attendize 门票销售和活动管理应用程序。您现在可以使用 Attendize 组织和管理无限数量的活动,而无需支付任何额外费用。有关更多信息,您可以在 Attendize Doc 访问 Attendize 官方文档