如何在 Debian 9 上安装 October CMS 平台
在此页
- 要求
- 先决条件
- 初始步骤
- 第 1 步 - 安装 PHP 和必要的 PHP 扩展
- 第 2 步 - 安装 MariaDB 并为 October 创建数据库
- 第 3 步 - 安装 Acme.sh 客户端并获取 Lets Encrypt 证书(可选)
- 第 4 步 - 安装 NGINX 并为 10 月配置 NGINX
- 第 5 步 - 下载并安装 October CMS 平台
- 第 6 步 - 完成 10 月份的设置
- 链接
October CMS 是一个免费、开源、自托管的 CMS 平台,基于 Laravel PHP 框架。 October CMS 源代码托管在 Github 上。在本教程中,我们将通过使用 NGINX 作为 Web 服务器、MariaDB 作为数据库服务器,引导您在 Debian 9(stretch)操作系统上完成 October CMS 安装过程,您还可以选择使用 acme.sh 客户端来保护传输层和让加密证书颁发机构添加 SSL 支持。
要求
在继续之前,您应该检查您的服务器是否满足最低系统要求。 October CMS 对网络托管有以下服务器要求:
- PHP 7.0 或更高版本
- PHP PDO 扩展
- cURL PHP 扩展
- OpenSSL PHP 扩展
- Mbstring PHP 库
- Zip PHP 库
- GD PHP 库
- XML PHP 扩展
- JSON PHP 扩展
- 带有
mod_rewrite或 NGINX 的 Apache - 数据库服务器(MariaDB、MySQL、PostgreSQL)
先决条件
- 运行 Debian 9 (stretch) 的系统。
- 具有 sudo 权限的非根用户。
初始步骤
检查您的 Debian 系统版本:
lsb_release -ds
# Debian GNU/Linux 9.7 (stretch)
设置时区:
dpkg-reconfigure tzdata更新您的操作系统包(软件)。这是重要的第一步,因为它确保您拥有操作系统默认软件包的最新更新和安全修复程序:
apt update && apt upgrade -y安装 Debian 操作系统基本管理所需的一些基本软件包:
apt install -y curl wget vim git sudo unzip socat bash-completion dirmngr apt-transport-https第 1 步 - 安装 PHP 和必要的 PHP 扩展
October CMS 平台需要 PHP 7.0 或更高版本。默认情况下,Debian 9 在其默认软件存储库中具有 PHP 7.0 版,这适用于 October CMS。
安装 PHP 以及必要的 PHP 扩展:
sudo apt install -y php7.0 php7.0-cli php7.0-fpm php7.0-common php7.0-mysql php7.0-curl php7.0-json php7.0-zip php7.0-gd php7.0-xml php7.0-mbstring 要显示在模块中编译的 PHP,您可以运行:
php -m

ctype
curl
exif
fileinfo
. . .
. . .
检查 PHP 版本:
php --version

# PHP 7.0.33-0+deb9u1 (cli) (built: Dec  7 2018 11:36:49) ( NTS )
# Copyright (c) 1997-2017 The PHP Group
# Zend Engine v3.0.0, Copyright (c) 1998-2017 Zend Technologies
#     with Zend OPcache v7.0.33-0+deb9u1, Copyright (c) 1999-2017, by Zend Technologies
PHP-FPM 服务在 Debian 9 系统重启时自动启动和启用,因此无需手动启动和启用。我们可以继续下一步,即数据库安装和设置。
第 2 步 - 安装 MariaDB 并为 October 创建数据库
十月支持 MySQL/MariaDB、PostgreSQL、SQLite 和 SQL 数据库。 Debian 团队用 MariaDB 取代了 MySQL 作为 Debian 9(stretch)的默认数据库,因此在本教程中,我们将使用 MariaDB 作为数据库服务器。如果你想安装原始的 MySQL,你可以添加和使用由 Oracle 维护的官方 MySQL 存储库。
从官方 MariaDB 存储库安装 MariaDB 数据库服务器:
sudo apt install -y software-properties-common dirmngr apt-transport-https
sudo apt-key adv --recv-keys --keyserver keyserver.ubuntu.com 0xF1656F24C74CD1D8
sudo add-apt-repository 'deb [arch=amd64,i386,ppc64el] https://mirrors.nxthost.com/mariadb/repo/10.2/debian stretch main'
sudo apt update
sudo apt install -y mariadb-server
检查 MariaDB 版本:
mysql --version
# mysql  Ver 15.1 Distrib 10.2.21-MariaDB, for debian-linux-gnu (x86_64) using readline 5.2
运行 mysql_secure 安装 脚本以提高 MariaDB 安全性并为 MariaDB root 用户设置密码:
sudo mysql_secure_installation回答每个问题:
Enter current password for root (enter for none): Press Enter
Set root password? [Y/n] Y
New password: your_secure_password
Re-enter new password: your_secure_password
Remove anonymous users? [Y/n] Y
Disallow root login remotely? [Y/n] Y
Remove test database and access to it? [Y/n] Y
Reload privilege tables now? [Y/n] Y
以 root 用户身份登录 MariaDB:
sudo mysql -u root -p
# Enter password
创建将用于安装 October 的 MariaDB 数据库和用户,并记住凭据:
CREATE DATABASE dbname;
GRANT ALL ON dbname.* TO 'username' IDENTIFIED BY 'password';
FLUSH PRIVILEGES;
退出 MariaDB shell:
quit第 3 步 - 安装 Acme.sh 客户端并获取 Lets Encrypt 证书(可选)
没有必要使用 HTTPS 保护您的网站,但这是保护您的网站流量的好习惯。为了从 Lets Encrypt 获得 SSL 证书,我们将使用 Acme.sh 客户端。 Acme.sh 是一个纯 UNIX shell 软件,用于零依赖地从 Lets Encrypt 获取 SSL 证书。
下载并安装 Acme.sh:
sudo su - root
git clone https://github.com/Neilpang/acme.sh.git
cd acme.sh
./acme.sh --install --accountemail example.com
source ~/.bashrc
cd ~
检查 acme.sh 版本:
acme.sh --version
# v2.8.0
为您的域名/主机名获取 RSA 和 ECC/ECDSA 证书:
# RSA 2048
acme.sh --issue --standalone -d example.com --keylength 2048
# ECDSA
acme.sh --issue --standalone -d example.com --keylength ec-256
如果你想要假证书进行测试,你可以在上面的命令中添加 --staging 标志。
运行上述命令后,您的证书和密钥将位于:
- 对于 RSA:
~/example.com目录。 - 对于 ECC/ECDSA:
~/example.com_ecc目录。
要列出您颁发的证书,您可以运行:
acme.sh --list创建一个目录来存储您的证书。我们将使用 /etc/letsencrypt 目录。
mkdir -p /etc/letsencrypt/example.com
sudo mkdir -p /etc/letsencrypt/example.com_ecc
安装/复制证书到 /etc/letsencrypt 目录。
# RSA
acme.sh --install-cert -d example.com \
        --cert-file /etc/letsencrypt/example.com/cert.pem \
        --key-file /etc/letsencrypt/example.com/private.key \
        --fullchain-file /etc/letsencrypt/example.com/fullchain.pem \
        --reloadcmd "sudo systemctl reload nginx.service"

# ECC/ECDSA
acme.sh --install-cert -d example.com --ecc \
        --cert-file /etc/letsencrypt/example.com_ecc/cert.pem \
        --key-file /etc/letsencrypt/example.com_ecc/private.key \
        --fullchain-file /etc/letsencrypt/example.com_ecc/fullchain.pem \
        --reloadcmd "sudo systemctl reload nginx.service"
所有证书将每 60 天自动更新一次。
获得证书后,退出 root 用户并返回普通 sudo 用户:
exit第 4 步 - 安装 NGINX 并为 10 月配置 NGINX
安装 NGINX 网络服务器:
sudo apt install -y nginx检查 NGINX 版本:
sudo nginx -v
# nginx version: nginx/1.10.3
通过运行以下命令为 October 配置 NGINX:
sudo vim /etc/nginx/sites-available/october.conf
并使用以下配置填充文件:
server {
    listen [::]:443 ssl http2;
    listen 443 ssl http2;
    listen [::]:80;
    listen 80;

    server_name example.com;

    index index.php index.html;
    root /var/www/october;

    ssl_certificate /etc/letsencrypt/example.com/fullchain.pem;
    ssl_certificate_key /etc/letsencrypt/example.com/private.key;
    ssl_certificate /etc/letsencrypt/example.com_ecc/fullchain.pem;
    ssl_certificate_key /etc/letsencrypt/example.com_ecc/private.key;

    location / {
        try_files $uri $uri/ /index.php?$query_string;
    }

    location ~ \.php$ {
        include snippets/fastcgi-php.conf;
        fastcgi_pass unix:/var/run/php/php7.0-fpm.sock;
        fastcgi_read_timeout 120s;
    }

    location ~ ^/favicon\.ico { try_files $uri /index.php; }
    location ~ ^/sitemap\.xml { try_files $uri /index.php; }
    location ~ ^/robots\.txt { try_files $uri /index.php; }
    location ~ ^/humans\.txt { try_files $uri /index.php; }
    location ~ ^/storage/app/uploads/public { try_files $uri 404; }
    location ~ ^/storage/app/media { try_files $uri 404; }
    location ~ ^/storage/temp/public { try_files $uri 404; }
    location ~ ^/modules/.*/assets { try_files $uri 404; }
    location ~ ^/modules/.*/resources { try_files $uri 404; }
    location ~ ^/modules/.*/behaviors/.*/assets { try_files $uri 404; }
    location ~ ^/modules/.*/behaviors/.*/resources { try_files $uri 404; }
    location ~ ^/modules/.*/widgets/.*/assets { try_files $uri 404; }
    location ~ ^/modules/.*/widgets/.*/resources { try_files $uri 404; }
    location ~ ^/modules/.*/formwidgets/.*/assets { try_files $uri 404; }
    location ~ ^/modules/.*/formwidgets/.*/resources { try_files $uri 404; }
    location ~ ^/modules/.*/reportwidgets/.*/assets { try_files $uri 404; }
    location ~ ^/modules/.*/reportwidgets/.*/resources { try_files $uri 404; }
    location ~ ^/plugins/.*/.*/assets { try_files $uri 404; }
    location ~ ^/plugins/.*/.*/resources { try_files $uri 404; }
    location ~ ^/plugins/.*/.*/behaviors/.*/assets { try_files $uri 404; }
    location ~ ^/plugins/.*/.*/behaviors/.*/resources { try_files $uri 404; }
    location ~ ^/plugins/.*/.*/reportwidgets/.*/assets { try_files $uri 404; }
    location ~ ^/plugins/.*/.*/reportwidgets/.*/resources { try_files $uri 404; }
    location ~ ^/plugins/.*/.*/formwidgets/.*/assets { try_files $uri 404; }
    location ~ ^/plugins/.*/.*/formwidgets/.*/resources { try_files $uri 404; }
    location ~ ^/plugins/.*/.*/widgets/.*/assets { try_files $uri 404; }
    location ~ ^/plugins/.*/.*/widgets/.*/resources { try_files $uri 404; }
    location ~ ^/themes/.*/assets { try_files $uri 404; }
    location ~ ^/themes/.*/resources { try_files $uri 404; }

}
通过将文件链接到 sites-enabled 目录来激活新的 october.conf 配置。
sudo ln -s /etc/nginx/sites-available/october.conf /etc/nginx/sites-enabled检查 NGINX 配置是否存在语法错误:
sudo nginx -t重新加载 NGINX 服务:
sudo systemctl reload nginx.service第 5 步 - 下载并安装 October CMS 平台
创建文档根目录:
sudo mkdir -p /var/www/october将 /var/www/october 目录的所有权更改为 [your_user]:
sudo chown -R [your_user]:[your_user] /var/www/october导航到文档根目录:
cd /var/www/october下载 October CMS 安装程序:
wget https://octobercms.com/download -O october.zip解压 October CMS 安装程序:
unzip october.zip
rm october.zip
mv install-master/* .
将 /var/www/october 目录的所有权更改为 www-data:
sudo chown -R www-data:www-data /var/www/october在网络浏览器中导航到 install.php 脚本,例如 example.com/install.php,然后按照安装说明进行操作。
第 6 步 - 完成 10 月设置
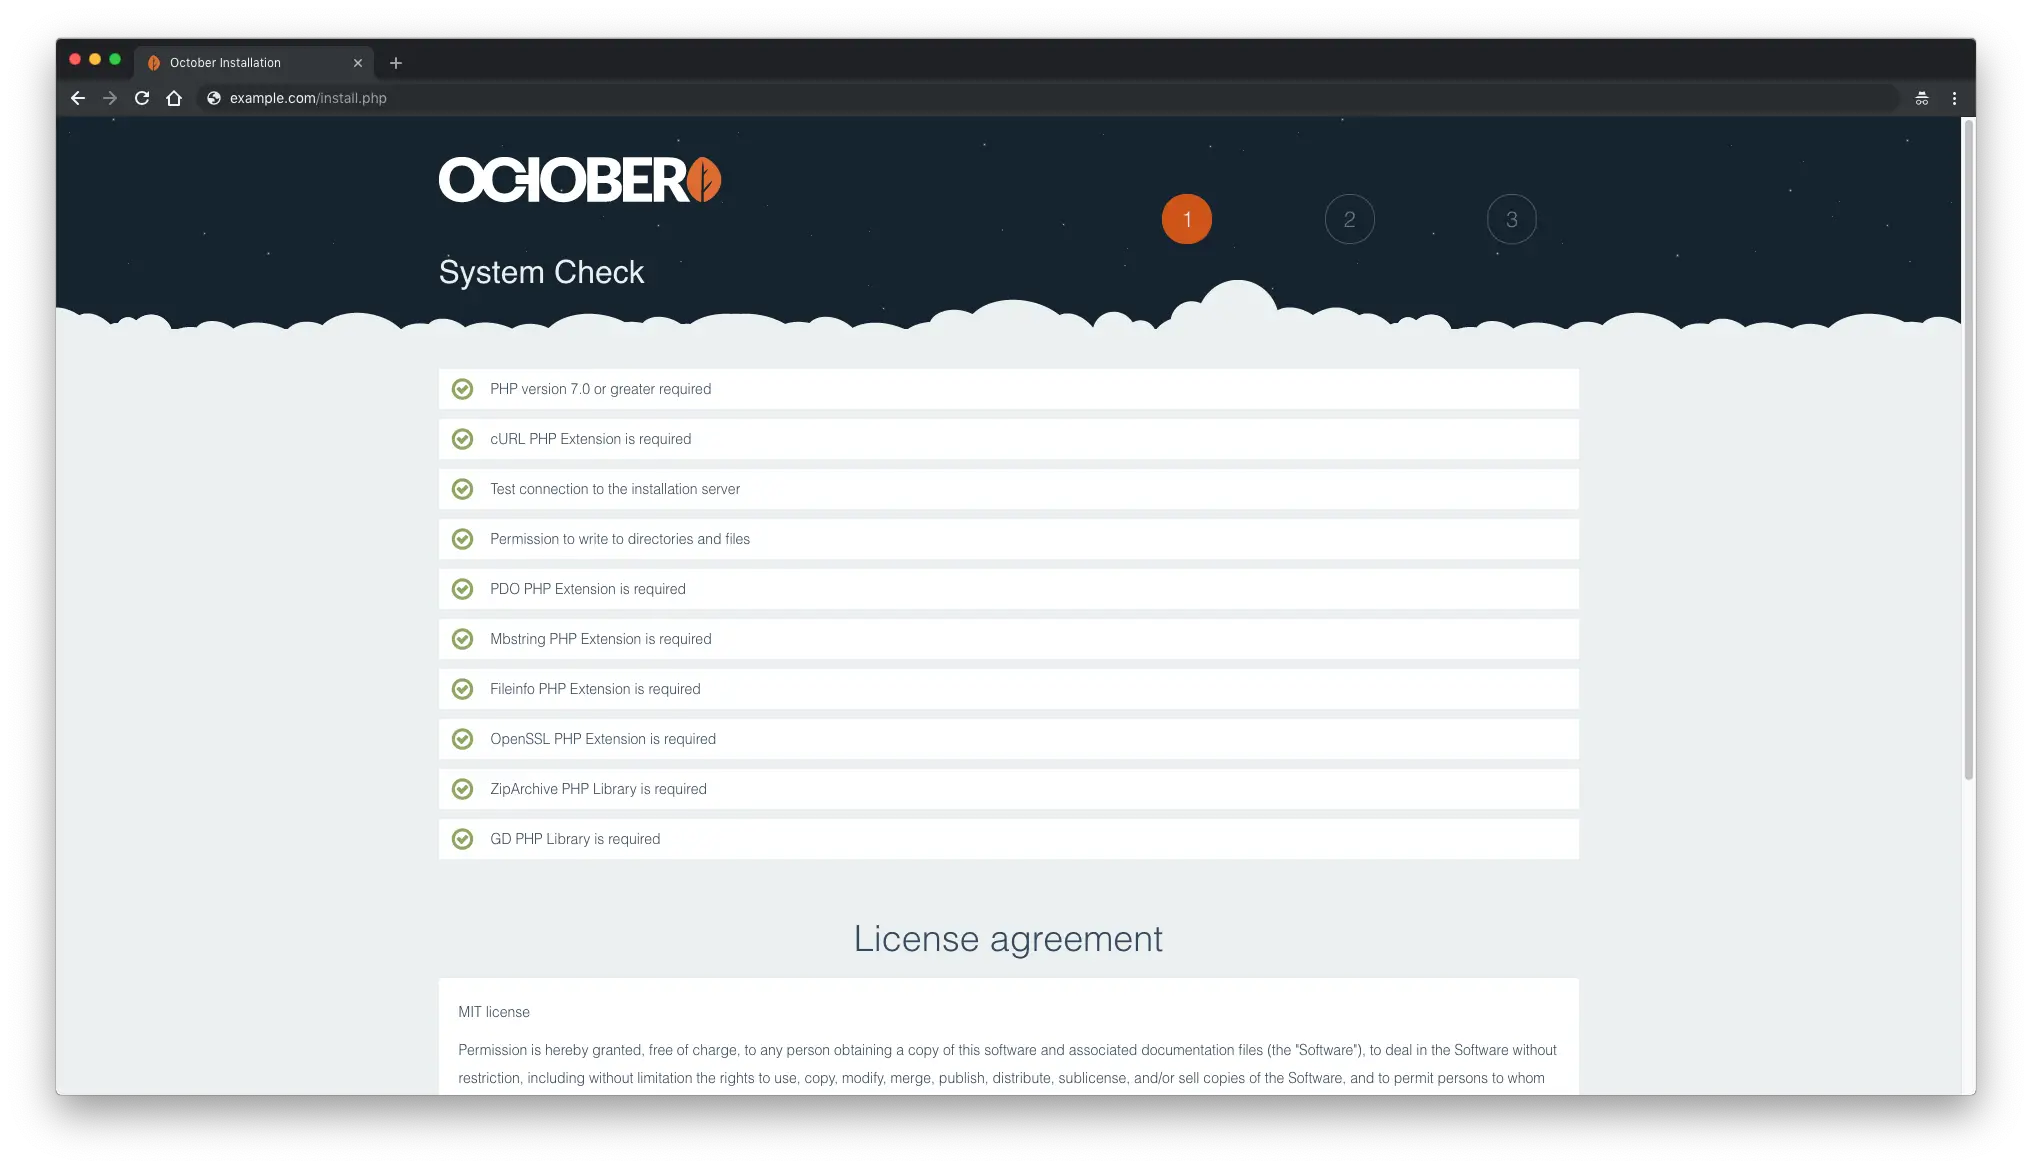
确保您的系统检查正常,然后按“同意并继续”按钮继续。
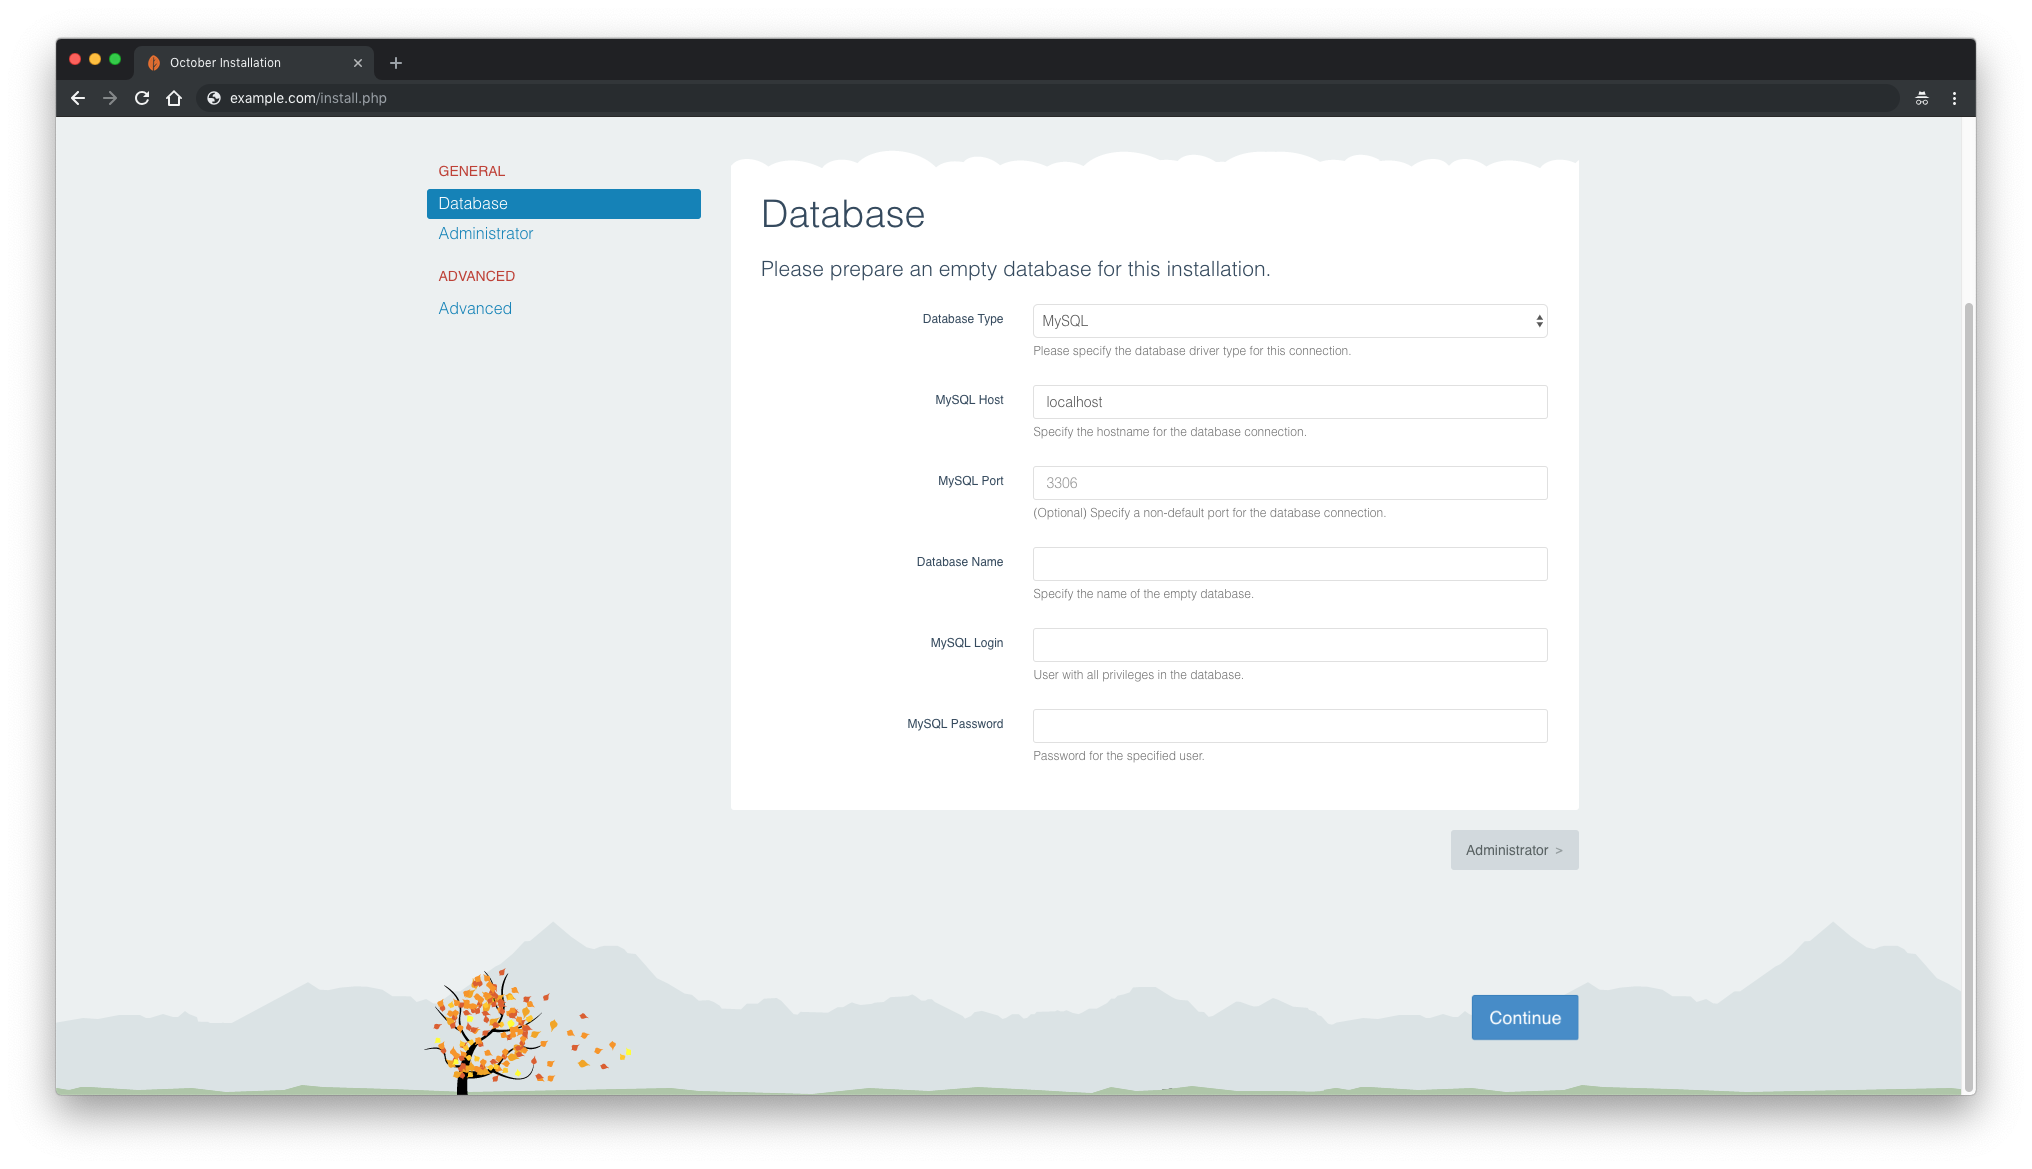
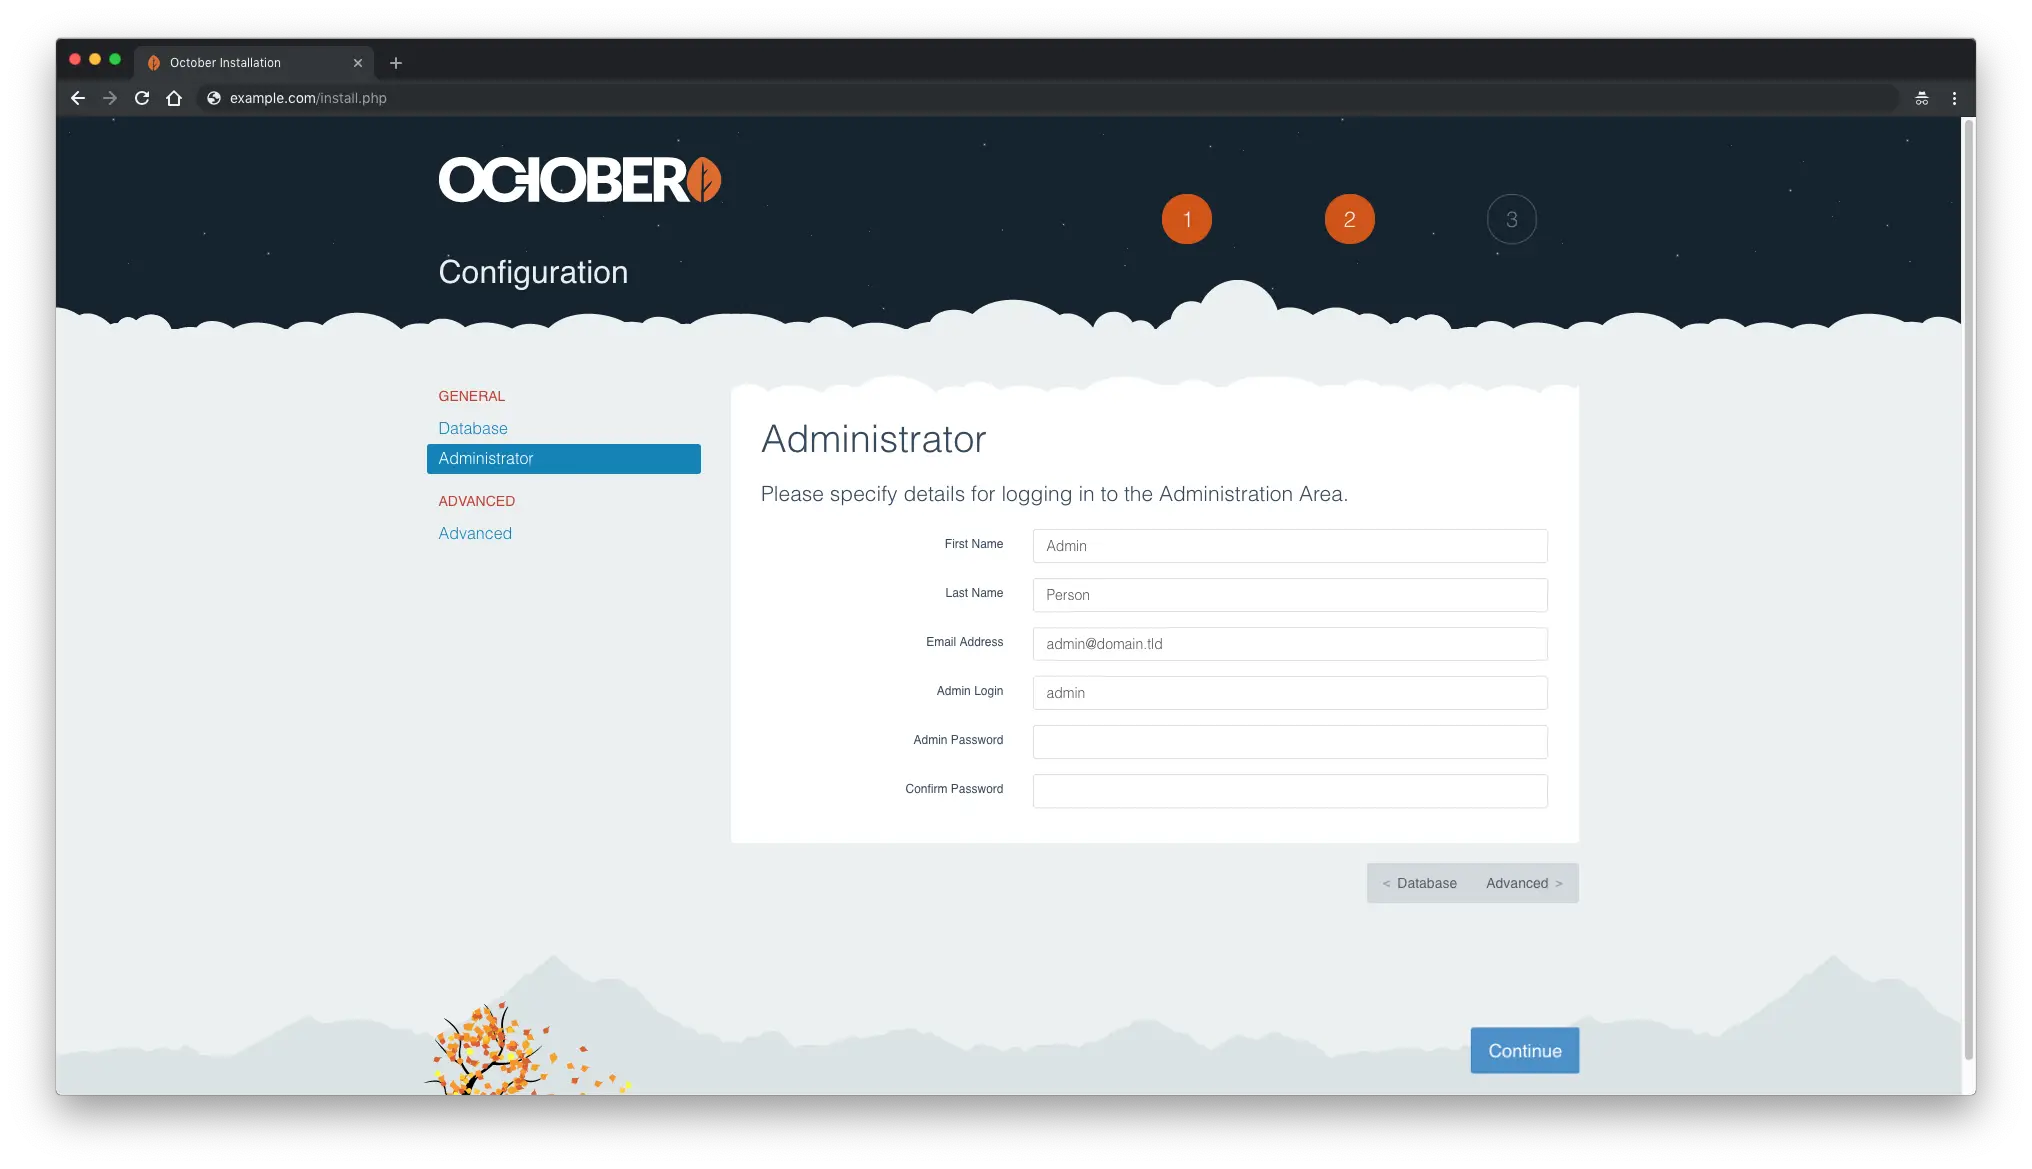
配置您的数据库和管理员用户设置。
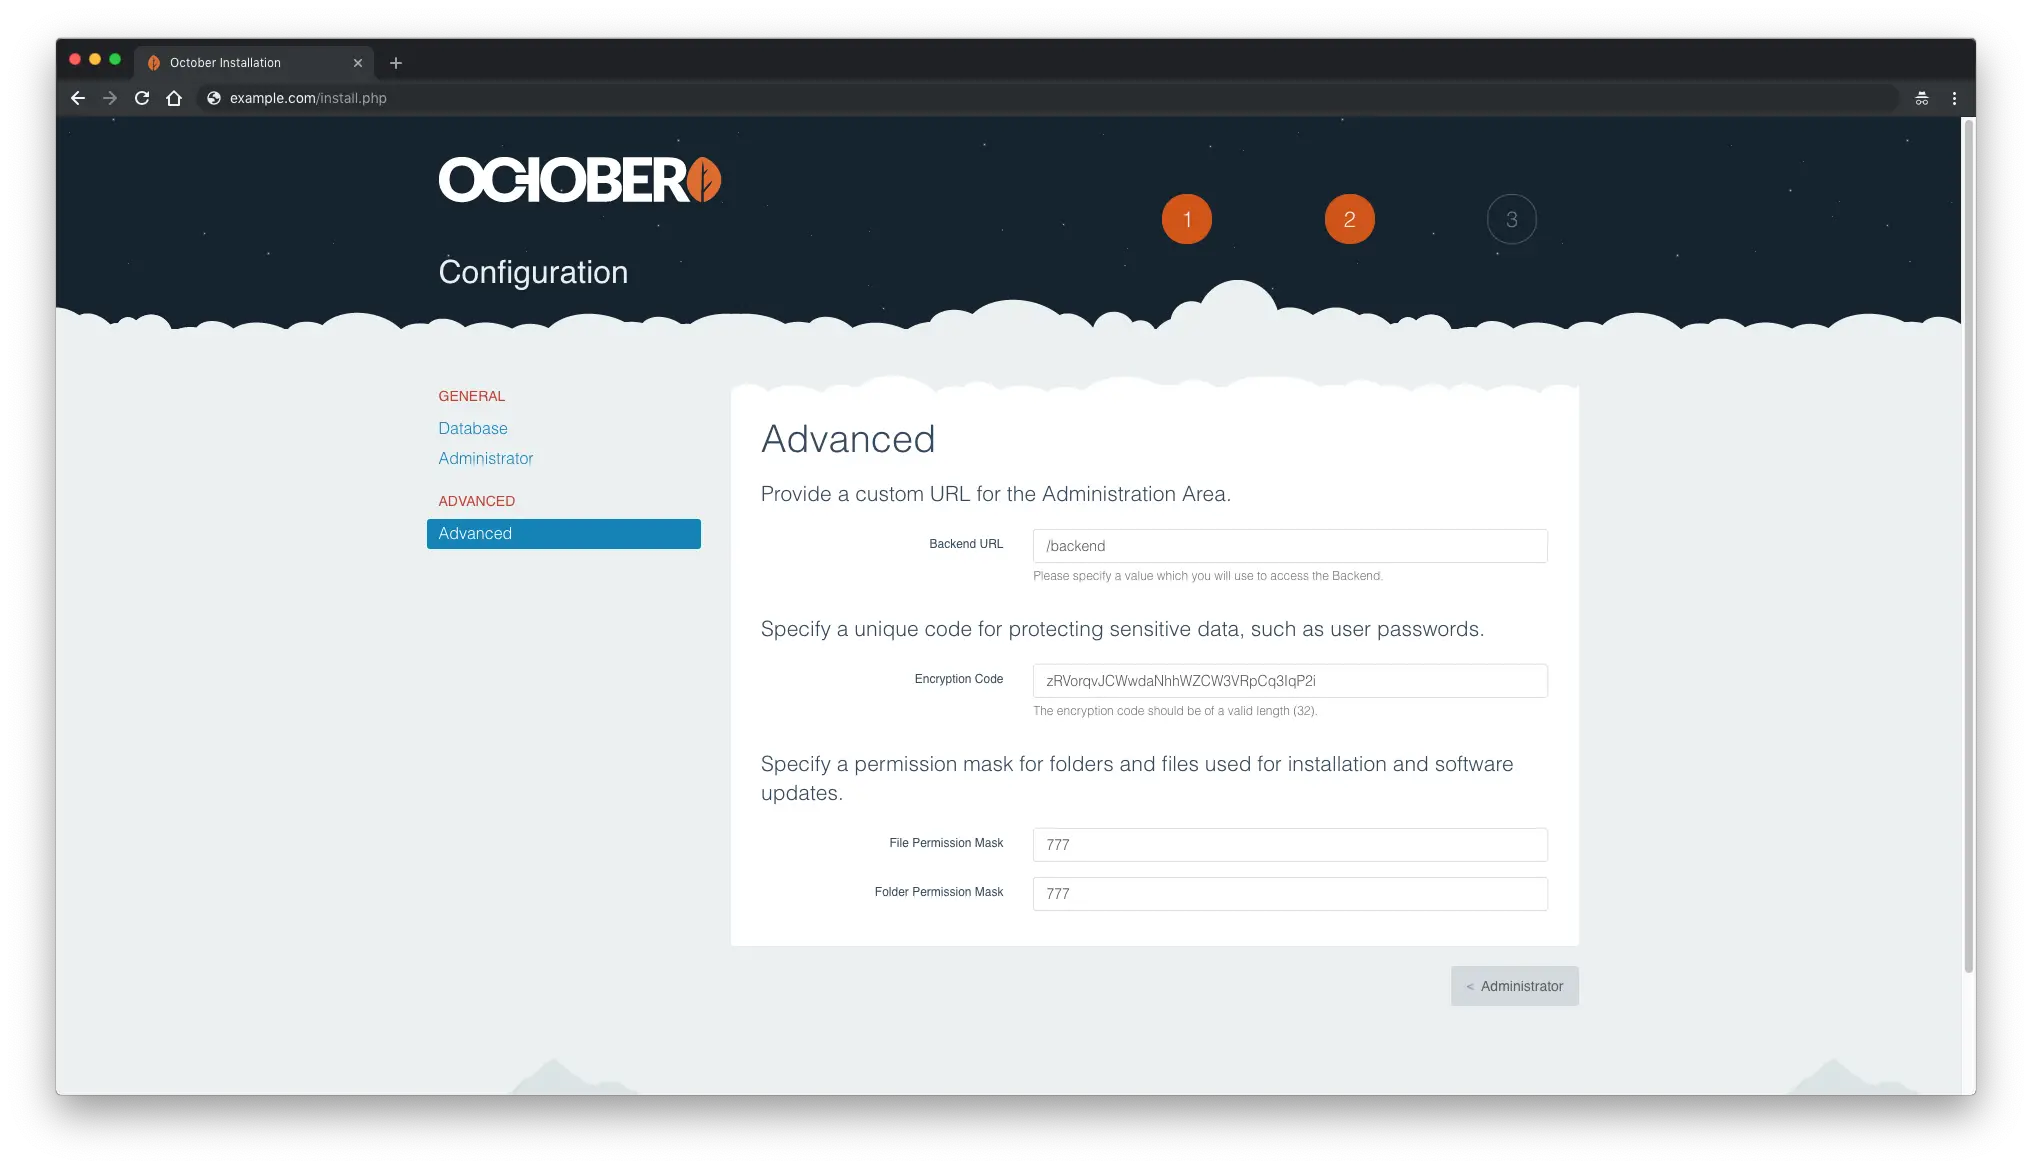
您还可以配置一些高级设置,也可以保留默认值。
最后,当一切都配置好后,按蓝色的“继续”按钮。
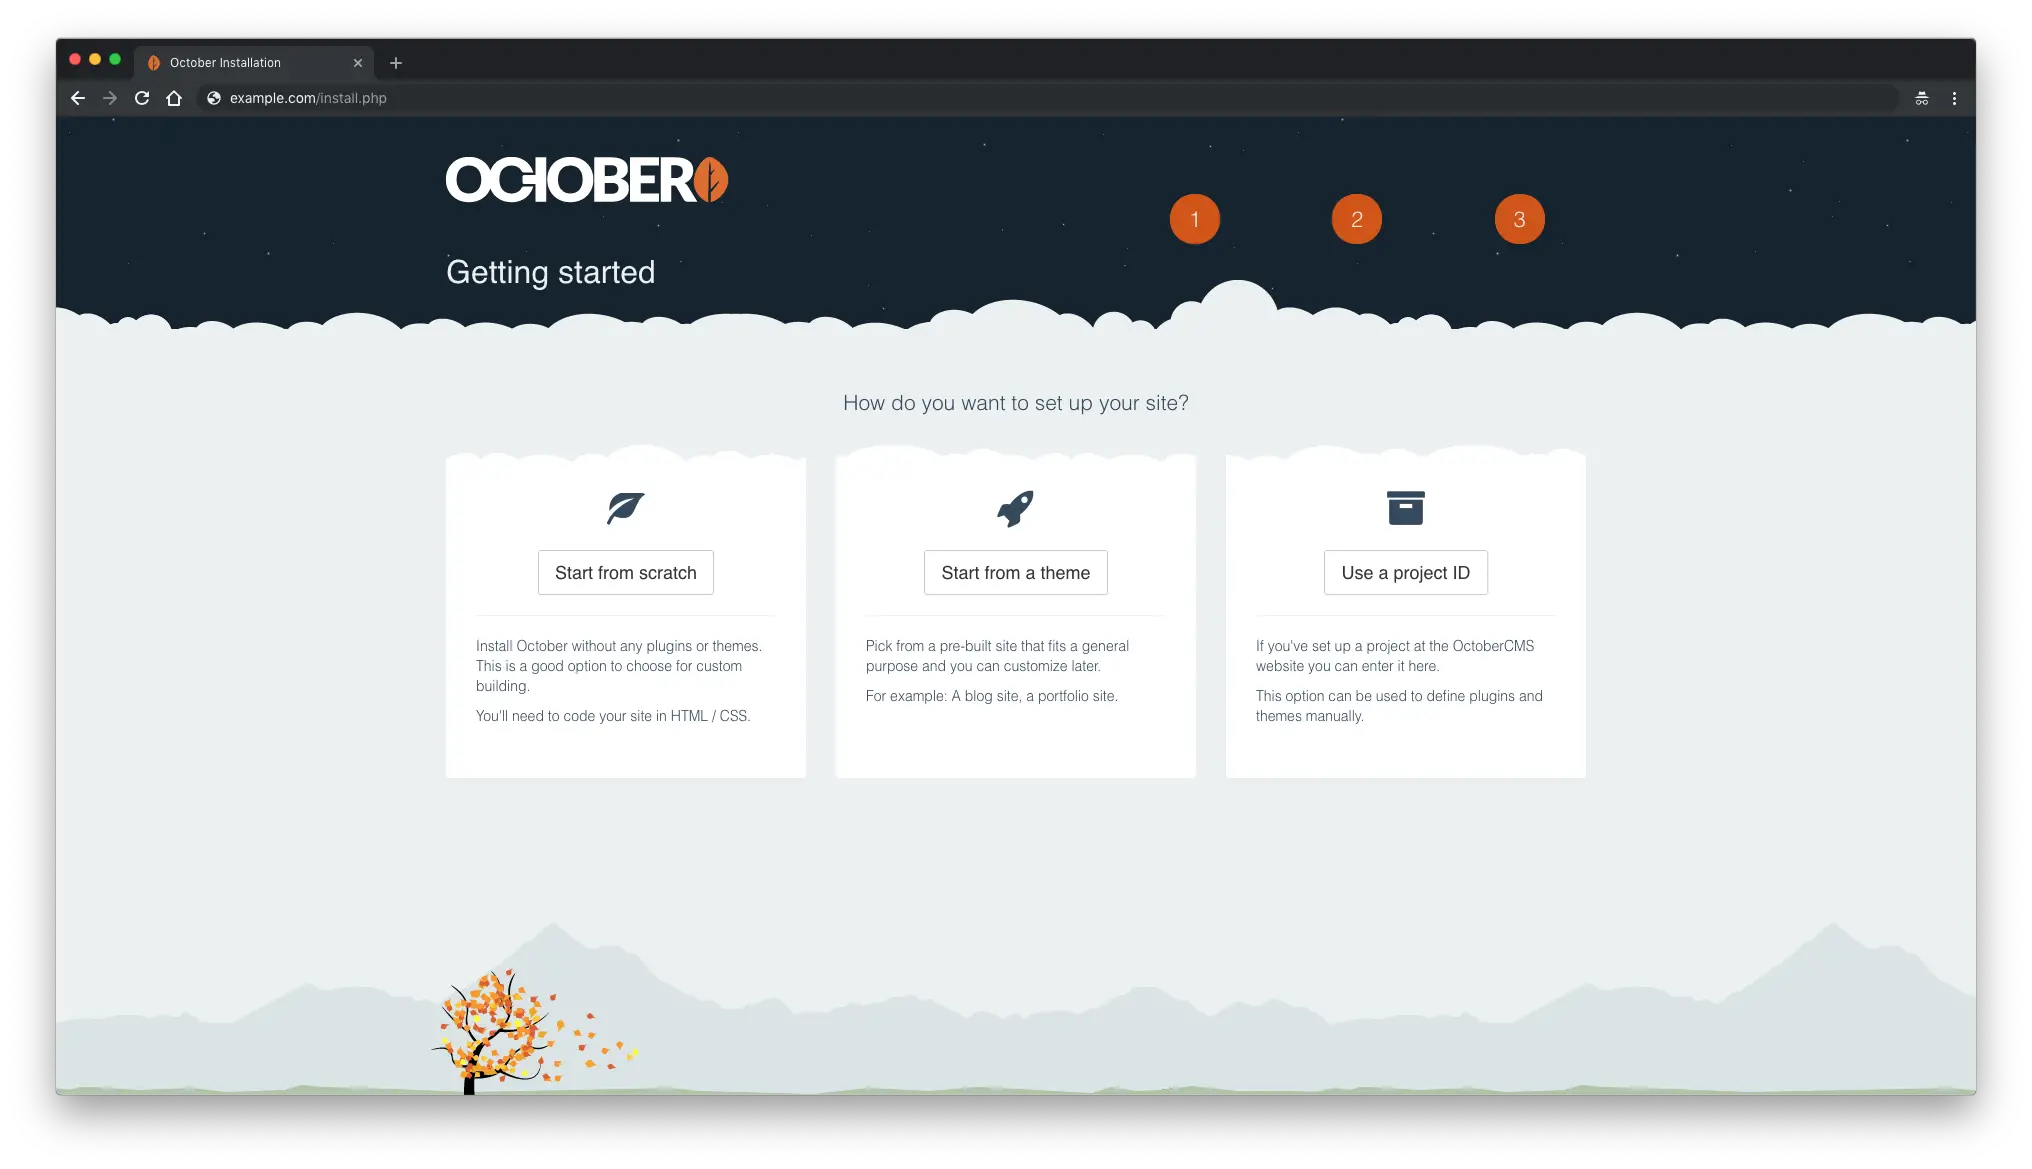
接下来,系统会询问您“您希望如何设置站点?”。您将有 3 个选项:从头开始、从主题开始、使用项目 ID。选择您的首选选项。
要访问 October CMS 平台的管理区域,只需将 /backend 附加到您的 URL/IP。
安装后,出于安全原因,您应该删除安装文件、install.php 脚本和 install_files 目录:
sudo rm /var/www/october/install.php && sudo rm -rf /var/www/october/install_files链接
- <李>
- https://github.com/octobercms/october
