如何在 Ubuntu 18.04 上安装 Plone CMS
在此页
- 要求
- 开始
- 安装克隆
- 访问 Plone Web 界面
Plone 是建立在 Zope 应用服务器之上的免费开源内容管理系统。它是用 Python 语言编写的,但也包含大量的 HTML、JavaScript 和 CSS。您可以使用 plone 构建任何类型的网站、博客和网上商店。 Plone 支持多种操作系统,如 Linux、Mac OS X、Windows、BSD 和 Solaris。它简单、易于使用、易于设置、维护和修改。 Plone 提供了许多功能,包括多站点管理、灵活的工作流程、企业集成、工业强度安全、搜索功能、多语言支持等等。
在本教程中,我们将学习如何在 Ubuntu 18.04 服务器上安装 Plone。
要求
- 在您的系统上安装了 Ubuntu 18.04 服务器。
- 具有 sudo 权限的非根用户。
入门
在开始之前,您需要使用最新版本更新您的系统。您可以通过运行以下命令来执行此操作:
sudo apt-get update -y
sudo apt-get upgrade -y
接下来,您需要为您的系统安装一些必需的依赖项。您可以使用以下命令安装所有这些:
sudo apt-get install build-essential gcc libjpeg-dev wget readline-common libssl-dev libxml2-dev libxslt1-dev python2.7 python-dev python-btrees -y安装完成后,您可以继续下一步。
安装克隆
首先,您需要从 https://launchpad.net/plone 下载 Plone 到 /tmp 目录。您也可以使用以下命令下载它:
cd /tmp
wget https://launchpad.net/plone/5.1/5.1.4/+download/Plone-5.1.4-UnifiedInstaller-r1.tgz
下载完成后,使用以下命令解压缩下载的文件:
tar -xvzf Plone-5.1.4-UnifiedInstaller-r1.tgz接下来,使用以下命令将提取的目录复制到 /opt:
sudo cp -r Plone-5.1.4-UnifiedInstaller-r1 /opt/plone接下来,将目录更改为 /opt/plone 并使用以下命令开始安装:
cd /opt/plone
sudo ./install.sh standalone --target=/opt/plone --password=password --with-python=/usr/bin/python2.7
安装成功完成后,您应该会看到以下输出:
#####################################################################

######################  Installation Complete  ######################

Plone successfully installed at /opt/plone
See /opt/plone/zinstance/README.html
for startup instructions.

Use the account information below to log into the Zope Management Interface
The account has full 'Manager' privileges.

  Username: admin
  Password: password

This account is created when the object database is initialized. If you change
the password later (which you should!), you'll need to use the new password.

Use this account only to create Plone sites and initial users. Do not use it
for routine login or maintenance.- If you need help, ask in IRC channel #plone on irc.freenode.net. - The live support channel also exists at http://plone.org/chat - You can also ask for help on https://community.plone.org - Submit feedback and report errors at https://github.com/plone/Products.CMFPlone/issues (For install problems, https://github.com/plone/Installers-UnifiedInstaller/issues)
接下来,使用以下命令启动 Plone 服务:
sudo /opt/plone/zinstance/bin/plonectl start输出:
instance: . .
daemon process started, pid=22438
您还可以使用以下命令检查 Plone 的状态:
sudo /opt/plone/zinstance/bin/plonectl status输出:
instance: program running; pid=22438
访问 Plone Web 界面
Plone 现已启动并运行,是时候通过 Web 浏览器访问它了。
打开您的网络浏览器并输入 URL http://your-server-ip:8080,在我的例子中:http://192.168.1.100:8080,您将被重定向到以下页面:
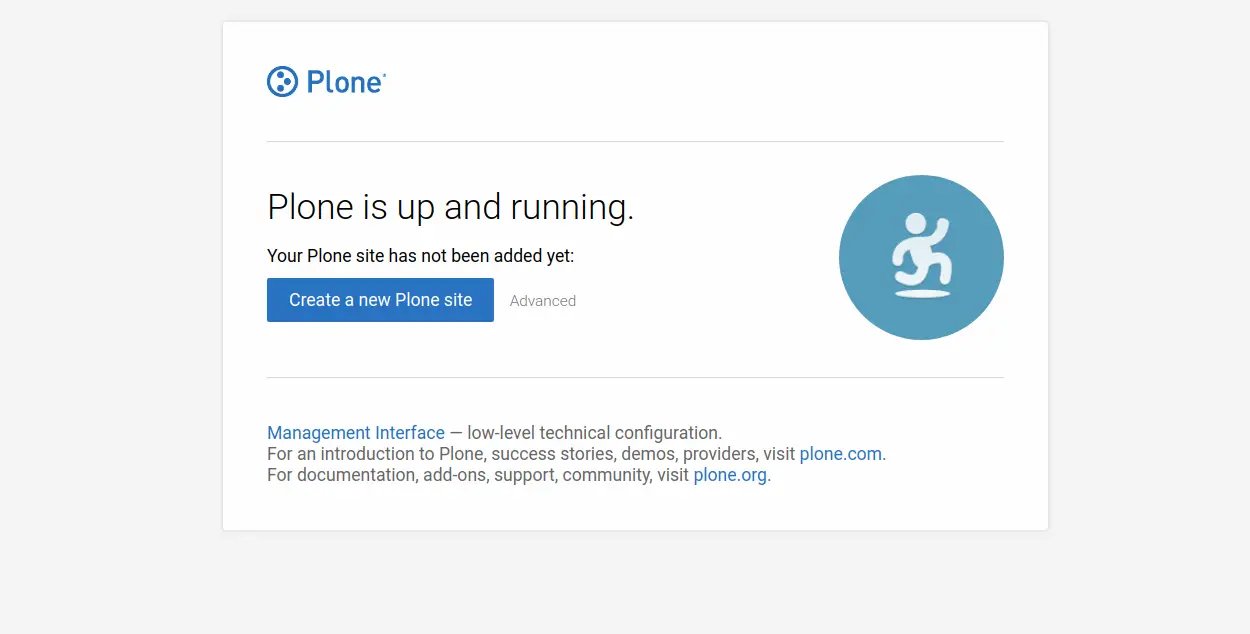
现在,单击“创建新的 Plone 站点”按钮。您应该会看到以下页面:
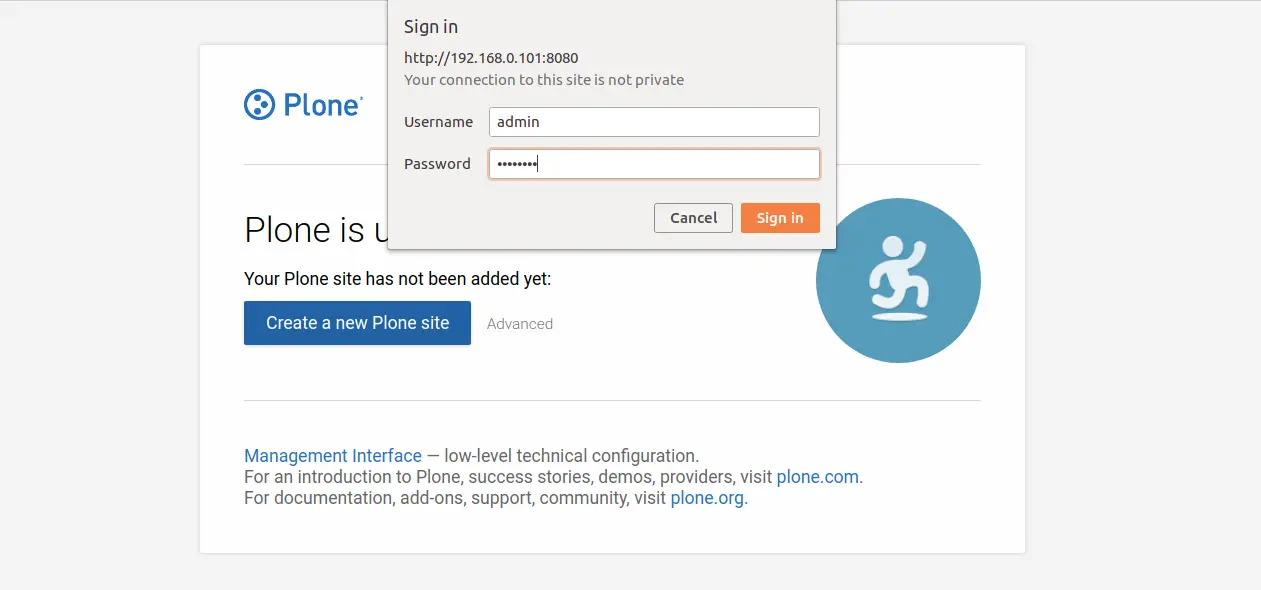
现在,提供您的管理员用户名和密码(用户名:admin,密码:password),然后单击登录按钮。您应该会看到以下页面:
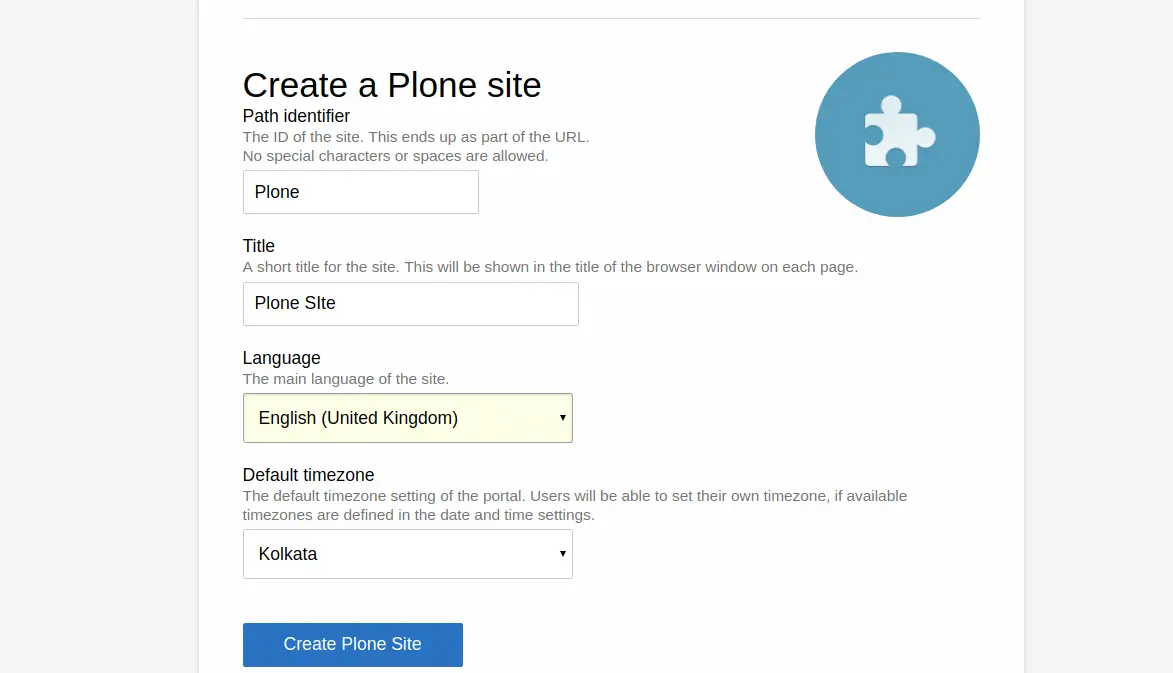
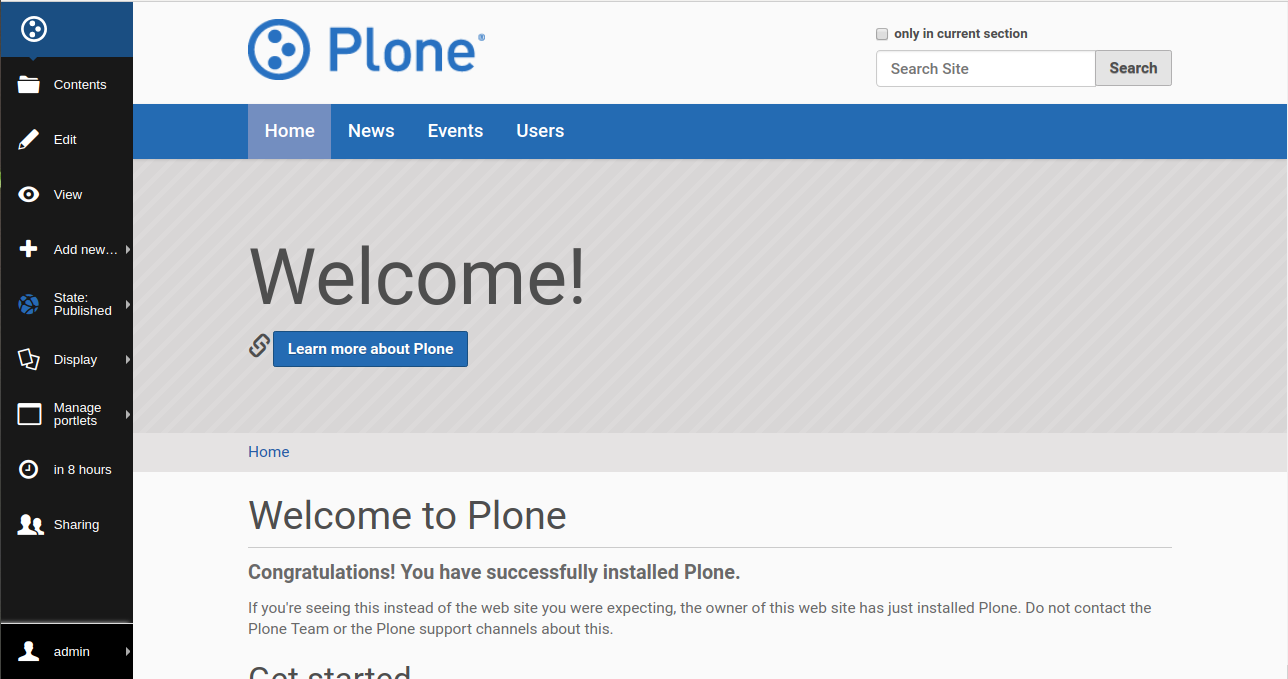
现在,提供所有必需的信息并单击“创建克隆站点”按钮。您应该在以下页面中看到 Plone 仪表板: