如何在 Rocky Linux 9 上安装 Jellyfin 媒体服务器
在此页
- 先决条件
- 第 1 步 - 配置防火墙
- 第 2 步 - 安装 Docker 和 Docker Compose
- 第 3 步 - 创建 Docker Compose 配置
- 第 4 步 - 启动 Jellyfin
- 第 5 步 - 安装 Nginx
- 第 6 步 - 安装 SSL
- 第 7 步 - 配置 Nginx
- 第 8 步 - 访问和配置 Jellyfin
- 第 9 步 - 升级 Jellyfin
- 结论
Jellyfin 是一种免费的开源媒体服务器,可让您流式传输可从任何地方访问的内容。它支持电影、电视节目、音乐和直播电视/DVR。 Jellyfin 服务器可以在 Windows、Linux 或 macOS 上设置,其内容可以使用浏览器和使用公共 URL 的移动应用程序从不同设备即时访问。只要这些媒体设备连接到 Internet 或同一网络,它甚至可以在其他 PC、电视或电话上流式传输这些文件。它提供了多种功能,包括支持 DLNA、无播放限制、从 TheTVDB、TheMovieDB 和烂番茄自动获取元数据、自动录制、支持硬件加速等等。
Jellyfin 是 Emby 过渡到专有许可模型后 Emby Media 服务器的一个分支。
在本教程中,您将学习如何在 Rocky Linux 9 服务器上使用 Docker 安装 Jellyfin Media Server。
先决条件
-
A server running Rocky Linux 9 with a minimum of 2 CPU cores and 4GB of memory. You will need to upgrade the server as per requirements.
-
A non-root user with sudo privileges.
-
A fully qualified domain name (FQDN) pointing to your server. For our purposes, we will use
jellyfin.example.comas the domain name. -
Make sure everything is updated.
$ sudo dnf update -
Install basic utility packages. Some of them may already be installed.
$ sudo dnf install wget curl nano unzip yum-utils -y
第 1 步 - 配置防火墙
第一步是配置防火墙。 Rocky Linux 使用 Firewalld 防火墙。检查防火墙状态。
$ sudo firewall-cmd --state
running
防火墙适用于不同的区域,公共区域是我们将使用的默认区域。列出防火墙上所有活动的服务和端口。
$ sudo firewall-cmd --permanent --list-services
它应该显示以下输出。
cockpit dhcpv6-client ssh
Jellyfin 需要 HTTP 和 HTTPS 端口才能运行。打开它们。
$ sudo firewall-cmd --permanent --add-service=http
$ sudo firewall-cmd --permanent --add-service=https
添加伪装,因为应用程序将联系其他实例。
$ sudo firewall-cmd --permanent --add-masquerade
重新加载防火墙以应用更改。
$ sudo firewall-cmd --reload
第 2 步 - 安装 Docker 和 Docker Compose
Rocky Linux 附带旧版本的 Docker。要安装最新版本,首先,安装官方 Docker 存储库。
$ sudo yum-config-manager \
    --add-repo \
    https://download.docker.com/linux/centos/docker-ce.repo
安装最新版本的 Docker。
$ sudo dnf install docker-ce docker-ce-cli containerd.io
在尝试安装 Docker 时,您可能会遇到以下错误。
ror:
 Problem: problem with installed package buildah-1:1.26.2-1.el9_0.x86_64
  - package buildah-1:1.26.2-1.el9_0.x86_64 requires runc >= 1.0.0-26, but none of the providers can be installed
  - package containerd.io-1.6.9-3.1.el9.x86_64 conflicts with runc provided by runc-4:1.1.3-2.el9_0.x86_64
  - package containerd.io-1.6.9-3.1.el9.x86_64 obsoletes runc provided by runc-4:1.1.3-2.el9_0.x86_64
  - cannot install the best candidate for the job
如果出现上述错误,请使用以下命令。
$ sudo dnf install docker-ce docker-ce-cli containerd.io docker-compose-plugin --allowerasing
启用并运行 Docker 守护进程。
$ sudo systemctl enable docker --now
验证它是否正在运行。
? docker.service - Docker Application Container Engine
     Loaded: loaded (/usr/lib/systemd/system/docker.service; enabled; vendor preset: disabled)
     Active: active (running) since Sat 2022-11-12 00:19:44 UTC; 6s ago
TriggeredBy: ? docker.socket
       Docs: https://docs.docker.com
   Main PID: 99263 (dockerd)
      Tasks: 8
     Memory: 28.1M
        CPU: 210ms
     CGroup: /system.slice/docker.service
             ??99263 /usr/bin/dockerd -H fd:// --containerd=/run/containerd/containerd.sock
默认情况下,Docker 需要 root 权限。如果您想避免每次运行 docker 命令时都使用 sudo,请将您的用户名添加到 docker 组。
$ sudo usermod -aG docker $(whoami)
您将需要注销服务器并以同一用户身份重新登录以启用此更改或使用以下命令。
$ su - ${USER}
确认您的用户已添加到 Docker 组。
$ groups
navjot wheel docker
第 3 步 - 创建 Docker Compose 配置
为 Jellyfin Docker 配置创建目录。
$ mkdir ~/jellyfin
切换到目录。
$ cd ~/jellyfin
创建并打开 Docker 组合文件以进行编辑。
$ nano docker-compose.yml
将以下代码粘贴到其中。
version: '3.8'
services:
  jellyfin:
    image: jellyfin/jellyfin
    container_name: jellyfin
    user: 1000:1000
    volumes:
      - ./config:/config
      - ./cache:/cache
      - ./media:/media
      - ./media2:/media2:ro
    restart: 'unless-stopped'
    ports:
      - 8096:8096
    # Optional - alternative address used for autodiscovery
    environment:
      - JELLYFIN_PublishedServerUrl=http://jellyfin.example.com
通过按 Ctrl + X 并在出现提示时输入 Y 来保存文件。
上面的 docker 文件从 Docker Hub 注册表中提取最新版本的 Jellyfin 服务器。图像的用户和组 ID 设置为 1000。您可以根据您的系统用户 ID 更改它以获得正确的权限。我们已经为缓存、配置和媒体文件安装了目录。容器重启策略设置为 unless-stopped 这意味着它将继续运行,除非手动停止。默认情况下,Jellyfin 在端口 8096 上运行,这是我们向主机公开的内容,供 Nginx 稍后使用。我们还设置了一个指定 Jellyfins 公共 URL 的环境变量。
为缓存和配置目录创建目录。然后将它们作为持久卷挂载到组合文件中。我们还在我们的文件中安装了两个媒体文件。您可以根据需要归档任意数量的媒体目录。 media2 目录以只读方式挂载。
第 4 步 - 启动 Jellyfin
使用以下命令验证 Docker 组合配置。
$ docker compose config
您将收到类似的输出以确认有效性。
name: jellyfin
services:
  jellyfin:
    container_name: jellyfin
    environment:
      JELLYFIN_PublishedServerUrl: http://jellyfin.nspeaks.xyz
    image: jellyfin/jellyfin
    network_mode: host
    restart: unless-stopped
    user: 1000:1000
    volumes:
    - type: bind
      source: /home/navjot/jellyfin/config
      target: /config
      bind:
        create_host_path: true
    - type: bind
      source: /home/navjot/jellyfin/cache
      target: /cache
      bind:
        create_host_path: true
    - type: bind
      source: /home/navjot/jellyfin/media
      target: /media
      bind:
        create_host_path: true
    - type: bind
      source: /home/navjot/jellyfin/media2
      target: /media2
      read_only: true
      bind:
        create_host_path: true
启动 Jellyfin 容器。
$ docker compose up -d
第 5 步 - 安装 Nginx
Rocky Linux 附带旧版本的 Nginx。您需要下载官方 Nginx 存储库以安装最新版本。
创建并打开 /etc/yum.repos.d/nginx.repo 文件以创建官方 Nginx 存储库。
$ sudo nano /etc/yum.repos.d/nginx.repo
将以下代码粘贴到其中。
[nginx-stable]
name=nginx stable repo
baseurl=http://nginx.org/packages/centos/$releasever/$basearch/
gpgcheck=1
enabled=1
gpgkey=https://nginx.org/keys/nginx_signing.key
module_hotfixes=true

[nginx-mainline]
name=nginx mainline repo
baseurl=http://nginx.org/packages/mainline/centos/$releasever/$basearch/
gpgcheck=1
enabled=0
gpgkey=https://nginx.org/keys/nginx_signing.key
module_hotfixes=true
通过按 Ctrl + X 并在出现提示时输入 Y 来保存文件。
安装 Nginx 服务器。
$ sudo dnf install nginx
验证安装。
$ nginx -v
nginx version: nginx/1.22.1
启用并启动 Nginx 服务器。
$ sudo systemctl enable nginx --now
检查服务器的状态。
$ sudo systemctl status nginx
? nginx.service - nginx - high performance web server
     Loaded: loaded (/usr/lib/systemd/system/nginx.service; enabled; vendor preset: disabled)
     Active: active (running) since Sun 2022-11-13 13:49:55 UTC; 1s ago
       Docs: http://nginx.org/en/docs/
    Process: 230797 ExecStart=/usr/sbin/nginx -c /etc/nginx/nginx.conf (code=exited, status=0/SUCCESS)
   Main PID: 230798 (nginx)
      Tasks: 3 (limit: 12355)
     Memory: 2.8M
        CPU: 13ms
     CGroup: /system.slice/nginx.service
             ??230798 "nginx: master process /usr/sbin/nginx -c /etc/nginx/nginx.conf"
             ??230799 "nginx: worker process"
             ??230800 "nginx: worker process"
第 6 步 - 安装 SSL
Certbot 工具使用 Lets Encrypt API 生成 SSL 证书。它需要 EPEL 存储库才能工作。
$ sudo dnf install epel-release
我们将使用 Snapd 安装 Certbot。安装快照。
$ sudo dnf install snapd
启用并启动 Snap 服务。
$ sudo systemctl enable snapd --now
安装 Snap 核心包。
$ sudo snap install core
$ sudo snap refresh core
为 Snapd 工作创建必要的链接。
$ sudo ln -s /var/lib/snapd/snap /snap
$ echo 'export PATH=$PATH:/var/lib/snapd/snap/bin' | sudo tee -a /etc/profile.d/snapd.sh
发出以下命令以安装 Certbot。
$ sudo snap install --classic certbot
通过创建指向其可执行文件的符号链接来启用 Certbot。
$ sudo ln -s /snap/bin/certbot /usr/bin/certbot
生成 SSL 证书。
$ sudo certbot certonly --nginx --agree-tos --no-eff-email --staple-ocsp --preferred-challenges http -m -d jellyfin.example.com
上面的命令会将证书下载到服务器上的 /etc/letsencrypt/live/jellyfin.example.com 目录。
生成 Diffie-Hellman 组证书。
$ sudo openssl dhparam -dsaparam -out /etc/ssl/certs/dhparam.pem 4096
要检查 SSL 续订是否正常工作,请试运行该过程。
$ sudo certbot renew --dry-run
如果您没有看到任何错误,则一切就绪。您的证书将自动更新。
第 7 步 - 配置 Nginx
打开文件 /etc/nginx/nginx.conf 进行编辑。
$ sudo nano /etc/nginx/nginx.conf
在行 include /etc/nginx/conf.d/*.conf; 之前添加以下行。
server_names_hash_bucket_size 64;
通过按 Ctrl + X 并在出现提示时输入 Y 来保存文件。
创建并打开文件 /etc/nginx/conf.d/jellyfin.conf 进行编辑。
$ sudo nano /etc/nginx/conf.d/jellyfin.conf
将以下代码粘贴到其中。
## Censor sensitive information in logs
log_format stripsecrets '$remote_addr $host - $remote_user [$time_local] '
                    '"$secretfilter" $status $body_bytes_sent '
                    '$request_length $request_time $upstream_response_time '
                    '"$http_referer" "$http_user_agent"';

map $request $secretfilter {
    ~*^(?<prefix1>.*[\?&]api_key=)([^&]*)(?<suffix1>.*)$  "${prefix1}***$suffix1";
    default                                               $request;
}

# Cache video streams
# Set in-memory cache-metadata size in keys_zone, size of video caching and how many days a cached object should persist
proxy_cache_path  /var/cache/nginx/jellyfin-videos levels=1:2 keys_zone=jellyfin-videos:100m inactive=90d max_size=35000m;
map $request_uri $h264Level { ~(h264-level=)(.+?)& $2; }
map $request_uri $h264Profile { ~(h264-profile=)(.+?)& $2; }

# Cache images
proxy_cache_path /var/cache/nginx/jellyfin levels=1:2 keys_zone=jellyfin:100m max_size=15g inactive=30d use_temp_path=off;

limit_conn_zone $binary_remote_addr zone=addr:10m;

server {
  listen 80;
  listen [::]:80;
  server_name jellyfin.example.com;
  location / { return 301 https://$host$request_uri; }
}

server {
   listen 443 ssl http2;
   listen [::]:443 ssl http2;
   server_name jellyfin.example.com;

   ## The default `client_max_body_size` is 1M, this might not be enough for some posters, etc.
   client_max_body_size 20M;

   # use a variable to store the upstream proxy
   # in this example we are using a hostname which is resolved via DNS
   # (if you aren't using DNS remove the resolver line and change the variable to point to an IP address e.g `set $jellyfin 127.0.0.1`)
   set $jellyfin jellyfin;
   resolver 127.0.0.1 valid=30;

   access_log  /var/log/nginx/jellyfin.access.log stripsecrets;
   error_log   /var/log/nginx/jellyfin.error.log;

   http2_push_preload on; # Enable HTTP/2 Server Push

   ssl_certificate /etc/letsencrypt/live/jellyfin.example.com/fullchain.pem;
   ssl_certificate_key /etc/letsencrypt/live/jellyfin.example.com/privkey.pem;
   ssl_trusted_certificate /etc/letsencrypt/live/jellyfin.example.com/chain.pem;
   ssl_session_timeout 1d;

   # Enable TLS versions (TLSv1.3 is required upcoming HTTP/3 QUIC).
   ssl_protocols TLSv1.2 TLSv1.3;

   # Enable TLSv1.3's 0-RTT. Use $ssl_early_data when reverse proxying to
   # prevent replay attacks.
   #
   # @see: https://nginx.org/en/docs/http/ngx_http_ssl_module.html#ssl_early_data
   ssl_early_data on;

   ssl_ciphers 'ECDHE-ECDSA-AES256-GCM-SHA384:ECDHE-RSA-AES256-GCM-SHA384:ECDHE-ECDSA-CHACHA20-POLY1305:ECDHE-RSA-CHACHA20-POLY1305:ECDHE-ECDSA-AES256-SHA384:ECDHE-RSA-AES256-SHA384';
   ssl_prefer_server_ciphers on;
   ssl_session_cache shared:SSL:10m;
   ssl_session_tickets off;

   keepalive_timeout    70;
   sendfile             on;
   client_max_body_size 80m;

   # OCSP Stapling ---
   # fetch OCSP records from URL in ssl_certificate and cache them
   ssl_stapling on;
   ssl_stapling_verify on;
   ssl_dhparam /etc/ssl/certs/dhparam.pem;

   # Content Security Policy
   # See: https://developer.mozilla.org/en-US/docs/Web/HTTP/CSP
   # Enforces https content and restricts JS/CSS to origin
   # External Javascript (such as cast_sender.js for Chromecast) must be whitelisted.
   # NOTE: The default CSP headers may cause issues with the webOS app
   add_header Content-Security-Policy "default-src https: data: blob: http://image.tmdb.org; style-src 'self' 'unsafe-inline'; script-src 'self' 'unsafe-inline' https://www.gstatic.com/cv/js/sender/v1/cast_sender.js https://www.gstatic.com/eureka/clank/95/cast_sender.js https://www.gstatic.com/eureka/clank/96/cast_sender.js https://www.gstatic.com/eureka/clank/97/cast_sender.js https://www.youtube.com blob:; worker-src 'self' blob:; connect-src 'self'; object-src 'none'; frame-ancestors 'self'";

   # Security / XSS Mitigation Headers
   # NOTE: X-Frame-Options may cause issues with the webOS app
   add_header X-Frame-Options "SAMEORIGIN";
   add_header X-XSS-Protection "1; mode=block";
   add_header X-Content-Type-Options "nosniff";
   add_header X-Early-Data $tls1_3_early_data;

   location = / {
       return 302 http://$host/web/;
       return 302 https://$host/web/;
   }

   location / {
       # Proxy main Jellyfin traffic
       proxy_pass http://$jellyfin:8096;
       proxy_set_header Host $host;
       proxy_set_header X-Real-IP $remote_addr;
       proxy_set_header X-Forwarded-For $proxy_add_x_forwarded_for;
       proxy_set_header X-Forwarded-Proto $scheme;
       proxy_set_header X-Forwarded-Protocol $scheme;
       proxy_set_header X-Forwarded-Host $http_host;
       proxy_buffering off;
  }

  # location block for /web - This is purely for aesthetics so /web/#!/ works instead of having to go to /web/index.html/#!/
   location = /web/ {
       # Proxy main Jellyfin traffic
       proxy_pass http://$jellyfin:8096/web/index.html;
       proxy_set_header Host $host;
       proxy_set_header X-Real-IP $remote_addr;
       proxy_set_header X-Forwarded-For $proxy_add_x_forwarded_for;
       proxy_set_header X-Forwarded-Proto $scheme;
       proxy_set_header X-Forwarded-Protocol $scheme;
       proxy_set_header X-Forwarded-Host $http_host;
   }

   location /socket {
       # Proxy Jellyfin Websockets traffic
       proxy_pass http://$jellyfin:8096;
       proxy_http_version 1.1;
       proxy_set_header Upgrade $http_upgrade;
       proxy_set_header Connection "upgrade";
       proxy_set_header Host $host;
       proxy_set_header X-Real-IP $remote_addr;
       proxy_set_header X-Forwarded-For $proxy_add_x_forwarded_for;
       proxy_set_header X-Forwarded-Proto $scheme;
       proxy_set_header X-Forwarded-Protocol $scheme;
       proxy_set_header X-Forwarded-Host $http_host;
   }

   # Cache video streams
   location ~* ^/Videos/(.*)/(?!live)
   {
       # Set size of a slice (this amount will be always requested from the backend by nginx)
       # Higher value means more latency, lower more overhead
       # This size is independent of the size clients/browsers can request
       slice 2m;

       proxy_cache jellyfin-videos;
       proxy_cache_valid 200 206 301 302 30d;
       proxy_ignore_headers Expires Cache-Control Set-Cookie X-Accel-Expires;
       proxy_cache_use_stale error timeout invalid_header updating http_500 http_502 http_503 http_504;
       proxy_connect_timeout 15s;
       proxy_http_version 1.1;
       proxy_set_header Connection "";
       # Transmit slice range to the backend
       proxy_set_header Range $slice_range;

       # This saves bandwidth between the proxy and jellyfin, as a file is only downloaded one time instead of multiple times when multiple clients want to at the same time
       # The first client will trigger the download, the other clients will have to wait until the slice is cached
       # Esp. practical during SyncPlay
       proxy_cache_lock on;
       proxy_cache_lock_age 60s;

       proxy_pass http://$jellyfin:8096;
       proxy_cache_key "jellyvideo$uri?MediaSourceId=$arg_MediaSourceId&VideoCodec=$arg_VideoCodec&AudioCodec=$arg_AudioCodec&AudioStreamIndex=$arg_AudioStreamIndex&VideoBitrate=$arg_VideoBitrate&AudioBitrate=$arg_AudioBitrate&SubtitleMethod=$arg_SubtitleMethod&TranscodingMaxAudioChannels=$arg_TranscodingMaxAudioChannels&RequireAvc=$arg_RequireAvc&SegmentContainer=$arg_SegmentContainer&MinSegments=$arg_MinSegments&BreakOnNonKeyFrames=$arg_BreakOnNonKeyFrames&h264-profile=$h264Profile&h264-level=$h264Level&slicerange=$slice_range";

       # add_header X-Cache-Status $upstream_cache_status; # This is only for debugging cache
   }

   # Cache images
   location ~ /Items/(.*)/Images {
       proxy_pass http://127.0.0.1:8096;
       proxy_set_header Host $host;
       proxy_set_header X-Real-IP $remote_addr;
       proxy_set_header X-Forwarded-For $proxy_add_x_forwarded_for;
       proxy_set_header X-Forwarded-Proto $scheme;
       proxy_set_header X-Forwarded-Protocol $scheme;
       proxy_set_header X-Forwarded-Host $http_host;

       proxy_cache jellyfin;
       proxy_cache_revalidate on;
       proxy_cache_lock on;
       # add_header X-Cache-Status $upstream_cache_status; # This is only to check if cache is working
   }

   # Downloads limit (inside server block)
   location ~ /Items/(.*)/Download$ {
       proxy_pass http://127.0.0.1:8096;
       proxy_set_header Host $host;
       proxy_set_header X-Real-IP $remote_addr;
       proxy_set_header X-Forwarded-For $proxy_add_x_forwarded_for;
       proxy_set_header X-Forwarded-Proto $scheme;
       proxy_set_header X-Forwarded-Protocol $scheme;
       proxy_set_header X-Forwarded-Host $http_host;

       limit_rate 1700k; # Speed limit (here is on kb/s)
       limit_conn addr 3; # Number of simultaneous downloads per IP
       limit_conn_status 460; # Custom error handling
       # proxy_buffering on; # Be sure buffering is on (it is by default on nginx), otherwise limits won't work
   }

}

# This block is useful for debugging TLS v1.3. Please feel free to remove this
# and use the `$ssl_early_data` variable exposed by NGINX directly should you
# wish to do so.
map $ssl_early_data $tls1_3_early_data {
  "~." $ssl_early_data;
  default "";
}
完成后,按 Ctrl + X 并在出现提示时输入 Y 来保存文件。
验证 Nginx 配置文件语法。
$ sudo nginx -t
nginx: the configuration file /etc/nginx/nginx.conf syntax is ok
nginx: configuration file /etc/nginx/nginx.conf test is successful
配置 SELinux 以允许网络连接。
$ sudo setsebool -P httpd_can_network_connect 1
重新启动 Nginx 服务器。
$ sudo systemctl restart nginx
如果您收到以下错误,则很可能是由于 SELinux 限制。
nginx: [emerg] open() "/var/run/nginx.pid" failed (13: Permission denied)
要修复错误,请运行以下命令。
$ sudo ausearch -c 'nginx' --raw | audit2allow -M my-nginx
$ sudo semodule -X 300 -i my-nginx.pp
再次启动 Nginx 服务。
$ sudo systemctl start nginx
第 8 步 - 访问和配置 Jellyfin
访问 URL https://jellyfin.example.com,您将看到以下屏幕。
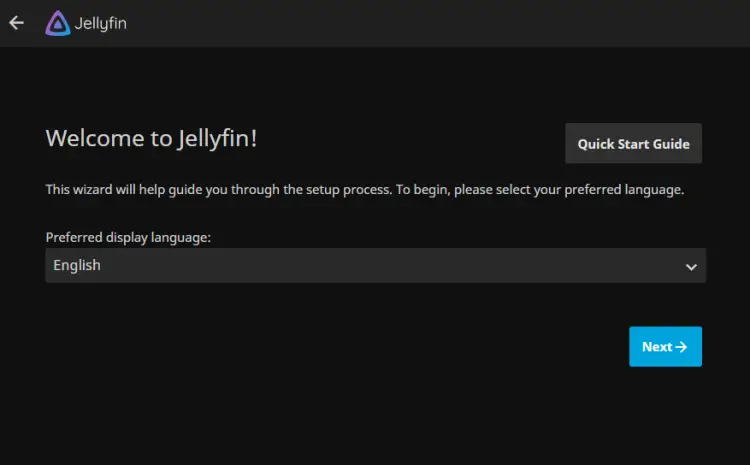
选择显示语言并单击下一步按钮继续。
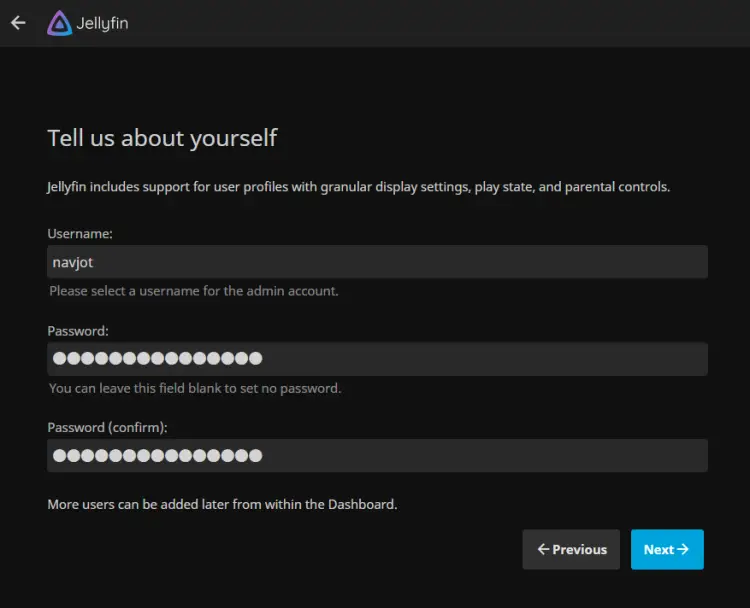
输入您的用户详细信息,然后单击“下一步”按钮继续。单击添加媒体库以添加媒体库。我们正在为电影添加一个。

填写所有选项,然后单击“文件夹”选项旁边的加号,为您的库选择文件夹。向下滚动并填写所需的选项。单击确定按钮完成添加库。您将返回到库设置页面。

单击下一步按钮继续。
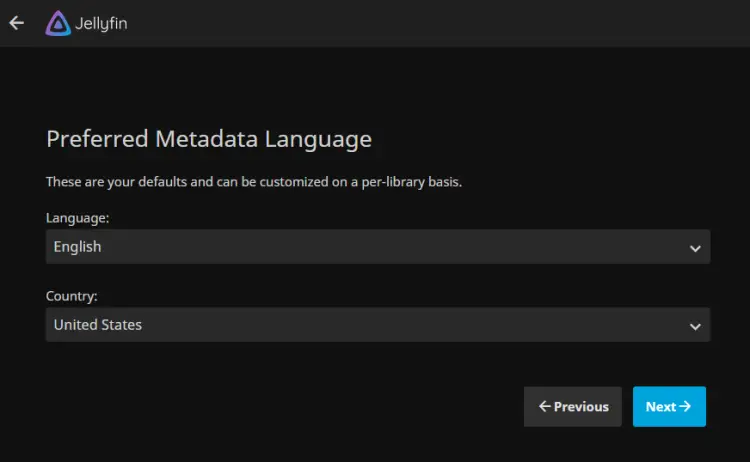
选择媒体元数据的语言和国家/地区,然后单击下一步按钮继续。

确保选中允许远程连接选项。如果要使用端口映射,也请启用它。完成后单击下一步按钮。
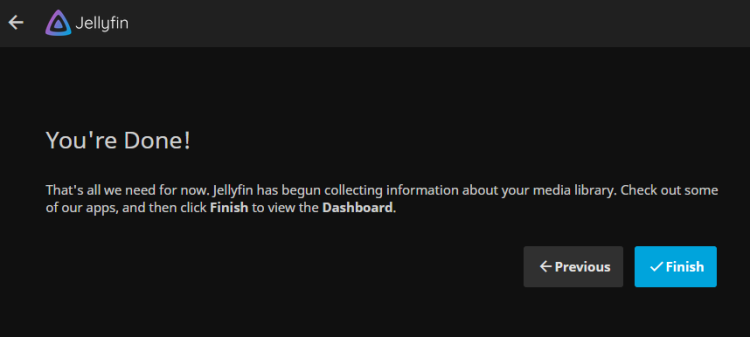
设置完成。单击完成按钮进入 Jellyfin 登录页面。

输入您之前创建的用户详细信息,然后单击“登录”按钮进入仪表板。
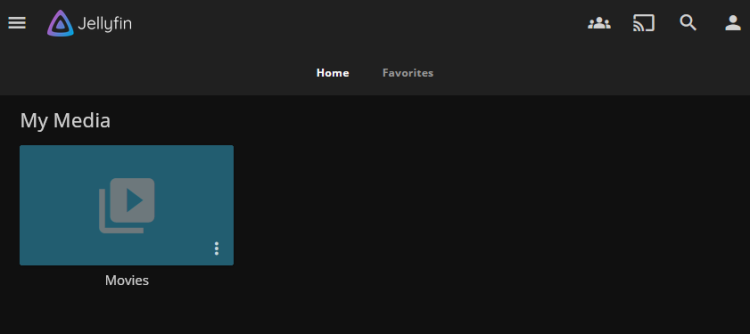
您可以开始使用 Jellyfin 来播放您的内容。
第 9 步 - 升级 Jellyfin
升级 Jellyfin 很简单,只需几个步骤。首先,切换到目录。
$ cd ~/jellyfin
停止 Jellyfin 容器。
$ docker compose down --remove-orphans
为 Jellyfin 拉取最新的容器镜像。
$ docker compose pull
如果需要,可以在 docker-compose.yml 中进行任何更改。
启动 Jellyfin 容器。
$ docker compose up -d
结论
我们关于在 Rocky Linux 9 服务器上使用 Docker 安装 Jellyfin Media Server 的教程到此结束。如果您有任何问题,请在下面的评论中发表。