如何在 Ubuntu 22.04 上安装 Jupyter Notebook
在此页
- 先决条件
- 开始
- 安装Python
- 安装 Jupyter Notebook
- 生成 Jupyter Notebook 密码
- 为 Jupyter Notebook 创建一个 Systemd 服务文件
- 将 Nginx 配置为 Jupyter Notebook 的反向代理
- 访问 Jupyter Notebook
- 结论
Jupyter Notebook 是一个免费的、开源的、基于网络的交互式计算平台,允许用户通过网络浏览器编辑和运行文档。它基于 Python,允许您在 Web 上创建和共享包含实时代码、方程式和可视化效果的文档。其目标是为跨多种编程语言的交互式计算开发开源软件、开放标准和服务。
在本教程中,我将向您展示如何在 Ubuntu 22.04 上安装 Jupyter Notebook 软件。
先决条件
- 一台运行 Ubuntu 22.04 的服务器。
- 使用您的服务器 IP 指向一个有效的域名。
- 在服务器上配置了根密码。
入门
首先,建议将所有软件包更新和升级到最新版本。您可以通过运行以下命令来更新所有这些:
apt update -y
apt upgrade -y
更新所有包后,您可以继续下一步:
安装 Python
首先,您需要在服务器上安装 Python 和其他依赖项。您可以通过运行以下命令来安装所有这些:
apt-get install python3 python3-pip -y安装所有包后,您可以使用以下命令验证 Python 版本:
python3 --version您应该看到以下输出:
Python 3.10.6
接下来,使用以下命令将 PIP 更新到最新版本:
pip3 install --upgrade pip接下来,使用以下命令验证 PIP 版本:
pip3 --version您应该看到以下输出:
pip 22.2.2 from /usr/local/lib/python3.10/dist-packages/pip (python 3.10)
接下来,使用以下命令安装 Python 虚拟环境包:
pip3 install virtualenv完成后,您可以继续下一步。
安装 Jupyter 笔记本
首先,使用以下命令创建一个目录来存储您的笔记本:
mkdir ~/project接下来,导航到项目目录并使用以下命令创建 Python 虚拟环境:
cd ~/project
virtualenv notebookenv
接下来,使用以下命令激活虚拟环境:
source notebookenv/bin/activate接下来,使用以下命令安装 Jupyter Notebook:
pip install jupyter安装 Jupyter Notebook 后,使用以下命令运行 Jupyter Notebook:
jupyter notebook --allow-root如果一切正常,您将获得以下输出:
[I 14:23:26.729 NotebookApp] Serving notebooks from local directory: /root/project
[I 14:23:26.729 NotebookApp] Jupyter Notebook 6.4.12 is running at:
[I 14:23:26.729 NotebookApp] http://localhost:8888/?token=5dbdfdbf2e2dc72ccdaaa7361db8c55877ecfbc45676e625
[I 14:23:26.729 NotebookApp]  or http://127.0.0.1:8888/?token=5dbdfdbf2e2dc72ccdaaa7361db8c55877ecfbc45676e625
[I 14:23:26.730 NotebookApp] Use Control-C to stop this server and shut down all kernels (twice to skip confirmation).
[W 14:23:26.734 NotebookApp] No web browser found: could not locate runnable browser.
[C 14:23:26.734 NotebookApp]

    To access the notebook, open this file in a browser:
        file:///root/.local/share/jupyter/runtime/nbserver-3214-open.html
    Or copy and paste one of these URLs:
        http://localhost:8888/?token=5dbdfdbf2e2dc72ccdaaa7361db8c55877ecfbc45676e625
     or http://127.0.0.1:8888/?token=5dbdfdbf2e2dc72ccdaaa7361db8c55877ecfbc45676e625
按 CTRL+C 停止 Jupyter Notebook。
完成后,您可以继续下一步。
生成 Jupyter Notebook 密码
建议使用密码保护 Jupyter Notebook。首先,使用以下命令生成 Jupyter Notebook 配置文件:
jupyter notebook --generate-config您应该看到以下输出:
Writing default config to: /root/.jupyter/jupyter_notebook_config.py
接下来,使用以下命令设置 Jupyter Notebook 密码:
jupyter notebook password设置密码如下图:
Enter password:
Verify password:
[NotebookPasswordApp] Wrote hashed password to /root/.jupyter/jupyter_notebook_config.json
接下来,使用以下命令从 Python 虚拟环境中停用:
deactivate完成后,您可以继续下一步。
为 Jupyter Notebook 创建系统服务文件
接下来,您需要创建一个 systemd 服务文件来管理 Jupyter Notebook。您可以使用以下命令创建它:
nano /etc/systemd/system/jupyter.service添加以下代码:
[Unit]
Description=Jupyter Notebook

[Service]
Type=simple
PIDFile=/run/jupyter.pid
ExecStart=/root/project/notebookenv/bin/jupyter-notebook --config=/root/.jupyter/jupyter_notebook_config.py --allow-root
User=root
Group=root
WorkingDirectory=/root/project/notebookenv
Restart=always
RestartSec=10

[Install]
WantedBy=multi-user.target
保存并关闭文件,然后使用以下命令重新加载 systemd 守护进程:
systemctl daemon-reload接下来,启动 Jupyter Notebook 并使用以下命令使其在系统重启时启动:
systemctl start jupyter
systemctl enable jupyter
要验证 Jupyter Notebook 的状态,请运行以下命令:
systemctl status jupyter您应该看到以下输出:
? jupyter.service - Jupyter Notebook
     Loaded: loaded (/etc/systemd/system/jupyter.service; disabled; vendor preset: enabled)
     Active: active (running) since Tue 2022-10-11 14:27:01 UTC; 4s ago
   Main PID: 3649 (jupyter-noteboo)
      Tasks: 1 (limit: 2242)
     Memory: 53.4M
        CPU: 980ms
     CGroup: /system.slice/jupyter.service
             ??3649 /root/project/notebookenv/bin/python /root/project/notebookenv/bin/jupyter-notebook --config=/root/.jupyter/jupyter_noteb>

Oct 11 14:27:01 ubuntu2204 systemd[1]: Started Jupyter Notebook.
Oct 11 14:27:02 ubuntu2204 jupyter-notebook[3649]: [I 14:27:02.288 NotebookApp] Serving notebooks from local directory: /root/project/noteboo>
Oct 11 14:27:02 ubuntu2204 jupyter-notebook[3649]: [I 14:27:02.289 NotebookApp] Jupyter Notebook 6.4.12 is running at:
Oct 11 14:27:02 ubuntu2204 jupyter-notebook[3649]: [I 14:27:02.289 NotebookApp] http://localhost:8888/
Oct 11 14:27:02 ubuntu2204 jupyter-notebook[3649]: [I 14:27:02.290 NotebookApp] Use Control-C to stop this server and shut down all kernels (>
Oct 11 14:27:02 ubuntu2204 jupyter-notebook[3649]: [W 14:27:02.293 NotebookApp] No web browser found: could not locate runnable browser.
完成后,您可以继续下一步。
将 Nginx 配置为 Jupyter Notebook 的反向代理
至此,Jupyter Notebook 已经启动并运行在8888 端口上。现在,您需要将Nginx 配置为反向代理,以便通过80 端口访问Jupyter Notebook。
首先,使用以下命令安装 Nginx Web 服务器包:
apt-get install nginx -y安装 Nginx 后,使用以下命令创建 Nginx 虚拟主机配置文件:
nano /etc/nginx/conf.d/jupyter.conf添加以下配置:
upstream notebook {
server 127.0.0.1:8888;
}

server {
listen 80;
server_name jupyter.example.com;

access_log /var/log/nginx/example.com.access.log;
error_log /var/log/nginx/example.com.error.log;

location / {
     proxy_pass http://localhost:8888;
     proxy_set_header X-Forwarded-For $proxy_add_x_forwarded_for;
     proxy_set_header X-Real-IP $remote_addr;
     proxy_set_header Host $http_host;
     proxy_http_version 1.1;
     proxy_redirect off;
     proxy_buffering off;
     proxy_set_header Upgrade $http_upgrade;
     proxy_set_header Connection "upgrade";
     proxy_read_timeout 86400;
     }
}
保存并关闭文件,然后使用以下命令验证 Nginx 是否存在任何语法错误:
nginx -t您应该看到以下输出:
nginx: the configuration file /etc/nginx/nginx.conf syntax is ok
nginx: configuration file /etc/nginx/nginx.conf test is successful
接下来,重新启动 Nginx 服务以应用更改:
systemctl restart nginx您还可以使用以下命令检查 Nginx 状态:
systemctl status nginx您将获得以下输出:
? nginx.service - A high performance web server and a reverse proxy server
     Loaded: loaded (/lib/systemd/system/nginx.service; enabled; vendor preset: enabled)
     Active: active (running) since Tue 2022-10-11 14:28:53 UTC; 54s ago
       Docs: man:nginx(8)
    Process: 4193 ExecStartPre=/usr/sbin/nginx -t -q -g daemon on; master_process on; (code=exited, status=0/SUCCESS)
    Process: 4194 ExecStart=/usr/sbin/nginx -g daemon on; master_process on; (code=exited, status=0/SUCCESS)
   Main PID: 4195 (nginx)
      Tasks: 2 (limit: 2242)
     Memory: 2.6M
        CPU: 40ms
     CGroup: /system.slice/nginx.service
             ??4195 "nginx: master process /usr/sbin/nginx -g daemon on; master_process on;"
             ??4196 "nginx: worker process" "" "" "" "" "" "" "" "" "" "" "" "" "" "" "" "" "" "" "" "" "" "" "" "" "" "" ""

Oct 11 14:28:53 ubuntu2204 systemd[1]: Starting A high performance web server and a reverse proxy server...
Oct 11 14:28:53 ubuntu2204 systemd[1]: Started A high performance web server and a reverse proxy server.
接下来,使用以下命令将 root 用户添加到 www-data 组:
usermod -g www-data root接下来,编辑 Jupyter Notebook 配置文件并启用远程访问:
nano /root/.jupyter/jupyter_notebook_config.py更改以下行:
c.NotebookApp.allow_remote_access = True
保存并关闭文件,然后重新启动 Jupyter Notebook 服务以应用更改:
systemctl restart jupyter完成后,您可以继续下一步。
访问 Jupyter 笔记本
现在,打开 Web 浏览器并使用 URL http://jupyter.example.com 访问 Jupyter Notebook。您将被要求在以下屏幕上提供您的 Jupyter Notebook 密码:

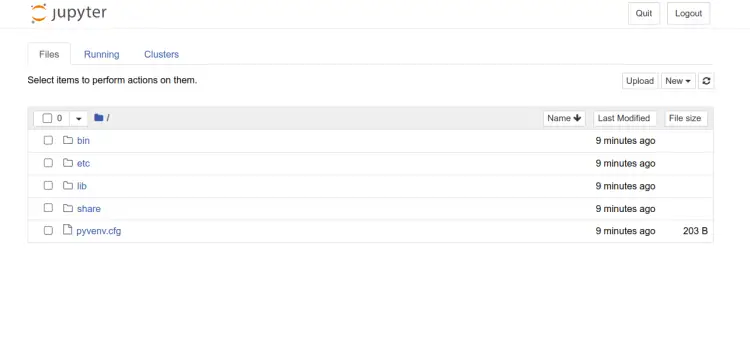
提供您的密码并单击“登录”按钮。您应该会在以下屏幕上看到 Jupyter Notebook 仪表板:
结论
恭喜!您已经在 Ubuntu 22.04 上成功安装了带有 Nginx 作为反向代理的 Jupyter Notebook。您现在可以通过互联网创建、共享和运行您的笔记本。如果您有任何问题,请随时问我。