如何在 Ubuntu 22.04 上使用 Apache 和 mod_wsgi 运行 Python 脚本
本教程适用于这些操作系统版本
- Ubuntu 22.04(Jammy Jellyfish)
- Ubuntu 20.04(Focal Fossa)
在此页
- 先决条件
- 开始
- 安装 Python 编程语言
- 安装 Apache 网络服务器和 mod_wsgi 模块
- Apache 中的 WSGI 模块配置
- 测试 Python 3 WSGI 脚本
- 下载为虚拟机
- 登录 VM 的详细信息
Apache 模块 mod_wsgi 提供了一个用于托管基于 Python 的 Web 应用程序的接口。它是专业托管系统的不错选择,因为它提供了高性能解决方案,但同样适用于小型站点。使用 mod_wsgi 可以轻松部署使用 Django、Web.py、Werkzug、Chery.py、TurboGears 和 Flask 等 Python 框架编写的应用程序。
在本教程中,我将向您展示如何在 Ubuntu 22.04 LTS 上使用 Apache Web 服务器安装和配置 mod_wsgi。本指南是来自 Hitesh Jethva 的适用于 Ubuntu 20.04 的 Apache WSGI 指南的更新版本。
先决条件
- Ubuntu 22.04 服务器或桌面
- 您必须是系统管理员并且拥有 root 或 sudo 权限才能安装和配置此软件。
入门
在开始之前,最好使用最新版本更新您的系统。您可以使用以下命令更新您的系统:
sudo apt update -y
sudo apt upgrade -y
更新系统后,重新启动它以实施更改。
安装 Python 编程语言
默认情况下,Python 预装在 Ubuntu 22.04 上。如果尚未安装 Python,则可以使用以下命令安装它:
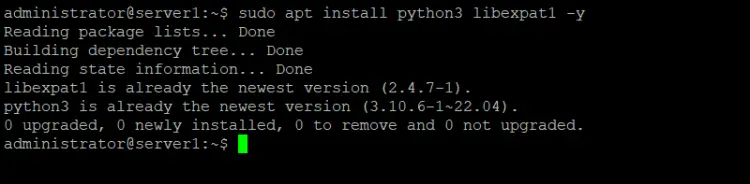
sudo apt install python3 libexpat1 -y下面的屏幕截图显示了已安装 python 时命令的输出。
现在继续下一步。
安装 Apache Web 服务器和 mod_wsgi 模块
在此步骤中,我们将安装 Apache Web 服务器和 mod_wsgi Python 模块。执行以下命令来安装这两个应用程序。依赖的软件包将自动安装。
sudo apt install apache2 apache2-utils ssl-cert libapache2-mod-wsgi-py3 -y
安装所有软件包后,您可以继续下一步。
Apache 中的 WSGI 模块配置
接下来,您需要在 Apache 默认 Web 根目录中创建一个新的 Python 脚本,以通过 WSGI Apache 模块为其提供服务。我们将在这里使用一个小的 Hello World 脚本来进行演示。
您可以使用以下命令创建 python 脚本:
sudo nano /var/www/html/wsgitest.py添加以下行:
def application(environ, start_response):
    status = '200 OK'
    output = b'Hello Howtoforge!\n'
    response_headers = [('Content-type', 'text/plain'),
                        ('Content-Length', str(len(output)))]
    start_response(status, response_headers)
    return [output]
保存并关闭文件。然后,使用以下命令将文件的所有权更改为 www-data:
sudo chown www-data:www-data /var/www/html/wsgitest.py
sudo chmod 775 /var/www/html/wsgitest.py
接下来,编辑 Apache 虚拟主机配置文件以通过 HTTP 协议提供此文件。
sudo nano /etc/apache2/sites-enabled/000-default.conf添加以下行:
WSGIScriptAlias /wsgi /var/www/html/wsgitest.py就在这条线之前
</VirtualHost>完整的虚拟主机文件如下所示:
        # The ServerName directive sets the request scheme, hostname and port that
        # the server uses to identify itself. This is used when creating
        # redirection URLs. In the context of virtual hosts, the ServerName
        # specifies what hostname must appear in the request's Host: header to
        # match this virtual host. For the default virtual host (this file) this
        # value is not decisive as it is used as a last resort host regardless.
        # However, you must set it for any further virtual host explicitly.
        #ServerName www.example.com

        ServerAdmin
        DocumentRoot /var/www/html

        # Available loglevels: trace8, ..., trace1, debug, info, notice, warn,
        # error, crit, alert, emerg.
        # It is also possible to configure the loglevel for particular
        # modules, e.g.
        #LogLevel info ssl:warn

        ErrorLog ${APACHE_LOG_DIR}/error.log
        CustomLog ${APACHE_LOG_DIR}/access.log combined

        # For most configuration files from conf-available/, which are
        # enabled or disabled at a global level, it is possible to
        # include a line for only one particular virtual host. For example the
        # following line enables the CGI configuration for this host only
        # after it has been globally disabled with "a2disconf".
        #Include conf-available/serve-cgi-bin.conf

        WSGIScriptAlias /wsgi /var/www/html/wsgitest.py


# vim: syntax=apache ts=4 sw=4 sts=4 sr noet
在文本编辑器中保存更改并关闭编辑器。下一步是重新启动 apache 网络服务器以应用更改。
systemctl restart apache2测试 Python 3 WSGI 脚本
现在 Apache HTTP 服务器配置为通过 HTTP 协议为我们的 Python 文件提供服务。
打开 Web 浏览器并输入 URL http://your-server-ip/wsgi。将 your-server-ip 替换为服务器的 IP 地址。您将获得一个白页,上面写着“Hello Howtoforge!”。
就是这样,您现在拥有一个正确配置的 Apache Web 服务器,可以使用 mod_wsgi 运行 Python 应用程序。下一步是将 Python Web 应用程序部署到目录 /var/www/html/ 并更改 /etc/apache2/sites-enabled/000-default.conf 文件中的 WSGIScriptAlias 行以匹配应用程序的启动脚本.然后再次重新启动 Apache 以应用配置更改。
下载为虚拟机
此设置可作为 ova/ovf 格式的虚拟机下载(与 VMWare 和 Virtualbox 兼容)供 howtoforge 订阅者使用。
VM 的登录详细信息
- 用户管理员的密码是:howtoforge。管理员用户具有 sudo 权限。
请在首次登录时更改所有密码。
- VM 的 IP 地址是 192.168.0.100