如何在 Ubuntu 22.04 上安装 Graylog 4
本教程适用于这些操作系统版本
- Ubuntu 22.04(Jammy Jellyfish)
- Ubuntu 20.04(Focal Fossa)
在此页
- 先决条件
- 开始
- 安装Java JDK
- 安装和配置 Elasticsearch
- 安装 MongoDB 服务器
- 安装和配置 Graylog
- 将 Nginx 配置为 Graylog 的反向代理
- 访问 Graylog 网络界面
- 结论
Graylog 是一种免费的开源日志监控工具,用于捕获、存储和实时分析数 TB 的机器数据。它专为现代日志分析而设计,使用户能够快速轻松地找到数据中的意义并更快地采取行动。它还提供警报和日志历史搜索系统,使用 ElasticSearch 作为主要索引数据库,使用 MongoDB 存储元信息。它可以帮助您以简单易读的格式监控、搜索和分析大量数据。
在本教程中,我们将向您展示如何在 Ubuntu 22.04 服务器上安装 Graylog。
先决条件
- 一台运行 Ubuntu 22.04 且内存至少为 4GB 的服务器
- 在服务器上配置了根密码。
入门
首先,您需要将系统包更新到最新版本。您可以使用以下命令更新它们:
apt update -y
apt upgrade
更新所有包后,您还需要在服务器上安装一些依赖项。您可以使用以下命令安装所有这些:
apt install apt-transport-https gnupg2 uuid-runtime pwgen curl dirmngr -y安装所有必需的依赖项后,您可以继续下一步。
安装 Java JDK
Graylog 需要在您的服务器上安装 Java。如果没有安装,可以使用以下命令安装:
apt install openjdk-11-jre-headless -y安装 Java 后,您可以通过运行以下命令来验证已安装的 Java 版本:
java -version您应该得到以下输出:
openjdk version "11.0.16" 2022-07-19
OpenJDK Runtime Environment (build 11.0.16+8-post-Ubuntu-0ubuntu122.04)
OpenJDK 64-Bit Server VM (build 11.0.16+8-post-Ubuntu-0ubuntu122.04, mixed mode, sharing)
完成后,您可以继续下一步。
安装和配置 Elasticsearch
Graylog 使用 Elasticsearch 来存储来自外部资源的日志。所以你需要在你的系统中安装 Elasticsearch。
默认情况下,Elasticsearch 包在 Ubuntu 默认存储库中不可用。因此,您需要将 Elasticsearch 存储库添加到您的系统中。
首先,使用以下命令下载并添加 Elasticsearch GPG 密钥:
wget -qO - https://artifacts.elastic.co/GPG-KEY-elasticsearch | apt-key add -接下来,使用以下命令添加 Elasticsearch 存储库:
echo "deb https://artifacts.elastic.co/packages/oss-7.x/apt stable main" | sudo tee -a /etc/apt/sources.list.d/elastic-7.x.list接下来,更新存储库并使用以下命令安装 Elasticsearch:
apt update -y
apt install elasticsearch-oss -y
安装 Elasticsearch 后,您需要编辑 Elasticsearch 配置文件并定义集群名称。您可以使用以下命令执行此操作:
nano /etc/elasticsearch/elasticsearch.yml将集群名称定义为 Graylog 并添加另一行,如下所示:
cluster.name: graylog
action.auto_create_index: false
完成后保存并关闭文件。然后,启动 Elasticsearch 服务并使用以下命令使其在开机时启动:
systemctl daemon-reload
systemctl start elasticsearch
systemctl enable elasticsearch
您还可以使用以下命令验证 Elasticsearch 服务的状态:
systemctl status elasticsearch您应该得到以下输出:
? elasticsearch.service - Elasticsearch
     Loaded: loaded (/lib/systemd/system/elasticsearch.service; disabled; vendor preset: enabled)
     Active: active (running) since Sun 2022-09-25 07:05:27 UTC; 21s ago
       Docs: https://www.elastic.co
   Main PID: 74226 (java)
      Tasks: 48 (limit: 4579)
     Memory: 1.2G
        CPU: 22.739s
     CGroup: /system.slice/elasticsearch.service
             ??74226 /usr/share/elasticsearch/jdk/bin/java -Xshare:auto -Des.networkaddress.cache.ttl=60 -Des.networkaddress.cache.negative.t>

Sep 25 07:05:11 ubuntu2204 systemd[1]: Starting Elasticsearch...
Sep 25 07:05:27 ubuntu2204 systemd[1]: Started Elasticsearch.
现在,使用以下命令验证 Elasticcsearch 响应:
curl -X GET http://localhost:9200您应该得到以下输出:
{
  "name" : "ubuntu2204",
  "cluster_name" : "graylog",
  "cluster_uuid" : "6IWBEBx_THa2Gzqb7a1LTQ",
  "version" : {
    "number" : "7.10.2",
    "build_flavor" : "oss",
    "build_type" : "deb",
    "build_hash" : "747e1cc71def077253878a59143c1f785afa92b9",
    "build_date" : "2021-01-13T00:42:12.435326Z",
    "build_snapshot" : false,
    "lucene_version" : "8.7.0",
    "minimum_wire_compatibility_version" : "6.8.0",
    "minimum_index_compatibility_version" : "6.0.0-beta1"
  },
  "tagline" : "You Know, for Search"
}
安装 MongoDB 服务器
Graylog 使用 MongoDB 作为数据库。所以你需要在你的服务器上安装 MongoDB 数据库。默认情况下,MongoDB 包不包含在 Ubuntu 默认存储库中。所以你需要将 MongoDB 官方仓库添加到你的系统中:
您可以使用以下命令添加它:
wget -qO - https://www.mongodb.org/static/pgp/server-4.4.asc | apt-key add -
echo "deb [ arch=amd64,arm64 ] https://repo.mongodb.org/apt/ubuntu focal/mongodb-org/4.4 multiverse" | tee /etc/apt/sources.list.d/mongodb-org-4.4.list
添加存储库后,更新存储库缓存并使用以下命令安装 Graylog:
apt update -y
apt install -y mongodb-org
安装 MongoDB 后,启动 MongoDB 服务并使用以下命令使其在系统重启时启动:
systemctl enable --now mongod您还可以使用以下命令检查 MongoDB 状态:
systemctl status mongod您应该在以下输出中看到 MongoDB 状态:
? mongod.service - MongoDB Database Server
     Loaded: loaded (/lib/systemd/system/mongod.service; enabled; vendor preset: enabled)
     Active: active (running) since Sun 2022-09-25 07:20:35 UTC; 8s ago
       Docs: https://docs.mongodb.org/manual
   Main PID: 77018 (mongod)
     Memory: 60.0M
        CPU: 936ms
     CGroup: /system.slice/mongod.service
             ??77018 /usr/bin/mongod --config /etc/mongod.conf

Sep 25 07:20:35 ubuntu2204 systemd[1]: Started MongoDB Database Server.
完成后,您可以继续下一步。
安装和配置 Graylog
默认情况下,Graylog 包在 Ubuntu 默认存储库中不可用。因此,您需要将 Graylog 存储库安装到您的服务器。
您可以使用以下命令下载 Graylog 存储库包:
wget https://packages.graylog2.org/repo/packages/graylog-4.3-repository_latest.deb下载完成后,使用以下命令安装下载的包:
dpkg -i graylog-4.3-repository_latest.deb接下来,更新存储库并使用以下命令安装 Graylog 服务器:
apt update -y
apt install graylog-server -y
安装 Graylog 服务器后,您需要生成一个密码来保护用户密码。您可以使用以下命令生成它:
pwgen -N 1 -s 96您应该看到以下输出:
d1fDH1NEOMgb3nxbFYY3eVpqzjOprwgPgFuGh2F0flDdZglJP2CxENV4WEeW8iqZXsjDEZgMob3oBvQYm62RXxoc33hKTPJa
接下来,您还需要为 Graylog 管理员用户生成一个安全密码。您将需要此密码才能登录 Graylog Web 界面。您可以使用以下命令生成它:
echo -n "Enter Password: " && head -1您应该看到以下输出:
Enter Password: yourpassword
e472e1436cbe87774c1bc75d0a646d67e506bea1dff8701fd41f34bca33e1419
现在,编辑 Graylog 主配置文件并定义两个密码:
nano /etc/graylog/server/server.conf粘贴上面生成的两个密码,如下所示:
password_secret = Wv4VQWCAA9sRbL7pxPeY7tb9lSo50esEWgNXxXHypx0Og3CezMmQLdF2QzQdRSIXmNXKINjRvZpPTrvZv4k4NlJrFYTfOc3c
root_password_sha2 = e472e1436cbe87774c1bc75d0a646d67e506bea1dff8701fd41f34bca33e1419
接下来,您还需要为您的服务器定义一个绑定地址,如下所示:
http_bind_address = 127.0.0.1:9000
完成后保存并关闭文件,然后启动 Graylog 服务并使用以下命令使其在系统重启时启动:
systemctl daemon-reload
systemctl start graylog-server
systemctl enable graylog-server
接下来,您可以使用以下命令验证 Graylog 服务器的状态:
systemctl status graylog-server您应该看到以下输出:
? graylog-server.service - Graylog server
     Loaded: loaded (/lib/systemd/system/graylog-server.service; disabled; vendor preset: enabled)
     Active: active (running) since Sun 2022-09-25 07:25:13 UTC; 10s ago
       Docs: http://docs.graylog.org/
   Main PID: 78082 (graylog-server)
      Tasks: 44 (limit: 4579)
     Memory: 539.4M
        CPU: 18.488s
     CGroup: /system.slice/graylog-server.service
             ??78082 /bin/sh /usr/share/graylog-server/bin/graylog-server
             ??78119 /usr/bin/java -Xms1g -Xmx1g -XX:NewRatio=1 -server -XX:+ResizeTLAB -XX:-OmitStackTraceInFastThrow -Djdk.tls.acknowledgeC>

Sep 25 07:25:13 ubuntu2204 systemd[1]: Started Graylog server.
Sep 25 07:25:13 ubuntu2204 graylog-server[78119]: OpenJDK 64-Bit Server VM warning: Option UseConcMarkSweepGC was deprecated in version 9.0 a>
Sep 25 07:25:14 ubuntu2204 graylog-server[78119]: WARNING: sun.reflect.Reflection.getCallerClass is not supported. This will impact performan>
Sep 25 07:25:17 ubuntu2204 graylog-server[78119]: WARNING: An illegal reflective access operation has occurred
Sep 25 07:25:17 ubuntu2204 graylog-server[78119]: WARNING: Illegal reflective access by retrofit2.Platform (file:/usr/share/graylog-server/gr>
Sep 25 07:25:17 ubuntu2204 graylog-server[78119]: WARNING: Please consider reporting this to the maintainers of retrofit2.Platform
Sep 25 07:25:17 ubuntu2204 graylog-server[78119]: WARNING: Use --illegal-access=warn to enable warnings of further illegal reflective access >
Sep 25 07:25:17 ubuntu2204 graylog-server[78119]: WARNING: All illegal access operations will be denied in a future release
您还可以使用以下命令验证 Graylog 服务器日志:
tail -f /var/log/graylog-server/server.log一旦 Graylog 服务器成功启动,您应该得到以下输出:
2022-09-25T07:25:40.117Z INFO  [ServerBootstrap] Services started, startup times in ms: {FailureHandlingService [RUNNING]=73, GeoIpDbFileChangeMonitorService [RUNNING]=88, PrometheusExporter [RUNNING]=88, OutputSetupService [RUNNING]=89, JobSchedulerService [RUNNING]=89, InputSetupService [RUNNING]=90, BufferSynchronizerService [RUNNING]=91, LocalKafkaMessageQueueReader [RUNNING]=92, LocalKafkaMessageQueueWriter [RUNNING]=92, GracefulShutdownService [RUNNING]=93, MongoDBProcessingStatusRecorderService [RUNNING]=93, UserSessionTerminationService [RUNNING]=101, StreamCacheService [RUNNING]=133, LocalKafkaJournal [RUNNING]=134, UrlWhitelistService [RUNNING]=134, ConfigurationEtagService [RUNNING]=137, EtagService [RUNNING]=139, PeriodicalsService [RUNNING]=174, LookupTableService [RUNNING]=203, JerseyService [RUNNING]=4076}
2022-09-25T07:25:40.133Z INFO  [ServerBootstrap] Graylog server up and running.
此时Graylog服务器已经启动并监听9000端口,可以通过以下命令查看:
ss -antpl | grep 9000您应该得到以下输出:
LISTEN 0 4096 [::ffff:127.0.0.1]:9000 *:* users:(("java",pid=78119,fd=56))
配置 Nginx 作为 Graylog 的反向代理
接下来,您需要安装并配置 Nginx 作为反向代理,以访问端口 80 上的 Graylog 服务器。
首先,使用以下命令安装 Nginx 服务器:
apt install nginx -y安装好Nginx服务器后,使用以下命令创建一个新的Nginx虚拟主机配置文件:
nano /etc/nginx/sites-available/graylog.conf添加以下行:
server {
    listen 80;
    server_name graylog.example.org;

location /
    {
      proxy_set_header Host $http_host;
      proxy_set_header X-Forwarded-Host $host;
      proxy_set_header X-Forwarded-Server $host;
      proxy_set_header X-Forwarded-For $proxy_add_x_forwarded_for;
      proxy_set_header X-Graylog-Server-URL http://$server_name/;
      proxy_pass       http://208.117.84.72:9000;
    }

}
完成后保存并关闭文件。然后,使用以下命令验证 Nginx 是否存在任何语法错误:
nginx -t您应该得到以下输出:
nginx: the configuration file /etc/nginx/nginx.conf syntax is ok
nginx: configuration file /etc/nginx/nginx.conf test is successful
接下来,使用以下命令启用 Nginx 虚拟主机配置文件:
ln -s /etc/nginx/sites-available/graylog.conf /etc/nginx/sites-enabled/接下来,删除 Nginx 默认虚拟主机文件:
rm -rf /etc/nginx/sites-enabled/default最后,重启 Nginx 服务以应用更改:
systemctl restart nginx接下来,使用以下命令验证 Graylog 的状态:
systemctl status nginx您应该得到以下输出:
? nginx.service - A high performance web server and a reverse proxy server
     Loaded: loaded (/lib/systemd/system/nginx.service; enabled; vendor preset: enabled)
     Active: active (running) since Sun 2022-09-25 07:30:45 UTC; 8s ago
       Docs: man:nginx(8)
    Process: 78980 ExecStartPre=/usr/sbin/nginx -t -q -g daemon on; master_process on; (code=exited, status=0/SUCCESS)
    Process: 78981 ExecStart=/usr/sbin/nginx -g daemon on; master_process on; (code=exited, status=0/SUCCESS)
   Main PID: 78982 (nginx)
      Tasks: 3 (limit: 4579)
     Memory: 3.3M
        CPU: 49ms
     CGroup: /system.slice/nginx.service
             ??78982 "nginx: master process /usr/sbin/nginx -g daemon on; master_process on;"
             ??78983 "nginx: worker process" "" "" "" "" "" "" "" "" "" "" "" "" "" "" "" "" "" "" "" "" "" "" "" "" "" "" ""
             ??78984 "nginx: worker process" "" "" "" "" "" "" "" "" "" "" "" "" "" "" "" "" "" "" "" "" "" "" "" "" "" "" ""

Sep 25 07:30:45 ubuntu2204 systemd[1]: Starting A high performance web server and a reverse proxy server...
Sep 25 07:30:45 ubuntu2204 systemd[1]: Started A high performance web server and a reverse proxy server.
访问 Graylog Web 界面
现在,打开您的 Web 浏览器并输入 URL http://graylog.example.com。您将被重定向到 Graylog 登录页面,如下所示:

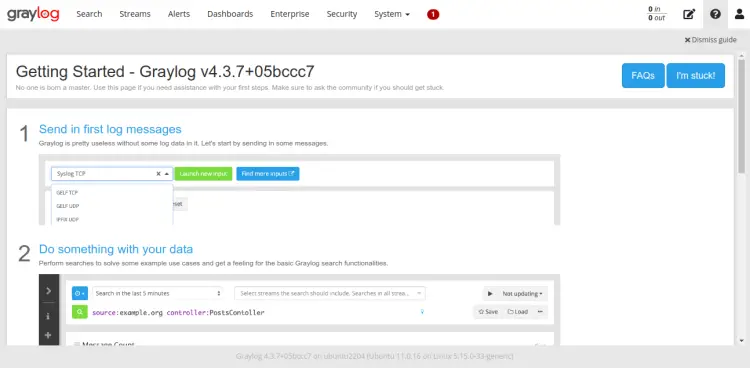
提供您的管理员用户名和密码,然后单击“登录”按钮。您应该会在下一页看到 Graylog 仪表板:
结论
恭喜!您已经在 Ubuntu 22.04 上成功安装并配置了 Graylog 服务器,并将 Nginx 作为反向代理。您现在可以浏览 Graylog 并创建输入以从外部源接收 Rsyslog 日志。如果您有任何问题,请随时问我。