如何在 Ubuntu 18.04 LTS 上安装 CodeIgniter PHP 框架
在此页
- 要求
- 安装 Apache 和 PHP
- 安装 CodeIgniter
- 访问 CodeIgniter
CodeIgniter 是由 Rick Ellis 于 2006 年创建的免费、开源且功能强大的 PHP 框架,占地面积非常小。它专为需要简单优雅的工具包来创建功能齐全的 Web 应用程序的开发人员而构建。它具有许多功能,包括轻量级、Active Record 数据库支持、图像处理库、帮助支持、URI 路由、基于模型-视图-控制器的系统等等。
在本教程中,我们将学习如何在 Ubuntu 18.04 LTS (Bionic Beaver) 服务器上安装 CodeIgniter。
要求
- 一台运行 Ubuntu 18.04 的服务器。
- 在您的服务器上设置了一个具有根密码的非根用户。
安装 Apache 和 PHP
CodeIgniter 在 Apache 网络服务器上运行并用 PHP 语言编写,因此您需要将 Apache 和 PHP 安装到您的系统中。首先,使用以下命令安装 Apache Web 服务器:
sudo apt-get install apache2 -y默认情况下,最新版本的 PHP 在 Ubuntu 18.04 中不可用,因此您需要为此添加存储库。您可以使用以下命令添加 PHP 存储库:
sudo apt-get install python-software-properties -y
sudo add-apt-repository -y ppa:ondrej/php
更新存储库后,您可以使用以下命令安装 PHP 和其他库:
sudo apt-get install libapache2-mod-php7.1 php7.1-common php7.1-xml php7.1-zip php7.1-mysql unzip wget -y接下来,启动 Apache Web 服务并使其在引导时启动:
sudo systemctl start apache2
sudo systemctl enable apache2
安装 CodeIgniter
您可以使用以下命令从 Git 存储库下载最新版本的 CodeIgniter:
wget https://github.com/bcit-ci/CodeIgniter/archive/3.1.5.zip下载完成后,使用以下命令解压缩下载的文件:
unzip 3.1.5.zip将提取的目录复制到 Apache 根目录并使用以下命令授予适当的权限:
sudo cp -r CodeIgniter-3.1.5 /var/www/html/codeigniter
sudo chown -R www-data:www-data /var/www/html/codeigniter
sudo chmod -R 777 /var/www/html/codeigniter/
接下来,为 CodeIgniter 创建一个 apache 虚拟主机指令。
sudo nano /etc/apache2/sites-available/codeigniter.conf添加以下行:
<VirtualHost *:80>
 ServerAdmin
 DocumentRoot /var/www/html/codeigniter
 ServerName yourdomain.com
 <Directory /var/www/html/codeigniter/>
Options +FollowSymLinks
AllowOverride All
Order allow,deny
allow from all
 </Directory>
 ErrorLog /var/log/apache2/codeigniter-error_log
 CustomLog /var/log/apache2/codeigniter-access_log common
</VirtualHost>
保存并关闭文件,然后使用以下命令启用虚拟主机文件:
sudo a2ensite codeigniter最后,重新启动 apache 服务以应用所有更改:
systemctl restart apache2访问 CodeIgniter
打开您的 Web 浏览器并输入 URL http://yourdomain.com,您将被重定向到 CodeIgniter 仪表板,如下页所示:
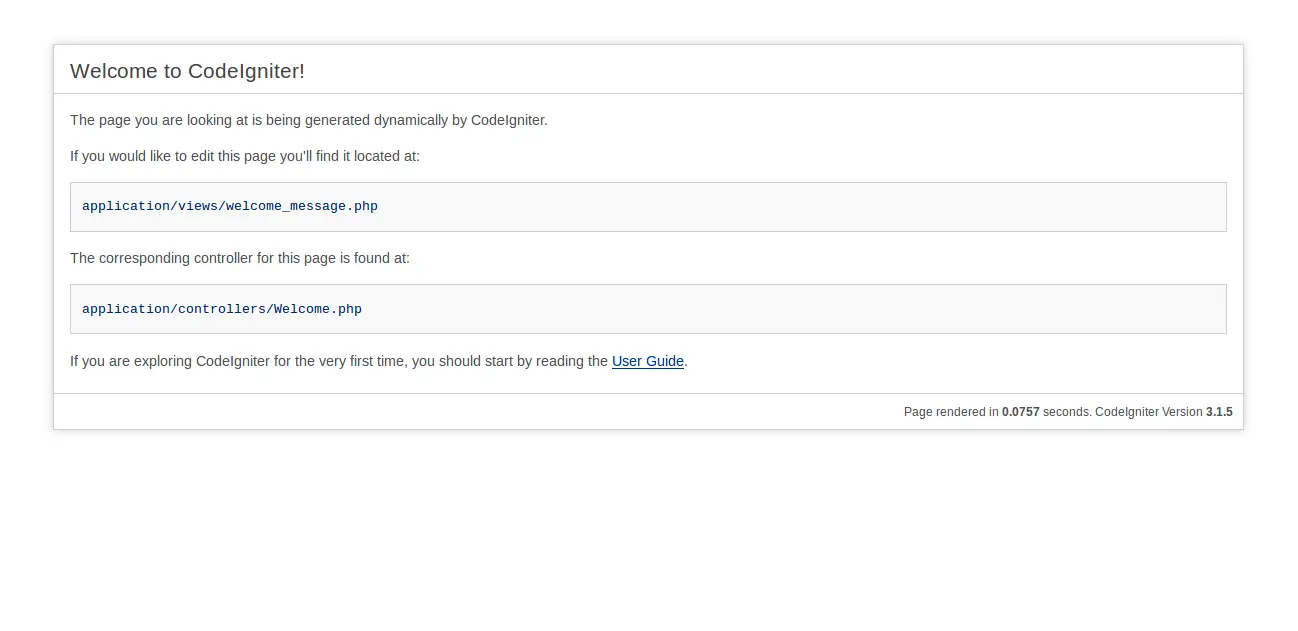
恭喜!您已经在 Ubuntu 18.04 LTS 服务器上成功安装了 CodeIgniter。