如何在 Ubuntu 22.04 上安装 Mattermost 团队消息系统
本教程适用于这些操作系统版本
- Ubuntu 22.04(Jammy Jellyfish)
- Ubuntu 20.04(Focal Fossa)
在此页
- 先决条件
- 第 1 步 - 配置防火墙
- 第 2 步 - 安装 PostgreSQL
- 第 3 步 - 配置 PostgreSQL
- 第 4 步 - 下载 Mattermost
- 第 5 步 - 为 Mattermost 创建系统用户并配置权限
- 第 6 步 - 创建 Systemd 单元文件
- 第 7 步 - 安装 Nginx
- 第 8 步 - 安装 SSL
- 第 9 步 - 配置 Nginx
- 第 10 步 - 访问 Mattermost 服务器
- 第 11 步 - 配置 Mattermost 服务器
- 配置电子邮件通知
Mattermost 是一个开源消息传递平台,用于聊天、文件共享、项目管理和工作流程编排。它是用 Go 语言编写的。它以云托管解决方案和自托管服务器的形式提供。它是 Slack 和其他专业平台的替代品。将其托管在您的服务器上的能力使您可以控制您的通信和敏感数据。
在本教程中,您将学习如何在 Ubuntu 22.04 服务器上安装 Mattermost 团队消息系统。
先决条件
-
A server running Ubuntu 22.04 with a minimum of 2 GB of RAM for up to 1000 users.
-
A non-root user with sudo privileges.
-
The Uncomplicated Firewall(UFW) is enabled and running.
-
A Fully Qualified domain name pointed to the server. For our tutorial, we will be using the domain
mattermost.example.com. -
Everything is updated.
$ sudo apt update && sudo apt upgrade
第 1 步 - 配置防火墙
安装任何包之前的第一步是配置防火墙以允许 HTTP 和 HTTPS 连接。
检查防火墙的状态。
$ sudo ufw status您应该会看到如下内容。
Status: active

To                         Action      From
--                         ------      ----
OpenSSH                    ALLOW       Anywhere
OpenSSH (v6)               ALLOW       Anywhere (v6)
Mattermost 需要端口 8065。此端口仅需要暂时打开以确认安装。我们稍后会删除它。
$ sudo ufw allow 8065允许 HTTP 和 HTTPs 端口。
$ sudo ufw allow http
$ sudo ufw allow https
再次检查状态以确认。
$ sudo ufw status
Status: active

To                         Action      From
--                         ------      ----
OpenSSH                    ALLOW       Anywhere
80/tcp                     ALLOW       Anywhere
443                        ALLOW       Anywhere
8065                       ALLOW       Anywhere
OpenSSH (v6)               ALLOW       Anywhere (v6)
80/tcp (v6)                ALLOW       Anywhere (v6)
443 (v6)                   ALLOW       Anywhere (v6)
8065 (v6)                  ALLOW       Anywhere (v6)
第 2 步 - 安装 PostgreSQL
Mattermost 可以与 MySQL 和 PostgreSQL 服务器一起使用,但 PostgreSQL 是推荐的选择。
Ubuntu 22.04 附带最新稳定版 (v14) 的 PostgreSQL。您可以使用单个命令安装它。
$ sudo apt install postgresql postgresql-contrib检查MySQL的版本。
$ psql --version
psql (PostgreSQL) 14.4 (Ubuntu 14.4-0ubuntu0.22.04.1)
第 3 步 - 配置 PostgreSQL
PostgreSQL 在安装期间创建一个 Linux 用户帐户
postgres。可以使用此帐户访问 PostgreSQL shell。登录到 PostgreSQL shell。
$ sudo -u postgres psql创建 Mattermost 数据库。
postgres=# CREATE DATABASE mattermostdb;创建 Mattermost 数据库用户。将
mmuser-password替换为您选择的更强的密码。postgres=# CREATE USER mmuser WITH PASSWORD 'mmuser-password';授予用户对数据库的所有权限。
postgres=# GRANT ALL PRIVILEGES ON DATABASE mattermost to mmuser;通过在 shell 中输入
\q退出 PostgreSQL shell。postgres=# \q打开文件
/etc/postgresql/{version}/main/pg_hba.conf进行编辑。$ sudo nano /etc/postgresql/{version}/main/pg_hba.conf找到以下几行。
# "local" is for Unix domain socket connections only
local   all             all                                     peer
# IPv4 local connections:
host    all             all             127.0.0.1/32            scram-sha-256
# IPv6 local connections:
host    all             all             ::1/128                 scram-sha-256
将上述行中的值
peer和scram-sha-256更改为trust。# "local" is for Unix domain socket connections only local all all trust # IPv4 local connections: host all all 127.0.0.1/32 trust # IPv6 local connections: host all all ::1/128 trust通过按 Ctrl + X 并在出现提示时输入 Y 来保存文件。
重新启动 PostgreSQL 服务以启用更改。
$ sudo systemctl restart postgresql确认您可以连接到 Mattermost SQL 用户。
$ psql --dbname=mattermost --username=mmuser --password系统将提示您输入密码。输入它,您将登录到 PostgreSQL shell。输入
\q退出 shell。Password: psql (14.4 (Ubuntu 14.4-0ubuntu0.22.04.1)) Type "help" for help. mattermost-> \q第 4 步 - 下载 Mattermost
下载最新版本的 Mattermost 服务器。在编写本教程时,最新的可用版本是 7.0.1。
$ wget https://releases.mattermost.com/7.0.1/mattermost-7.0.1-linux-amd64.tar.gz提取存档。
$ tar -xvzf mattermost*.gz将提取的文件移动到
/opt目录。$ sudo mv mattermost /opt为 Mattermost 服务器创建数据存储目录。
$ sudo mkdir /opt/mattermost/data第 5 步 - 为 Mattermost 创建系统用户并配置权限
打开配置文件
/opt/mattermost/config/config.json进行编辑。$ sudo nano /opt/mattermost/config/config.json将变量
SiteURL设置为要用于安装的域名。"SiteURL": "https://mattermost.example.com",找到
SqlSettings下的变量DriverName,将其值修改为mysql。"DriverName": "mysql",将变量
DataSource设置为以下值。将mmuser替换为 SQL 用户名,将YourPassword23!替换为 SQL 密码,将mattermostdb替换为数据库名称,您在第 4 步中配置。"DataSource": "mmuser:(localhost:3306)/mattermostdb?charset=utf8mb4,utf8&writeTimeout=30s",此时您可以配置许多其他设置,但在安装后进行配置会更容易。目前,只有这两个设置是必不可少的。
通过按 Ctrl + X 并在出现提示时输入 Y 来保存文件。
为 Mattermost 服务器创建系统用户和组。
$ sudo useradd --system --user-group mattermost将 Mattermost 目录的所有权更改为新创建的用户和组。
$ sudo chown -R mattermost:mattermost /opt/mattermost向目录中的
mattermost组授予写入权限。$ sudo chmod -R g+w /opt/mattermost切换到 Mattermost 目录。
$ cd /opt/mattermost以
mattermost用户身份启动 Mattermost 服务器。$ sudo -u mattermost ./bin/mattermost服务器将启动并生成一堆日志信息。等待行
Server is listening on [::]:8065出现。在浏览器中访问 URLhttp://,您将看到以下登录页面。:8065 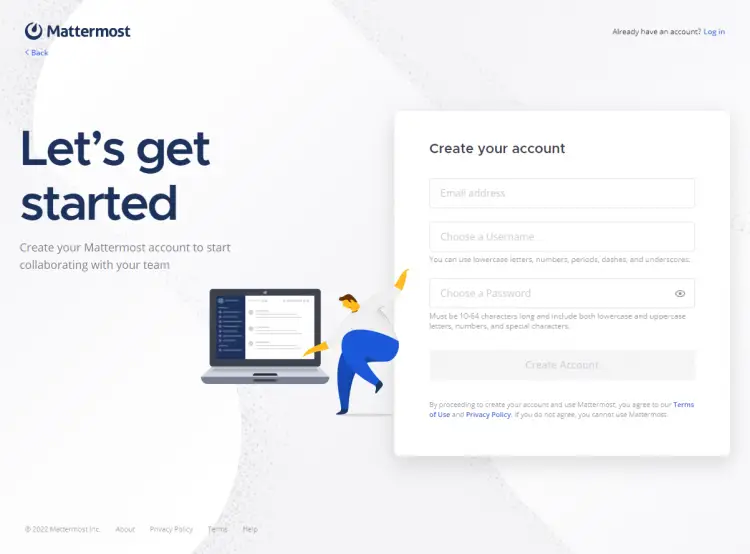
按 Ctrl + C 停止服务器。我们稍后会回到这里来配置安装。
第 6 步 - 创建 Systemd 单元文件
下一步是为 Mattermost 创建一个系统文件。
创建并打开单元文件进行编辑。
$ sudo nano /lib/systemd/system/mattermost.service将以下代码粘贴到其中。
[Unit]
Description=Mattermost
After=network.target
After=postgresql.service
BindsTo=postgresql.service

[Service]
Type=notify
ExecStart=/opt/mattermost/bin/mattermost
TimeoutStartSec=3600
KillMode=mixed
Restart=always
RestartSec=10
WorkingDirectory=/opt/mattermost
User=mattermost
Group=mattermost
LimitNOFILE=49152

[Install]
WantedBy=multi-user.target
通过按 Ctrl + X 并在出现提示时输入 Y 来保存文件。
重新加载 systemd 守护程序以加载服务文件。
$ sudo systemctl daemon-reload启动 Mattermost 服务。
$ sudo systemctl start mattermost检查服务的状态。
? mattermost.service - Mattermost
     Loaded: loaded (/lib/systemd/system/mattermost.service; disabled; vendor preset: enabled)
     Active: active (running) since Mon 2022-07-11 01:24:46 UTC; 20s ago
   Main PID: 23628 (mattermost)
      Tasks: 48 (limit: 2241)
     Memory: 448.2M
        CPU: 14.929s
     CGroup: /system.slice/mattermost.service
             ??23628 /opt/mattermost/bin/mattermost
             ??23651 plugins/com.mattermost.plugin-channel-export/server/dist/plugin-linux-amd64
             ??23656 plugins/com.mattermost.nps/server/dist/plugin-linux-amd64
             ??23662 plugins/com.mattermost.calls/server/dist/plugin-linux-amd64
             ??23668 plugins/com.mattermost.apps/server/dist/plugin-linux-amd64
             ??23674 plugins/playbooks/server/dist/plugin-linux-amd64
             ??23683 plugins/focalboard/server/dist/plugin-linux-amd64
 ....
启用服务。
$ sudo systemctl enable mattermost第 7 步 - 安装 Nginx
Ubuntu 22.04 附带旧版本的 Nginx。要安装最新版本,您需要下载官方 Nginx 存储库。
导入 Nginx 签名密钥。
$ curl https://nginx.org/keys/nginx_signing.key | gpg --dearmor \
| sudo tee /usr/share/keyrings/nginx-archive-keyring.gpg >/dev/null
添加 Nginx 稳定版本的存储库。
$ echo "deb [signed-by=/usr/share/keyrings/nginx-archive-keyring.gpg arch=amd64] \
http://nginx.org/packages/ubuntu `lsb_release -cs` nginx" \
| sudo tee /etc/apt/sources.list.d/nginx.list
更新系统存储库。
$ sudo apt update安装 Nginx。
$ sudo apt install nginx验证安装。
$ nginx -v
nginx version: nginx/1.22.0
第 8 步 - 安装 SSL
我们需要安装 Certbot 来生成 SSL 证书。您可以使用 Ubuntu 存储库安装 Certbot,也可以使用 Snapd 工具获取最新版本。我们将使用 Snapd 版本。
Ubuntu 22.04 默认安装了 Snapd。运行以下命令以确保您的 Snapd 版本是最新的。
$ sudo snap install core安装 Certbot。
$ sudo snap install --classic certbot使用以下命令通过创建指向
/usr/bin目录的符号链接来确保可以运行 Certbot 命令。$ sudo ln -s /snap/bin/certbot /usr/bin/certbot运行以下命令生成 SSL 证书。
$ sudo certbot certonly --standalone --agree-tos --no-eff-email --staple-ocsp --preferred-challenges http -m -d mattermost.example.com上面的命令会将证书下载到服务器上的
/etc/letsencrypt/live/mattermost.example.com目录。生成 Diffie-Hellman 组证书。
$ sudo openssl dhparam -dsaparam -out /etc/ssl/certs/dhparam.pem 4096打开文件
/etc/letsencrypt/renewal/mattermost.example.com.conf进行编辑。$ sudo nano /etc/letsencrypt/renewal/mattermost.example.com.conf在底部粘贴以下代码。
pre_hook = systemctl stop nginx
post_hook = systemctl start nginx
通过按 Ctrl + X 并在出现提示时输入 Y 来保存文件。
我们使用 Certbot 的独立选项生成了 SSL 证书。它运行其 Web 服务器来创建证书,这意味着 Nginx 应该在续订期间关闭。 pre_hook 和 post_hook 命令在续费前后运行,自动关闭和重启 Nginx 服务器,无需人工干预。
要检查 SSL 续订是否正常工作,请试运行该过程。
$ sudo certbot renew --dry-run如果您没有看到任何错误,则一切就绪。您的证书将自动更新。
第 9 步 - 配置 Nginx
打开文件
/etc/nginx/nginx.conf进行编辑。$ sudo nano /etc/nginx/nginx.conf在行
include /etc/nginx/conf.d/*.conf;之前添加以下行。server_names_hash_bucket_size 64;通过按 Ctrl + X 并在出现提示时输入 Y 来保存文件。
创建并打开文件
/etc/nginx/conf.d/monica.conf进行编辑。$ sudo nano /etc/nginx/conf.d/mattermost.conf将以下代码粘贴到其中。将
mattermost.example.com替换为您的域名。确保client_max_body_size的值设置为 10MB,这是 Monica 中文件的默认上传大小。它与我们之前使用 PHP 配置的值相同。upstream backend { server 127.0.0.1:8065; keepalive 32; } proxy_cache_path /var/cache/nginx levels=1:2 keys_zone=mattermost_cache:10m max_size=3g inactive=120m use_temp_path=off; server { listen 80 default_server; server_name mattermost.example.com; return 301 https://$server_name$request_uri; } server { listen 443 ssl http2; server_name mattermost.example.com; http2_push_preload on; # Enable HTTP/2 Server Push ssl_certificate /etc/letsencrypt/live/mattermost.example.com/fullchain.pem; ssl_certificate_key /etc/letsencrypt/live/mattermost.example.com/privkey.pem; ssl_trusted_certificate /etc/letsencrypt/live/mattermost.example.com/chain.pem; ssl_session_timeout 1d; # Enable TLS versions (TLSv1.3 is required upcoming HTTP/3 QUIC). ssl_protocols TLSv1.2 TLSv1.3; # Enable TLSv1.3's 0-RTT. Use $ssl_early_data when reverse proxying to # prevent replay attacks. # # @see: https://nginx.org/en/docs/http/ngx_http_ssl_module.html#ssl_early_data ssl_early_data on; ssl_ciphers 'ECDHE-ECDSA-AES256-GCM-SHA384:ECDHE-RSA-AES256-GCM-SHA384:ECDHE-ECDSA-CHACHA20-POLY1305:ECDHE-RSA-CHACHA20-POLY1305:ECDHE-ECDSA-AES256-SHA384:ECDHE-RSA-AES256-SHA384'; ssl_prefer_server_ciphers on; ssl_session_cache shared:SSL:50m; # HSTS (ngx_http_headers_module is required) (15768000 seconds = six months) add_header Strict-Transport-Security max-age=15768000; # OCSP Stapling --- # fetch OCSP records from URL in ssl_certificate and cache them ssl_stapling on; ssl_stapling_verify on; ssl_dhparam /etc/ssl/certs/dhparam.pem; add_header X-Early-Data $tls1_3_early_data; location ~ /api/v[0-9]+/(users/)?websocket$ { proxy_set_header Upgrade $http_upgrade; proxy_set_header Connection "upgrade"; client_max_body_size 50M; proxy_set_header Host $http_host; proxy_set_header X-Real-IP $remote_addr; proxy_set_header X-Forwarded-For $proxy_add_x_forwarded_for; proxy_set_header X-Forwarded-Proto $scheme; proxy_set_header X-Frame-Options SAMEORIGIN; proxy_buffers 256 16k; proxy_buffer_size 16k; client_body_timeout 60; send_timeout 300; lingering_timeout 5; proxy_connect_timeout 90; proxy_send_timeout 300; proxy_read_timeout 90s; proxy_http_version 1.1; proxy_pass http://backend; } location / { client_max_body_size 50M; proxy_set_header Connection ""; proxy_set_header Host $http_host; proxy_set_header X-Real-IP $remote_addr; proxy_set_header X-Forwarded-For $proxy_add_x_forwarded_for; proxy_set_header X-Forwarded-Proto $scheme; proxy_set_header X-Frame-Options SAMEORIGIN; proxy_buffers 256 16k; proxy_buffer_size 16k; proxy_read_timeout 600s; proxy_cache mattermost_cache; proxy_cache_revalidate on; proxy_cache_min_uses 2; proxy_cache_use_stale timeout; proxy_cache_lock on; proxy_http_version 1.1; proxy_pass http://backend; } } # This block is useful for debugging TLS v1.3. Please feel free to remove this # and use the `$ssl_early_data` variable exposed by NGINX directly should you # wish to do so. map $ssl_early_data $tls1_3_early_data { "~." $ssl_early_data; default ""; }通过按 Ctrl + X 并在出现提示时输入 Y 来保存文件。
赋予 Nginx 对缓存目录的权限。
$ sudo chown -R nginx:nginx /var/cache/nginx验证您的 Nginx 配置。
$ sudo nginx -t重新启动 Nginx 服务器。
$ sudo systemctl restart nginx第 10 步 - 访问 Mattermost 服务器
在浏览器中打开 URL
https://mattermost.example.com,您将看到第 5 步中所示的注册页面。输入您的帐户详细信息,它将被设置为系统管理员。在继续之前,我们需要关闭端口 8065,因为我们已将 Mattermost 配置为可通过公共 URL 访问。因此,开放端口存在安全隐患。
$ sudo ufw delete allow 8065接下来,您将被带到团队创建页面。
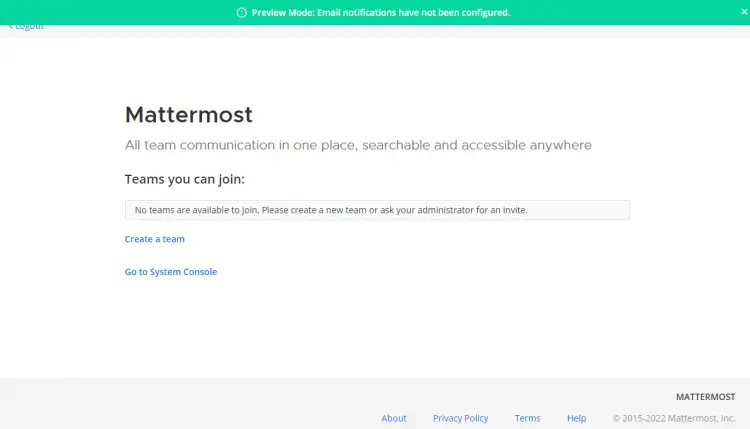
单击“创建团队”按钮创建您的第一个团队。
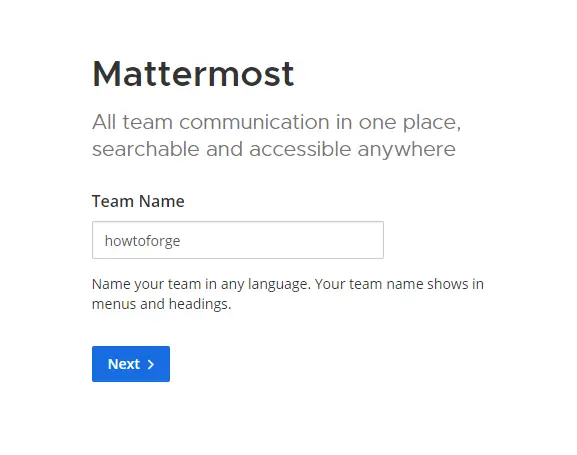
接下来,系统会要求您为团队设置一个公共 URL。
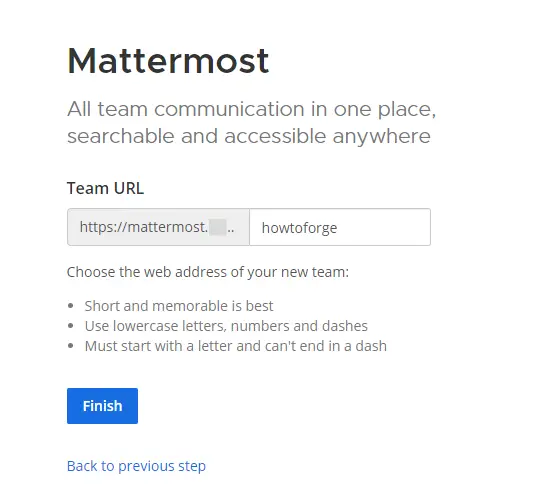
单击“完成”按钮打开 Mattermost 仪表板。
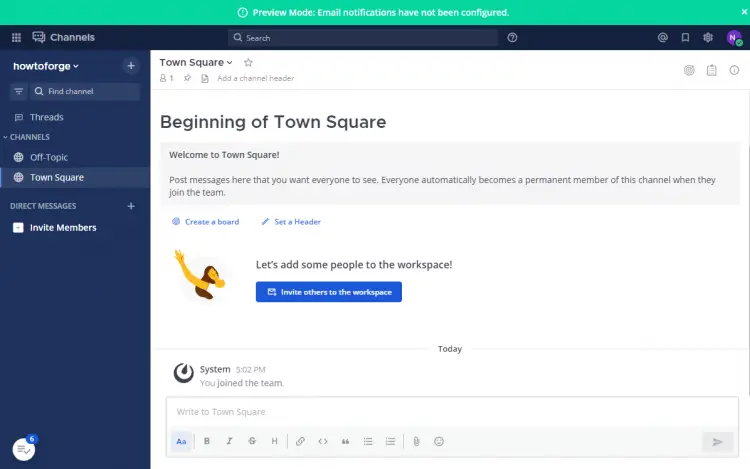
第 11 步 - 配置 Mattermost 服务器
您可以使用
config.json文件或使用仪表板中的系统控制台配置 Mattermost。我们将通过仪表板进行操作,因为那样更容易。单击左上角的产品按钮,然后选择系统控制台选项。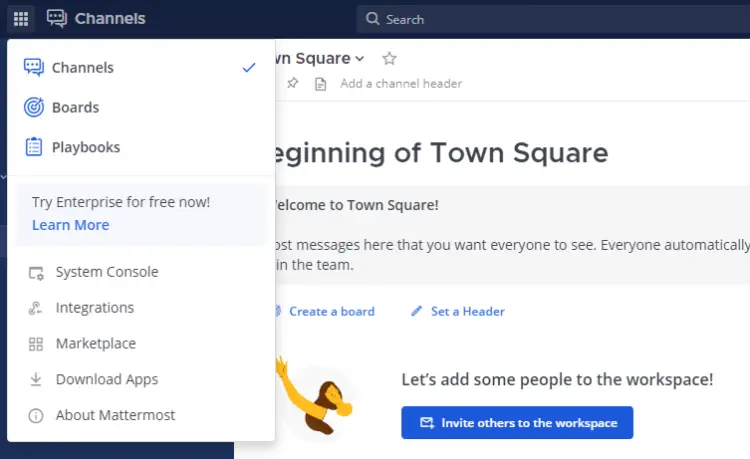
您将被带到系统控制台仪表板,您可以在其中配置有关服务器的所有内容。
配置电子邮件通知
消息系统最重要的功能之一是电子邮件通知。
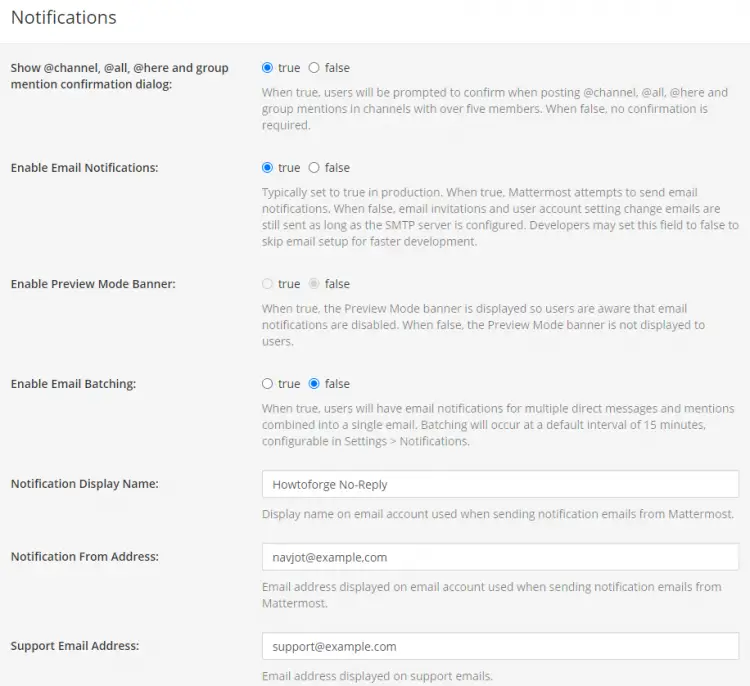
第一步是启用通知。访问系统控制台 >> 站点配置 >> Noficiations 菜单并设置以下选项。
- 将启用电子邮件通知设置为 true
- 将通知显示名称设置为无回复
- 将 Notification From Address 设置为 [email 。
- 将支持电子邮件地址设置为 [email
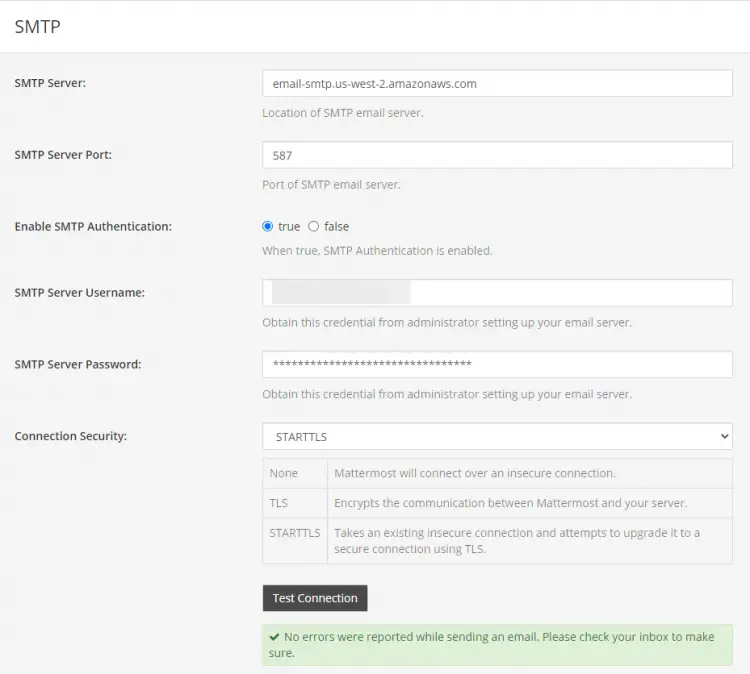
下一步是启用 SMTP。访问系统控制台 >> 环境 >> SMTP 菜单并设置以下选项。对于我们的教程,我们使用的是 Amazon SES 邮件程序。
- 将 SMTP 服务器设置为 {SMTP-server}
- 将 SMTP 服务器端口设置为 465
- 将启用 SMTP 身份验证设置为 true
- 将 SMTP 服务器用户名设置为 {SES-username}
- 将 SMTP 服务器密码设置为 {SES-Key}
- 将连接安全设置为 TLS 或 STARTTLS,具体取决于 SMTP 服务器接受的内容
单击测试连接按钮以确认 SMTP 设置。
还有很多设置要配置。完成后,您需要从终端重新启动服务器以使更改生效。
$ sudo systemctl restart mattermost结论
我们关于在 Ubuntu 22.04 服务器上安装和配置 Mattermost Team Messaging 系统的教程到此结束。如果您有任何问题,请在下面的评论中发表。