如何在 Centos 上安装 Nginx、MariaDB 和 PHP (LEMP Stack)
LEMP 堆栈服务器是运行 Linux、Nginx(发音为 Engine x)、MySQL/MariaDB 和 PHP(或 Perl/Python)的服务器。它与LAMP服务器类似,只不过Web服务器平台由Nginx而不是Apache控制。
在本指南中,我们将在 CentOS 8 和 9 上安装 LEMP 堆栈。
先决条件
- 建议至少 10GB 可用磁盘空间。
- CentOS 8 ISO 安装文件。
步骤 1 - Linux 操作系统 - Centos8
CentOS 8 已于 2019 年 9 月 24 日发布。 CentOS 8 可以在各种架构上运行,包括 x86_64(64 位 Intel/AMD)、aarch64(64 位 ARM)和 ppc64le(IBM POWER,little-endian)。第一步,您需要从其官方网站下载 CentOS 8。您可以使用以下 URL 下载 CentOS 8 Linux:
http://isoredirect.centos.org/centos/8/isos/x86_64/您还可以从 CentOS 8 镜像下载 CentOS 8 ISO。
之后,如果您使用 VMware ESXi 或 VirtualBox 来准备启动,我们需要将此 iso 挂载到 CD/DVD 驱动器。如果您安装在本地 PC 或服务器上,则需要制作可启动 USB 记忆棒或 DVD。
启动系统,您将看到以下屏幕:
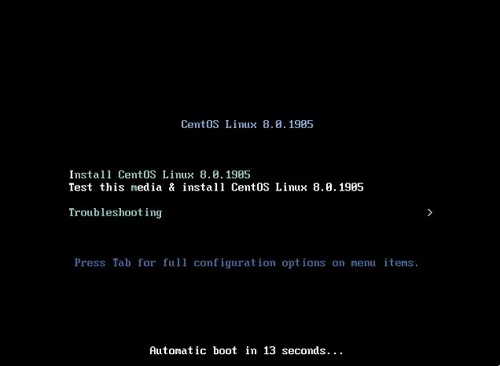
选择安装 CentosOS Linux 8.0.1905:
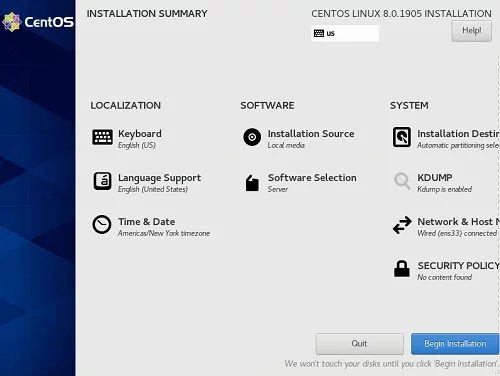
选择如下所示的本地化、软件和系统设置,或者您可以自行自定义。
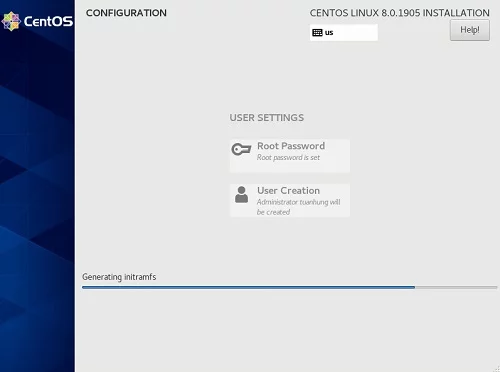
等待安装完成,然后单击左下角的“重新启动”按钮。
我们需要在用户创建时为自己创建 root 密码和新用户帐户。
重新启动过程完成后,您可以使用上一步创建的用户帐户检查 ssh 到您的服务器。
第 2 步 - 安装 Nginx
Nginx 是一个用于 HTTP、HTTPS、SMTP、POP3 和 IMAP 协议的开源反向代理服务器。它还可以作为负载均衡器、HTTP 缓存和 Web 服务器(原始服务器)运行。它非常注重高并发、高性能和极低的内存使用量。
现在你已经干净安装了 Centos8。输入以下命令来安装 Nginx Web 服务器。我们使用 sudo 命令来运行管理任务。第一次我们需要输入您的账户密码:
[tuanhung@localhost ~]$ sudo yum install nginx -y
We trust you have received the usual lecture from the local System Administrator. It usually boils down to these three things:
#1) Respect the privacy of others.
#2) Think before you type.
#3) With great power comes great responsibility.
[sudo] password for tuanhung:
CentOS-8 - AppStream [=== ] --- B/s | 0 B --:-- ETA
安装完成后,我们可以使用以下命令启动 Nginx 并使其在启动时自动启动:
[tuanhung@localhost ~]$ sudo systemctl start nginx
[tuanhung@localhost ~]$ sudo systemctl enable nginx
Created symlink /etc/systemd/system/multi-user.target.wants/nginx.service → /usr/lib/systemd/system/nginx.service.
检查 Nginx 状态:
[tuanhung@localhost ~]$ sudo systemctl status nginx
? nginx.service - The nginx HTTP and reverse proxy server
Loaded: loaded (/usr/lib/systemd/system/nginx.service; enabled; vendor preset: dis>
Active: active (running) since Thu 2019-12-19 04:12:46 EST; 37s ago
Main PID: 30930 (nginx)
Tasks: 2 (limit: 5061)
Memory: 5.6M
CGroup: /system.slice/nginx.service
??30930 nginx: master process /usr/sbin/nginx
??30931 nginx: worker process
12 月 19 日 04:12:46 localhost.localdomain systemd[1]: 启动 nginx HTTP 和反向>
12 月 19 日 04:12:46 localhost.localdomain nginx[30926]: nginx: 配置文件 /et>
12 月 19 日 04:12:46 localhost.localdomain nginx[30926]: nginx: 配置文件 /etc/ng>
12 月 19 日 04:12:46 localhost.localdomain systemd[1]: nginx.service: 无法解析 PID >
12 月 19 日 04:12:46 localhost.localdomain systemd[1]: 启动 nginx HTTP 和反向 >
第 1-15/15 行(结束)
好的,现在 Nginx 正在运行。但到目前为止,我们还需要执行一步,以便客户端可以访问我们的 Web 服务器。
默认情况下,Centos 8 使用firewalld 来控制和保护您的服务器免受不需要的流量的影响。您可以通过以下命令查看防火墙规则或服务状态:
[tuanhung@localhost ~]$ sudo firewall-cmd --list-all
public (active)
target: default
icmp-block-inversion: no
interfaces: ens33
sources:
services: cockpit dhcpv6-client ssh
ports:
protocols:
masquerade: no
forward-ports:
source-ports:
icmp-blocks:
rich rules:
[tuanhung@localhost ~]$
如您所见,防火墙状态仅允许 3 个服务:cockpit、dhcpv6、ssh 并阻止 HTTP 连接,因此您需要打开它才能从外部访问 Web 服务器。通过这个命令来做到这一点:
[tuanhung@localhost ~]$ sudo firewall-cmd --zone=public --add-service=http我们再次检查:
[tuanhung@localhost ~]$ sudo firewall-cmd --list-all
public (active)
target: default
icmp-block-inversion: no
interfaces: ens33
sources:
services: cockpit dhcpv6-client http ssh
ports:
protocols:
masquerade: no
forward-ports:
source-ports:
icmp-blocks:
rich rules:
[tuanhung@localhost ~]$
然后打开浏览器,您应该会看到类似的内容。
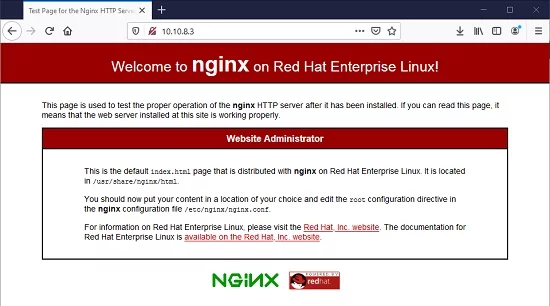
注 1:在我的例子中,我安装在同一 LAN 的 VPS 上。 IP 10.10.8.3 是 VPS 服务器的 IP。在你的情况下可能有所不同。
注意 2:在 firewalld 中,您可以添加带有选项 --permanent 的命令,以使规则在系统重新启动后保持不变。像这样:
firewall-cmd --permanent --zone=public --add-service=http第 3 步 - 安装 MariaDB 服务器
与 MySQL 相比,MariaDB 有一些优化来提高性能。它由 MySQL 的原始开发人员制作,并保证保持开源。
在 Centos 8 上安装 MariaDB:
[tuanhung@localhost ~]$ sudo yum install mariadb-server mariadb -y我们还启动该服务并使其能够在启动时自动启动。之后我们验证状态以确保服务正在运行。
[tuanhung@localhost ~]$ sudo systemctl start mariadb
[tuanhung@localhost ~]$ sudo systemctl enable mariadb
Created symlink /etc/systemd/system/mysql.service → /usr/lib/systemd/system/mariadb.service.
Created symlink /etc/systemd/system/mysqld.service → /usr/lib/systemd/system/mariadb.service.
Created symlink /etc/systemd/system/multi-user.target.wants/mariadb.service → /usr/lib/systemd/system/mariadb.service.
[tuanhung@localhost ~]$ sudo systemctl status mariadb
? mariadb.service - MariaDB 10.3 database server
Loaded: loaded (/usr/lib/systemd/system/mariadb.service; enabled; vendor preset: d>
Active: active (running) since Thu 2019-12-19 05:16:37 EST; 1min 24s ago
Docs: man:mysqld(8)
https://mariadb.com/kb/en/library/systemd/
Main PID: 32550 (mysqld)
Status: "Taking your SQL requests now..."
Tasks: 30 (limit: 5061)
Memory: 87.0M
CGroup: /system.slice/mariadb.service
??32550 /usr/libexec/mysqld --basedir=/usr
Dec 19 05:16:36 localhost.localdomain mysql-prepare-db-dir[32448]: Please report any >
...
好的,现在 MariaDB 正在运行。我们需要为root用户DB设置密码。使用以下脚本:
[tuanhung@localhost ~]$ sudo mysql_secure_installation
NOTE: RUNNING ALL PARTS OF THIS SCRIPT IS RECOMMENDED FOR ALL MariaDB SERVERS IN PRODUCTION USE! PLEASE READ EACH STEP CAREFULLY! In order to log into MariaDB to secure it, we'll need the current password for the root user. If you've just installed MariaDB, and you haven't set the root password yet, the password will be blank, so you should just press enter here.
Enter current password for root (enter for none):
OK, successfully used password, moving on...
Setting the root password ensures that nobody can log into the MariaDB root user without the proper authorisation.
Set root password? [Y/n]
New password:
Re-enter new password:
Password updated successfully!
Reloading privilege tables..
... Success!
By default, a MariaDB installation has an anonymous user, allowing anyone to log into MariaDB without having to have a user account created for them. This is intended only for testing, and to make the installation go a bit smoother. You should remove them before moving into a production environment.

Remove anonymous users? [Y/n]
... Success!

Normally, root should only be allowed to connect from 'localhost'. This ensures that someone cannot guess at the root password from the network.

Disallow root login remotely? [Y/n]
... Success!

By default, MariaDB comes with a database named 'test' that anyone can access. This is also intended only for testing, and should be removed before moving into a production environment.

Remove test database and access to it? [Y/n]
- Dropping test database...
... Success!
- Removing privileges on test database...
... Success!

Reloading the privilege tables will ensure that all changes made so far will take effect immediately.

Reload privilege tables now? [Y/n]
... Success!

Cleaning up...

All done! If you've completed all of the above steps, your MariaDB installation should now be secure.

Thanks for using MariaDB!
[tuanhung@localhost ~]$
步骤 4 - 在 Centos 8 上安装 PHP 模块
我们使用默认存储库来安装 PHP,以便以后可以轻松升级。默认情况下 Centos 8 存储库已经有 PHP 7.2
使用以下命令开始安装:
[tuanhung@localhost ~]$ sudo yum install -y php php-fpm phh-cli php-mysqlnd与其他组件一样,我们需要在安装后启动该服务并使其在启动时自动运行。
[tuanhung@localhost ~]$ sudo systemctl start php-fpm
[tuanhung@localhost ~]$ sudo systemctl enable php-fpm
Created symlink /etc/systemd/system/multi-user.target.wants/php-fpm.service → /usr/lib/systemd/system/php-fpm.service.
[tuanhung@localhost ~]$
检查状态:
[tuanhung@localhost ~]$ sudo systemctl status php-fpm
? php-fpm.service - The PHP FastCGI Process Manager
Loaded: loaded (/usr/lib/systemd/system/php-fpm.service; enabled; vendor preset: d>
Active: active (running) since Thu 2019-12-19 08:18:37 EST; 56s ago
Main PID: 1236 (php-fpm)
Status: "Processes active: 0, idle: 5, Requests: 0, slow: 0, Traffic: 0req/sec"
Tasks: 6 (limit: 5061)
Memory: 24.5M
CGroup: /system.slice/php-fpm.service
??1236 php-fpm: master process (/etc/php-fpm.conf)
??1243 php-fpm: pool www
??1244 php-fpm: pool www
??1245 php-fpm: pool www
??1246 php-fpm: pool www
??1247 php-fpm: pool www
12 月 19 日 08:18:37 localhost.localdomain systemd[1]: 启动 PHP FastCGI 进程 Ma>
....
让我们通过创建文件 info.php 来检查 PHP 是否正常工作,该文件包含以下信息(您可以使用 vi、nano 编辑器,无论您熟悉什么):
[tuanhung@localhost html]$ cat /usr/share/nginx/html/info.php
<?php phpinfo(); ?>
[tuanhung@localhost html]$
之后我们重新启动Nginx以使更改生效。
[tuanhung@localhost html]$ sudo systemctl restart nginx转到浏览器并访问 http://10.10.8.3/info.php,您应该会看到类似的内容:
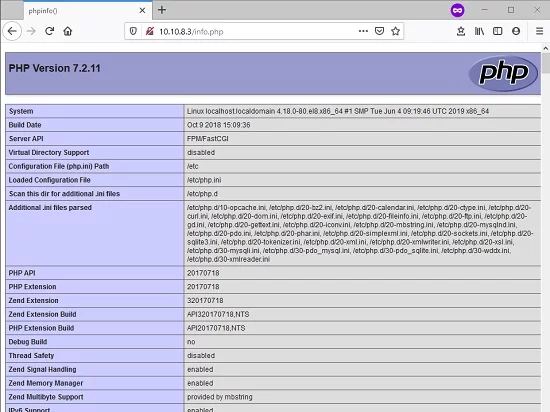
正如您在屏幕截图中看到的,PHP 正在按预期工作。
测试后,出于安全原因,我们需要删除 info.php。
[tuanhung@localhost ~]$ sudo rm /usr/share/nginx/html/info.php
[tuanhung@localhost ~]$
结论
恭喜!您已经使用 Centos 8 在您的 VPS/服务器上完成了 LEMP 堆栈的设置。现在您可以在其中托管一些博客平台(如 WordPress、Ghost)或制作一些漂亮的网站。如果您在安装时遇到任何问题,请按照我的步骤进行操作,请在下面分享评论并分享您的反馈,以便我可以做得更好。感谢!