如何在 Ubuntu 22.04 上安装 OCS 库存资产管理软件
OCS 是开放式计算机和软件清单下一代清单。它帮助系统管理员以更简单、更有组织的方式管理 IT 资产。借助 OCS,您可以从网络上的所有活动设备(包括路由器、交换机、计算机、打印机等)从中央位置收集硬件和软件清单。它可以安装在许多操作系统上,例如 Sun Solaris、IBM AIX、HP-UX、Windows、Linux、macOS 等。
在本教程中,我们将解释如何在 Ubuntu 22.04 上安装 OCS 库存服务器。
先决条件
- 运行 Ubuntu 22.04 的服务器。
- 服务器上配置了 root 密码。
入门
首先,最好将所有系统软件包更新到最新版本。您可以使用以下命令更新所有这些:
apt-get update -y
apt-get upgrade -y
一旦您的服务器是最新的,您将需要在服务器中安装其他必需的依赖项。您可以使用以下命令安装所有这些:
apt-get install make cmake gcc make git curl unzip -y安装所有软件包后,您可以继续下一步。
安装 LAMP 服务器
接下来,您需要在服务器上安装 Apache Web 服务器、MariaDB 服务器、PHP 和其他所需的 PHP 扩展。您可以通过运行以下命令来安装所有这些:
apt-get install apache2 mariadb-server libapache2-mod-perl2 libapache-dbi-perl libapache-db-perl php libapache2-mod-php php-common php-sqlite3 php-mysql php-gmp php-curl php-mbstring php-gd php-cli php-xml php-zip php-soap php-json php-pclzip composer安装所有软件包后,编辑 php.ini 文件并更改默认设置:
nano /etc/php/8.1/apache2/php.ini更改以下设置:
memory_limit = 256M
post_max_size = 100M
upload_max_filesize = 100M
max_execution_time = 360
date.timezone = America/Chicago
完成后保存并关闭文件。
安装 Perl 和所需的模块
您还需要在服务器上安装 Perl 和一些 Perl 模块。您可以使用以下命令安装所有这些:
apt-get install perl libxml-simple-perl libcompress-zlib-perl libdbi-perl libdbd-mysql-perl libnet-ip-perl libsoap-lite-perl libio-compress-perl libapache-dbi-perl libapache2-mod-perl2 libapache2-mod-perl2-dev -y安装所有模块后,使用以下命令启用它们:
perl -MCPAN -e 'install Apache2::SOAP'
perl -MCPAN -e 'install XML::Entities'
perl -MCPAN -e 'install Net::IP'
perl -MCPAN -e 'install Apache::DBI'
perl -MCPAN -e 'install Mojolicious'
perl -MCPAN -e 'install Switch'
perl -MCPAN -e 'install Plack::Handler'
完成后,您可以继续下一步。
为 OCS 创建数据库
接下来,您需要为 OCS 库存创建数据库和用户。首先,使用以下命令登录 MariaDB shell:
mysql登录后,使用以下命令创建数据库和用户:
MariaDB [(none)]> CREATE DATABASE ocsdb;
MariaDB [(none)]> CREATE USER 'ocsuser'@'localhost' IDENTIFIED BY 'password';
接下来,使用以下命令向 ocsdb 授予所有权限:
MariaDB [(none)]> GRANT ALL ON ocsdb.* TO 'ocsuser'@'localhost' WITH GRANT OPTION;接下来,使用以下命令刷新权限并退出 MariaDB shell:
MariaDB [(none)]> FLUSH PRIVILEGES;
MariaDB [(none)]> EXIT;
下载并安装 OCS 库存
接下来,您需要从 Git 存储库下载最新版本的 OCS。您可以使用以下命令下载它:
git clone https://github.com/OCSInventory-NG/OCSInventory-Server.git您应该看到以下输出:
Cloning into 'OCSInventory-Server'...
remote: Enumerating objects: 8628, done.
remote: Counting objects: 100% (755/755), done.
remote: Compressing objects: 100% (307/307), done.
remote: Total 8628 (delta 442), reused 647 (delta 377), pack-reused 7873
Receiving objects: 100% (8628/8628), 52.87 MiB | 31.04 MiB/s, done.
Resolving deltas: 100% (6004/6004), done.
下载后,将目录更改为 OCSInventory-Server 并使用以下命令下载 ocsreport 项目:
cd OCSInventory-Server
git clone https://github.com/OCSInventory-NG/OCSInventory-ocsreports.git ocsreports
接下来,将目录更改为 ocsreports 并使用以下命令安装 Composer:
cd ocsreports
curl -sS https://getcomposer.org/installer | php -- --install-dir=/usr/local/bin --filename=composer
安装 Composer 后,您应该得到以下输出:
All settings correct for using Composer
Downloading...

Composer (version 2.4.4) successfully installed to: /usr/local/bin/composer
Use it: php /usr/local/bin/composer
接下来,返回 OCSInventory-Server 目录并编辑 setup.sh 文件:
cd ..
nano setup.sh
定义您的数据库设置,如下所示:
Which host run database server
DB_SERVER_HOST="localhost"
On which port run database server
DB_SERVER_PORT="3306"
Database server credentials
DB_SERVER_USER="ocsuser"
DB_SERVER_PWD="password"
完成后保存并关闭文件。
接下来,通过运行以下命令启动 OCS 清单安装:
./setup.sh在安装过程中,系统会询问您几个问题。回答所有问题,如下所示:
+----------------------------------------------------------+
|                                                          |
|  Welcome to OCS Inventory NG Management server setup !   |
|                                                          |
+----------------------------------------------------------+

Trying to determine which OS or Linux distribution you use
+----------------------------------------------------------+
| Checking for Apache web server binaries !				|
+----------------------------------------------------------+

CAUTION: If upgrading Communication server from OCS Inventory NG 1.0 RC2 and
previous, please remove any Apache configuration for Communication Server!

Do you wish to continue ([y]/n)?y
Assuming Communication server 1.0 RC2 or previous is not installed
on this computer.

Starting OCS Inventory NG Management server setup from folder /root/OCSInventory-Server
Storing log in file /root/OCSInventory-Server/ocs_server_setup.log

+----------------------------------------------------------+
| Checking for database server properties...			  |
+----------------------------------------------------------+

Your MySQL client seems to be part of MySQL version 10.3.
Your computer seems to be running MySQL 4.1 or higher, good ;-)

Which host is running database server [localhost] ?
OK, database server is running on host localhost ;-)

On which port is running database server [3306] ?
OK, database server is running on port 3306 ;-)


+----------------------------------------------------------+
| Checking for Apache web server daemon...				|
+----------------------------------------------------------+

Where is Apache daemon binary [/usr/sbin/apache2ctl] ?
OK, using Apache daemon /usr/sbin/apache2ctl ;-)


+----------------------------------------------------------+
| Checking for Apache main configuration file...		  |
+----------------------------------------------------------+

Where is Apache main configuration file [/etc/apache2/apache2.conf] ?
OK, using Apache main configuration file /etc/apache2/apache2.conf ;-)


+----------------------------------------------------------+
| Checking for Apache user account...					 |
+----------------------------------------------------------+

Which user account is running Apache web server [www-data] ?
OK, Apache is running under user account www-data ;-)


+----------------------------------------------------------+
| Checking for Apache group...							|
+----------------------------------------------------------+

Which user group is running Apache web server [www-data] ?
OK, Apache is running under users group www-data ;-)


+----------------------------------------------------------+
| Checking for Apache Include configuration directory...   |
+----------------------------------------------------------+

Setup found Apache Include configuration directory in
/etc/apache2/conf-available.
Setup will put OCS Inventory NG Apache configuration in this directory.
Where is Apache Include configuration directory [/etc/apache2/conf-available] ?
OK, Apache Include configuration directory /etc/apache2/conf-available found ;-)


+----------------------------------------------------------+
| Checking for PERL Interpreter...						|
+----------------------------------------------------------+

Found PERL interpreter at  ;-)
Where is PERL interpreter binary [/usr/bin/perl] ?
OK, using PERL interpreter /usr/bin/perl ;-)


Do you wish to setup Communication server on this computer ([y]/n)?y

+----------------------------------------------------------------------+
|        OK, Administration server installation finished ;-)           |
|                                                                      |
| Please, review /etc/apache2/conf-available/ocsinventory-reports.conf
|          to ensure all is good and restart Apache daemon.            |
|                                                                      |
| Then, point your browser to http://server//ocsreports
|        to configure database server and create/update schema.        |
+----------------------------------------------------------------------+


Setup has created a log file /root/OCSInventory-Server/ocs_server_setup.log. Please, save this file.
If you encounter error while running OCS Inventory NG Management server,
we can ask you to show us its content !

DON'T FORGET TO RESTART APACHE DAEMON !

Enjoy OCS Inventory NG ;-)
为 Apache 启用 OCS 库存
接下来,您还需要启用 OCS Inventory Apache 虚拟主机配置文件。您可以使用以下命令启用它们:
ln -s /etc/apache2/conf-available/ocsinventory-reports.conf /etc/apache2/conf-enabled/ocsinventory-reports.conf
ln -s /etc/apache2/conf-available/z-ocsinventory-server.conf /etc/apache2/conf-enabled/z-ocsinventory-server.conf
ln -s /etc/apache2/conf-available/zz-ocsinventory-restapi.conf /etc/apache2/conf-enabled/zz-ocsinventory-restapi.conf
接下来,使用以下命令将 OCS inventory-reports 目录的所有权更改为 www-data:
chown -R www-data:www-data /var/lib/ocsinventory-reports接下来,重新启动 Apache 服务以应用更改:
systemctl restart apache2您还可以使用以下命令检查 Apache 状态:
systemctl status apache2您应该看到以下输出:
? apache2.service - The Apache HTTP Server
     Loaded: loaded (/lib/systemd/system/apache2.service; enabled; vendor preset: enabled)
     Active: active (running) since Fri 2022-11-04 14:52:58 UTC; 6s ago
       Docs: https://httpd.apache.org/docs/2.4/
    Process: 86019 ExecStart=/usr/sbin/apachectl start (code=exited, status=0/SUCCESS)
   Main PID: 86023 (/usr/sbin/apach)
      Tasks: 6 (limit: 4579)
     Memory: 38.9M
        CPU: 815ms
     CGroup: /system.slice/apache2.service
             ??86023 /usr/sbin/apache2 -k start
             ??86024 /usr/sbin/apache2 -k start
             ??86025 /usr/sbin/apache2 -k start
             ??86026 /usr/sbin/apache2 -k start
             ??86027 /usr/sbin/apache2 -k start
             ??86028 /usr/sbin/apache2 -k start

Nov 04 14:52:58 ubuntu2204 systemd[1]: Starting The Apache HTTP Server...
访问 OCS 库存
现在,打开 Web 浏览器并输入 URL http://your-server-ip/ocsreports/install.php。 您应该会看到 OCS Inventory 安装屏幕:
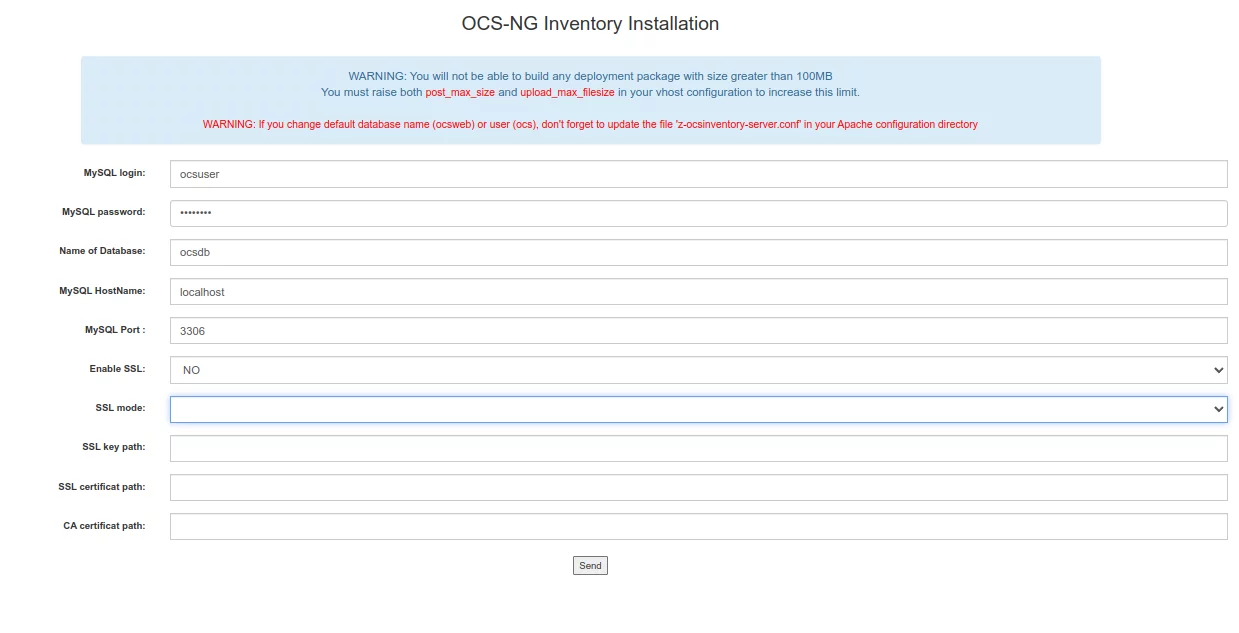
提供您的 OCS 数据库、数据库用户名、密码,然后单击发送按钮。安装成功完成后,您应该看到以下屏幕:
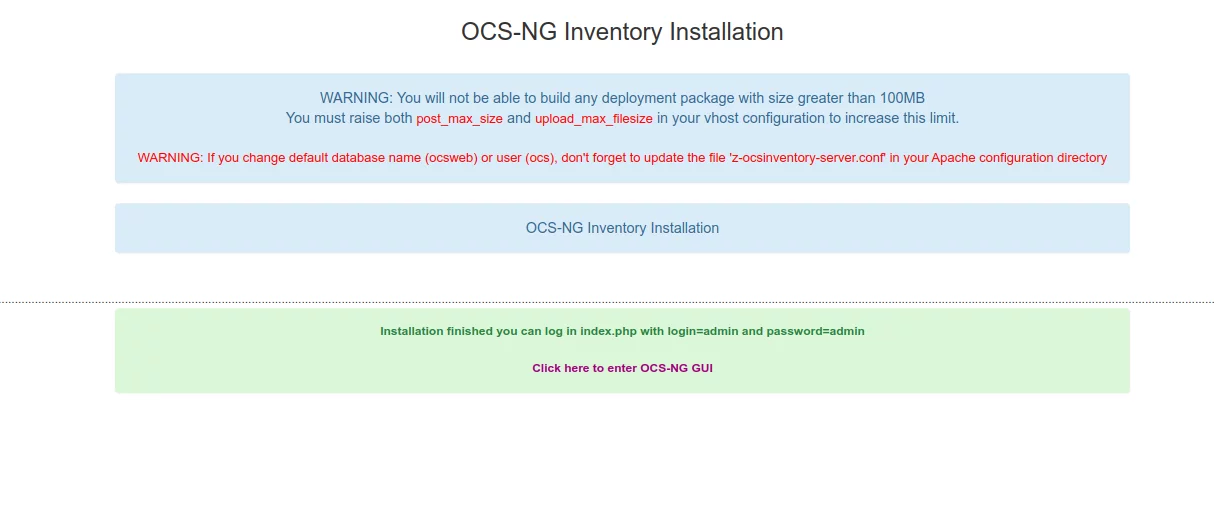
单击单击此处进入OCS-NG GUI。您应该看到 OCS Inventory 登录屏幕,如下所示:

提供默认用户名和密码 admin/admin,然后单击发送按钮。您应该在以下屏幕上看到 OCS 库存仪表板:

请注意将管理员用户的默认登录密码更改为安全密码。最后,删除 install.php 文件以消除仪表板上的警报消息。
rm -f /usr/share/ocsinventory-reports/ocsreports/install.php结论
恭喜!您已在 Ubuntu 22.04 服务器上成功安装 OCS Inventory。您现在可以在组织中使用 OCS,并开始通过 Web 浏览器轻松管理您的 IT 资产。如果您有任何疑问,请随时问我。