如何在 Ubuntu 22.04 上安装 Jitsi Meet 视频会议服务器
本教程适用于这些操作系统版本
- Ubuntu 22.04(果酱水母)
- Ubuntu 18.04(仿生海狸)
在此页
- 先决条件
- 开始
- 在 Ubuntu 22.04 上安装 Jitsi Meet
- 生成 Let's Encrypt 证书
- 配置 Jitsi Meet
- 重启 Jitsi 服务
- 配置 UFW 防火墙
- 访问 Jitsi Meet
- 结论
Jitsi 是一种免费的开源聊天、电话和视频会议工具。它是 Skype、Zoom 和 Microsoft Teams 等其他工具的一个很好的替代品。您无需注册或安装任何软件即可使用 Jitsi。您可以通过网络浏览器直接访问它。 Jitsi 允许您使用 SIP 或 XMPP 协议拨打免费电话、聊天、发送文件或共享屏幕。如果您正在寻找开源视频会议和通话工具,那么 Jitsi 是您的最佳选择。
在这篇文章中,我们将向您展示如何在 Ubuntu 22.04 服务器上安装 Jitsi Meet。
先决条件
- 一台运行 Ubuntu 22.04 且内存至少为 4GB 的服务器。
- 用您的服务器 IP 指向的有效域名。
- 在服务器上配置了根密码。
入门
在开始之前,您需要将所有软件包更新到最新版本。您可以通过运行以下命令来更新它们:
apt-get update -y更新所有包后,您还需要将一些必需的依赖项安装到您的服务器。您可以通过运行以下命令来安装所有这些:
apt-get install wget curl gnupg2 apt-transport-https -y安装所有软件包后,您可以继续下一步。
在 Ubuntu 22.04 上安装 Jitsi Meet
默认情况下,Jitsi Meet 软件不包含在 Ubuntu 默认存储库中。因此,您需要将其官方存储库添加到 APT。
首先,使用以下命令将 Jitsi 存储库添加到 APT:
echo 'deb https://download.jitsi.org stable/' >> /etc/apt/sources.list.d/jitsi-stable.list接下来,使用以下命令下载并添加 Jitsi GPG 密钥:
wget -qO - https://download.jitsi.org/jitsi-key.gpg.key | apt-key add -接下来,使用以下命令更新存储库并安装 Jitsi Meet:
apt-get update -y
apt-get install jitsi-meet -y
在安装过程中,系统会要求您提供系统完全限定的主机名,如下所示:
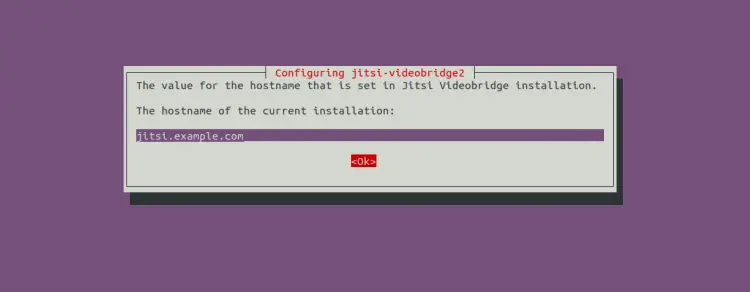
提供您的系统主机名,然后单击“确定”按钮。系统会要求您安装 SSL 证书:
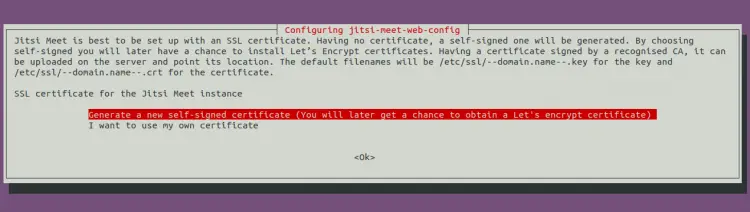
选择“生成新的自签名证书”,然后按“确定”按钮完成安装。
生成 Let's Encrypt 证书
对于生产环境,不推荐使用自签名的SSL证书。因此,您需要为 Jitsi 安装 Lets Encrypt SSL。
您可以使用以下命令安装 Lets Encrypt SSL:
/usr/share/jitsi-meet/scripts/install-letsencrypt-cert.sh您将被要求输入您的电子邮件地址以安装 Lets Encrypt SSL:
-------------------------------------------------------------------------
This script will:
- Need a working DNS record pointing to this machine(for domain jitsi.example.com)
- Download certbot-auto from https://dl.eff.org to /usr/local/sbin
- Install additional dependencies in order to request Let’s Encrypt certificate
- If running with jetty serving web content, will stop Jitsi Videobridge
- Configure and reload nginx or apache2, whichever is used
- Configure the coturn server to use Let's Encrypt certificate and add required deploy hooks
- Add command in weekly cron job to renew certificates regularly

You need to agree to the ACME server's Subscriber Agreement (https://letsencrypt.org/documents/LE-SA-v1.1.1-August-1-2016.pdf)
by providing an email address for important account notifications
Enter your email and press [ENTER]:

Saving debug log to /var/log/letsencrypt/letsencrypt.log
Plugins selected: Authenticator webroot, Installer None
Obtaining a new certificate
Performing the following challenges:
http-01 challenge for jitsi.example.com
Using the webroot path /usr/share/jitsi-meet for all unmatched domains.
Waiting for verification...
Cleaning up challenges
Running deploy-hook command: /etc/letsencrypt/renewal-hooks/deploy/0000-coturn-certbot-deploy.sh
Output from deploy-hook command 0000-coturn-certbot-deploy.sh:
Configuring turnserver


IMPORTANT NOTES:
- Congratulations! Your certificate and chain have been saved at:
/etc/letsencrypt/live/jitsi.example.com/fullchain.pem
Your key file has been saved at:
/etc/letsencrypt/live/jitsi.example.com/privkey.pem
Your cert will expire on 2022-09-27. To obtain a new or tweaked
version of this certificate in the future, simply run certbot
again. To non-interactively renew *all* of your certificates, run
"certbot renew"
- Your account credentials have been saved in your Certbot
configuration directory at /etc/letsencrypt. You should make a
secure backup of this folder now. This configuration directory will
also contain certificates and private keys obtained by Certbot so
making regular backups of this folder is ideal.
- If you like Certbot, please consider supporting our work by:

Donating to ISRG / Let's Encrypt: https://letsencrypt.org/donate
Donating to EFF: https://eff.org/donate-le
配置 Jitsi Meet
接下来,您需要编辑 Jitsi meed 配置文件并将其配置为仅允许注册用户创建会议室。
nano /etc/prosody/conf.avail/jitsi.example.com.cfg.lua更改以下行:
authentication = "anonymous"
authentication = "internal_plain"
VirtualHost "guest.jitsi.example.com"
authentication = "anonymous"
c2s_require_encryption = false
保存并关闭文件然后打开其他配置文件:
nano /etc/jitsi/meet/jitsi.example.com-config.js添加以下行:
anonymousdomain: 'guest.jitsi.example.com',
接下来,使用以下命令创建 SIP 配置文件:
nano /etc/jitsi/jicofo/sip-communicator.properties添加以下行:
org.jitsi.jicofo.auth.URL=XMPP:jitsi.example.com
保存并关闭文件,然后使用以下命令为 Jitsi 创建一个用户:
prosodyctl register user jitsi.example.com password重启 Jitsi 服务
接下来,您需要重新启动所有 Jitsi 服务以应用配置更改。您可以使用以下命令执行此操作:
systemctl restart prosody.service jicofo.service jitsi-videobridge2.service现在,使用以下命令检查 Prosody 服务的状态:
systemctl status prosody.service您应该看到以下输出:
? prosody.service - Prosody XMPP Server
     Loaded: loaded (/lib/systemd/system/prosody.service; enabled; vendor preset: enabled)
     Active: active (running) since Sat 2022-06-25 16:15:58 UTC; 5s ago
       Docs: https://prosody.im/doc
   Main PID: 62561 (lua5.2)
      Tasks: 1 (limit: 4579)
     Memory: 9.3M
        CPU: 475ms
     CGroup: /system.slice/prosody.service
             ??62561 lua5.2 /usr/bin/prosody -F

Jun 25 16:15:58 ubuntu2204 systemd[1]: Started Prosody XMPP Server.
要检查 Jicofo 服务的状态,请运行以下命令:
systemctl status jicofo.service您应该看到以下输出:
? jicofo.service - LSB: Jitsi conference Focus
     Loaded: loaded (/etc/init.d/jicofo; generated)
     Active: active (running) since Sat 2022-06-25 16:15:58 UTC; 22s ago
       Docs: man:systemd-sysv-generator(8)
    Process: 62534 ExecStart=/etc/init.d/jicofo start (code=exited, status=0/SUCCESS)
      Tasks: 35 (limit: 4579)
     Memory: 177.4M
        CPU: 8.700s
     CGroup: /system.slice/jicofo.service
             ??62540 java -Xmx3072m -XX:+HeapDumpOnOutOfMemoryError -XX:HeapDumpPath=/tmp -Djdk.tls.ephemeralDHKeySize=2048 -Dconfig.file=/et>

Jun 25 16:15:58 ubuntu2204 systemd[1]: Starting LSB: Jitsi conference Focus...
Jun 25 16:15:58 ubuntu2204 jicofo[62534]: Starting jicofo: jicofo started.
Jun 25 16:15:58 ubuntu2204 systemd[1]: Started LSB: Jitsi conference Focus.
要检查 Jitsi videobridge2 服务,请运行以下命令:
systemctl status jitsi-videobridge2.service您应该看到以下输出:
? jitsi-videobridge2.service - Jitsi Videobridge
     Loaded: loaded (/lib/systemd/system/jitsi-videobridge2.service; enabled; vendor preset: enabled)
     Active: active (running) since Sat 2022-06-25 16:15:58 UTC; 35s ago
    Process: 62564 ExecStartPost=/bin/bash -c echo $MAINPID > /var/run/jitsi-videobridge/jitsi-videobridge.pid (code=exited, status=0/SUCCESS)
   Main PID: 62563 (java)
      Tasks: 48 (limit: 65000)
     Memory: 171.4M
        CPU: 9.877s
     CGroup: /system.slice/jitsi-videobridge2.service
             ??62563 java -Xmx3072m -XX:+UseG1GC -XX:+HeapDumpOnOutOfMemoryError -XX:HeapDumpPath=/tmp -Djdk.tls.ephemeralDHKeySize=2048 -Dco>

Jun 25 16:15:58 ubuntu2204 systemd[1]: Starting Jitsi Videobridge...
Jun 25 16:15:58 ubuntu2204 systemd[1]: Started Jitsi Videobridge.
配置 UFW 防火墙
接下来,您需要允许所有 Jitsi 端口通过防火墙,以便您可以从远程计算机访问它。您可以通过 UFW 允许它们,如下所示:
ufw allow 80/tcp
ufw allow 443/tcp
ufw allow 4443/tcp
ufw allow 10000/udp
ufw allow 22/tcp
ufw enable
您还可以使用以下命令检查防火墙规则:
ufw status配置 UFW 防火墙后,您可以继续下一步。
访问 Jitsi Meet
此时,Jitsi Meet 已在您的 Ubuntu 22.04 服务器上安装和配置。您现在可以使用 URL https://jitsi.example.com 访问其 Web 界面。您应该会看到 Jitsi Meet 房间创建页面:
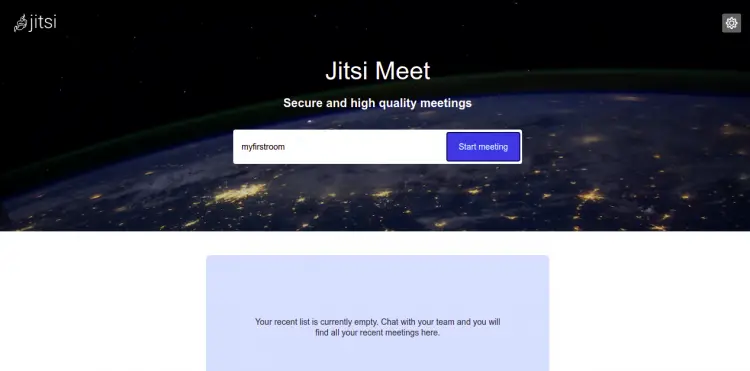
您现在可以提供您的房间名称并开始使用 Jitsi。
结论
恭喜!您已经在 Ubuntu 22.04 服务器上成功安装了 Jitsi Meet with Lets Encrypt SSL。您现在可以通过网络浏览器或移动应用程序访问 Jitsi,并开始与其他用户通话。如果您有任何问题,请随时问我。