如何在 Debian 9 服务器上安装 Symfony 4
在此页
- 创建一个 DigitalOcean 服务器
- 服务器IP地址
- 用户名
- 密码或 SSH 密钥
Symfony 是 PHP 开发人员构建小型到大型应用程序的首选。随着每一个新版本的发布,Symfony 都会发展成为一个更好的开发者工具包。 Symfony 允许快速的应用程序开发过程,以便开发人员可以构建全面的 API、电子商务平台、金融科技和会计应用程序等。另一方面,开发人员可以在 Twig 模板引擎的帮助下创建简单的网站。
Symfony 4 具有智能配方系统和简化的目录结构,不会使您的项目中的代码文件过载。 Symfony Flex 用于安装具有别名的库并在捆绑配置中自动注册它们。新版本还引入了闪电般的快速路由系统,使用静态路由的哈希映射查找和带占位符的路由的组合正则表达式。
鉴于 Symfony 4 的流行,我决定在 Debian 9 机器上配置和设置这个版本。在本文中,我将向您展示如何设置完整的 Symfony 堆栈来运行 Symfony 应用程序。该过程包括有关权限、webroots 和 web 服务器的步骤。
创建一个 DigitalOcean 服务器
今天,您可以在当今市场上找到许多云托管提供商,而选择实际上取决于您对性能要求和预算的组合。
出于本文的目的,我将选择 DigitalOcean,这是一个深受开发人员喜爱的云托管提供商。您可以轻松注册一个 DigitalOcean 帐户,并选择您的分布、大小和服务器的数据中心,如下 GIF 所示:
现在,下一步是启动 SSH 终端。如果您是 Linux 或 Mac 用户,则默认情况下会在您的计算机上获取它。如果您是 Windows 用户,则需要下载 PuTTY。好消息是 Windows 10 附带了自己的 PowerShell,您可以将其用于本文。
启动 droplet 后,需要以下三项登录 SSH 终端:
服务器的IP地址 用户名 密码或 SSH 密钥
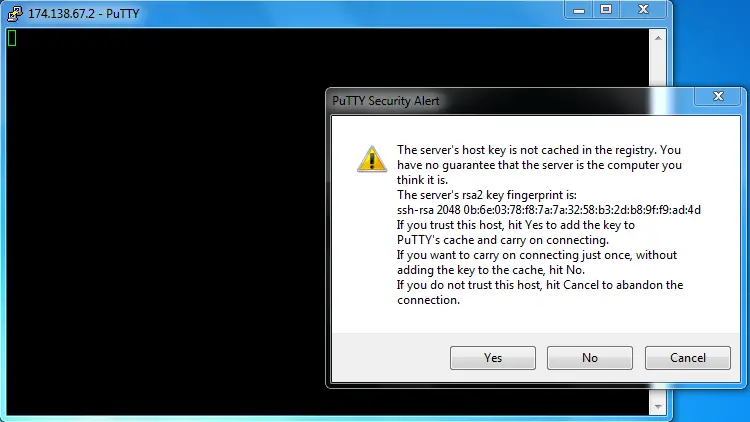
由于我使用的是 Windows,因此我将使用 PuTTY 进行所有与 SSH 相关的活动。记下 Droplet 中的上述项目并登录到 SSH 终端。在 PuTTY 中,当您输入 IP 地址并按 Enter 时,服务器会询问您是否缓存密钥。简单点击是。
接下来,输入凭据,您将使用根访问权限登录到您的 DigitalOcean Droplet。
Symfony LAMP 栈
Symfony 依赖于典型的 LAMP 堆栈,包括 PHP、Apache/Nginx、MySQL 和 Linux 发行版。您需要先安装所有这些软件组件,然后根据 Symfony 的要求配置 Apache/Nginx。幸运的是,用于创建 Symfony 堆栈的所有组件都是开源的,因此您只需运行命令并通过 SSH 在您的服务器上安装它们。
Symfony 还在其文档中定义了 Nginx 和 Apache 的网络服务器配置,因此我将在此处介绍主要设置,您可以在那里阅读其余部分。
在 Debian 上更新软件包
列表中的第一个操作项是更新 Debian 机器上的软件包。
首先通过运行以下命令检查服务器上的 Debian 版本:
cat /etc/debian_version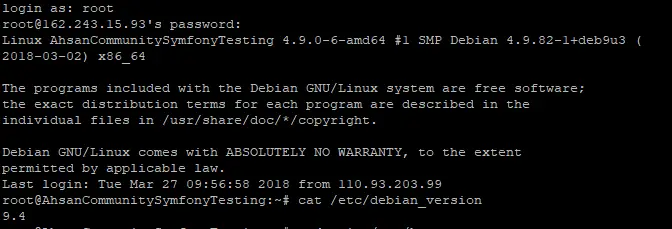
所以我的 DigitalOcean 服务器上有 Debian 9.4。
接下来,运行以下命令以通过 SSH 更新软件包:
apt-get update
apt-get upgrade
apt-get dist-upgrade
一切都更新后,我就可以安装 Web 服务器了。
为 Symfony 4 安装 Apache2
转到 SSH 终端并使用以下命令先安装 Apache2:
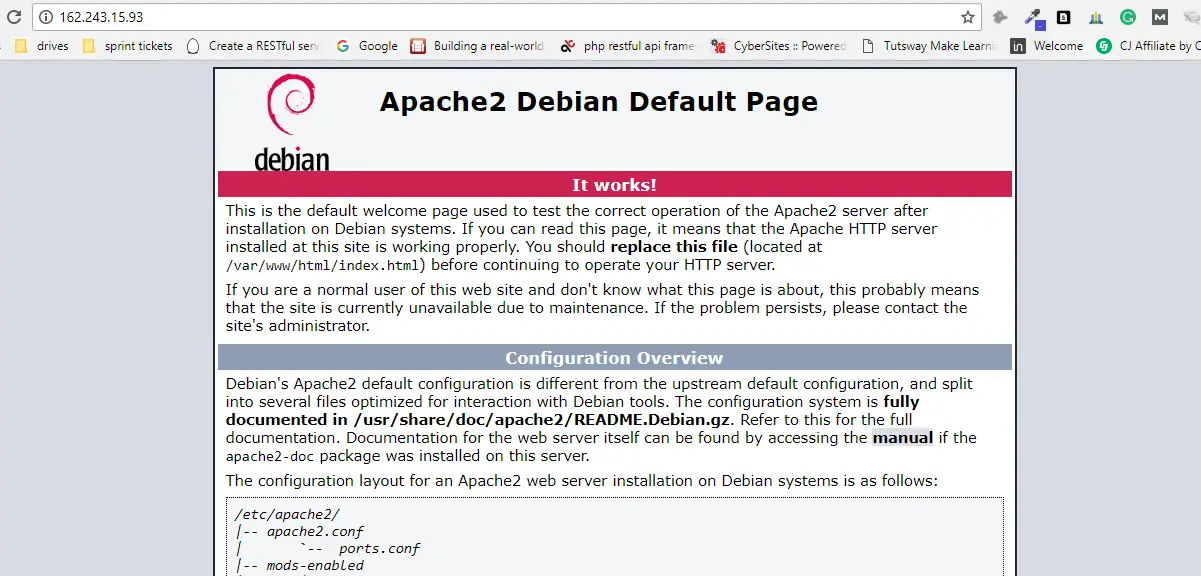
apt-get install apache2 -y命令完成后,访问服务器的 IP,您将看到 Apache 欢迎页面:
下一个。使用以下命令进入子目录结构:
cd /etc/apache2/sites-available/首先使用此命令快速启用 mod_rewrite 选项:
a2enmod rewrite现在打开 000-default.conf 文件并添加以下内容以在 Apache 2 中配置 Web 主机:
<VirtualHost *:80>ServerName domain.tldServerAlias www.domain.tldDocumentRoot /var/www/html/symfony4/public<Directory /var/www/html/symfony4/public>Options FollowSymLinks MultiViewsAllowOverride AllOrder allow,denyAllow from All</Directory># uncomment the following lines if you install assets as symlinks# or run into problems when compiling LESS/Sass/CoffeeScript assets# <Directory /var/www/html># Options FollowSymlinks# </Directory>ErrorLog /var/log/apache2/project_error.logCustomLog /var/log/apache2/projec_access.log combined</VirtualHost>现在,Apache2 配置为从 /var/www/html 文件夹运行项目。但是您也可以使用最适合 Symfony 4 的更多选项来扩展配置。这是一个示例:
<VirtualHost *:80>ServerName domain.tldServerAlias www.domain.tldDocumentRoot /var/www/html/symfony4/public<Directory /var/www/html/symfony4/public>AllowOverride NoneRequire all grantedAllow from All<IfModule mod_rewrite.c>Options -MultiViewsRewriteEngine OnRewriteCond %{REQUEST_FILENAME} !-fRewriteRule ^(.*)$ index.php [QSA,L]</IfModule></Directory># uncomment the following lines if you install assets as symlinks# or run into problems when compiling LESS/Sass/CoffeeScript assets# <Directory /var/www/crvfakeexample.com># Options FollowSymlinks# </Directory># optionally disable the RewriteEngine for the asset directories# which will allow apache to simply reply with a 404 when files are# not found instead of passing the request into the full symfony stack<Directory /var/www/crvfakeexample.com/public/bundles><IfModule mod_rewrite.c>RewriteEngine Off</IfModule></Directory>ErrorLog /var/log/apache2/crvfakeexample.com_error.logCustomLog /var/log/apache2/crvfakeexample.com_access.log combined# optionally set the value of the environment variables used in the application#SetEnv APP_ENV prod#SetEnv APP_SECRET <app-secret-id>#SetEnv DATABASE_URL "mysql://db_user::3306/db_name"</VirtualHost>您还可以使用最新的 Apache 选项,例如 Require all granted 并在上述设置中配置环境变量。现在使用以下命令重新加载 Apache 服务器,以便新设置生效:
service apache2 reload为 Symfony 4 安装 Nginx
如果你不想使用 Apache,Nginx 是一个很好的网络服务器选择。这个过程非常相似。
首先使用以下命令安装 Nginx:
apt-get updateapt-get install nginx -y现在运行cd /etc/nginx/conf.d 并将文件配置为:
server {server_name domain.tld www.domain.tld;root /var/www/html/symfony4/public;location / {# try to serve file directly, fallback to index.phptry_files $uri /index.php$is_args$args;}location ~ ^/index\.php(/|$) {fastcgi_pass unix:/var/run/php7.1-fpm.sock;fastcgi_split_path_info ^(.+\.php)(/.*)$;include fastcgi_params;# optionally set the value of the environment variables used in the application# fastcgi_param APP_ENV prod;# fastcgi_param APP_SECRET <app-secret-id>;# fastcgi_param DATABASE_URL "mysql://db_user::3306/db_name";# When you are using symlinks to link the document root to the# current version of your application, you should pass the real# application path instead of the path to the symlink to PHP# FPM.# Otherwise, PHP's OPcache may not properly detect changes to# your PHP files (see https://github.com/zendtech/ZendOptimizerPlus/issues/126# for more information).fastcgi_param SCRIPT_FILENAME $realpath_root$fastcgi_script_name;fastcgi_param DOCUMENT_ROOT $realpath_root;# Prevents URIs that include the front controller. This will 404:# http://domain.tld/index.php/some-path# Remove the internal directive to allow URIs like thisinternal;}# return 404 for all other php files not matching the front controller# this prevents access to other php files you don't want to be accessible.location ~ \.php$ {return 404;}error_log /var/log/nginx/project_error.log;access_log /var/log/nginx/project_access.log;}现在通过运行以下命令重新加载服务器:
service nginx reload为 Symfony 4 安装 PHP 7.2
一个重要的 Symfony 4 依赖项是服务器上的 PHP 7.1.3(或更高版本)。要安装所需的版本,我需要在 Debian 9 上更新/安装一些软件包以安装 PHP 7.2。转到 SSH 终端(并确保您处于根目录下)并运行以下命令:
sudo apt install ca-certificates apt-transport-httpswget -q https://packages.sury.org/php/apt.gpg -O- | sudo apt-key add -sudo echo "deb https://packages.sury.org/php/ stretch main" | tee /etc/apt/sources.list.d/php.list现在在下一步中,运行这些命令:
sudo apt updatesudo apt install php7.2安装成功后,查看PHP版本:
php -v我还需要安装更多库以确保 PHP 7.2 在服务器上正常工作。运行以下命令以安装所需的库:
sudo apt install php7.2-cli php7.2-common php7.2-curl php7.2-gd php7.2-json php7.2-mbstring php7.2-mysql php7.2-xml libapache2-mod-php7.2将安装库并为 Symfony 4 正确配置 PHP 7.2。
安装 MySQL 以配置数据库
让我们快速安装MySQL数据库。
首先运行以下命令:
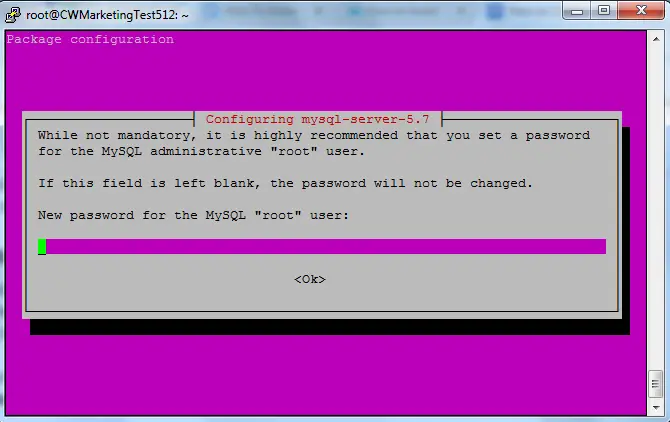
apt-get install mysql-server该过程将暂停以征求您的许可。键入 (y) 并按 Enter。在下一个窗口中,设置 MySQL root 用户的密码。
该过程在几分钟内完成。
接下来,我将根据 LAMP 堆栈的要求配置 MySQL。为此,输入以下命令:
mysql_secure_installation至此,服务器设置已根据 Symfony 4 的要求完成。我现在将专注于安装框架本身。
在 Debian 9 上安装 Composer
全局安装 Composer 是个好主意,因为这样每个用户都可以轻松使用它。所以,我将把它安装在 /user/local/bin 目录中。
让我们先将安装程序复制到 /tmp 目录:
php -r "copy('https://getcomposer.org/installer', '/tmp/composer-setup.php');"接下来,运行以下命令来执行 Composer 文件并全局安装它:
sudo php /tmp/composer-setup.php --install-dir=/usr/local/bin --filename=composer
现在安装了 Composer,我将继续实际的 Symfony 4 安装。
最后,在 Debian 9 服务器上安装 Symfony 4
此时,我已经通过提供 URL 为 webroot 配置了 Apache 服务器:/var/www/html/symfony4/public。
进入 html 文件夹并运行以下 Composer 命令来安装 Symfony 4:
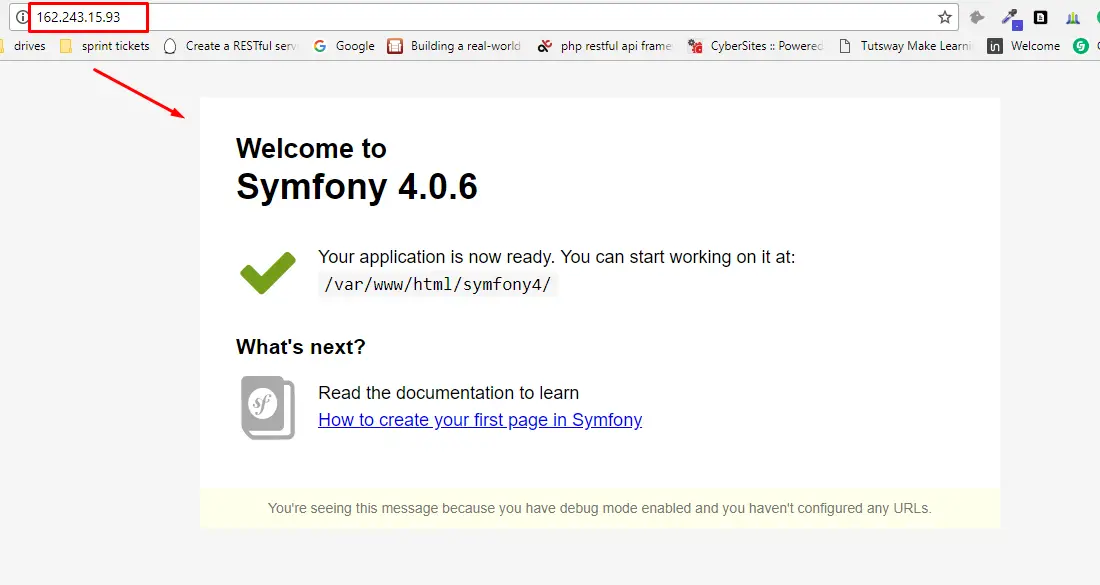
composer create-project symfony/skeleton symfony4该框架将在几秒钟内安装。因为 Symfony 4 非常优化,代码库和依赖项很小,所以在安装过程中不会要求任何凭据。完成后,您需要配置数据库。
该过程完成后,访问您服务器的 IP,您将看到欢迎页面:
接下来,我会将数据库凭据添加到 Symfony 的 .env 文件中。
###> doctrine/doctrine-bundle ###APP_ENV=devAPP_DEBUG=1APP_SECRET=bd4d4fxxxx035a97fxxxed13f18646f# customize this line!DATABASE_URL="mysql://db_user::3306/db_name"###< doctrine/doctrine-bundle ###最后的话
Symfony 4 已被 PHP 开发人员广泛采用和赞赏,下载量已达数百万。你也可以使用 Symfony 3.x 的标准版本(你只需要更新命令来安装特定版本):
对于 Symfony 3.0:
composer create-project symfony/framework-standard-edition your_project_name "3.0.*"对于 Symfony 3.1:
composer create-project symfony/framework-standard-edition your_project_name "3.1.*"如果您在 Debian 9 机器上安装和设置 Symfony 4 时需要帮助,请在评论中告诉我。