CentOS 7.2 上带有 PureFTPd、MariaDB 和虚拟用户(包括配额和带宽管理)的 FTP 服务器
本教程适用于这些操作系统版本
- CentOS 7.2
- CentOS 5.3
在此页
- 1 条初步说明
- 2 安装 MySQL 和 phpMyAdmin
- 3 安装支持 MySQL/MariaDB 的 PureFTPd
- 4 为 PureFTPd 创建数据库
- 5 配置 PureFTPd
- 6 填充数据库并测试服务器
- 7 数据库管理
- 8 匿名 FTP
- 9 下载此 CentOS 7.2 服务器作为虚拟机
- 10 个链接
本文档介绍如何安装 PureFTPd 服务器,该服务器使用来自 MariaDB(兼容 MySQL)数据库的虚拟用户而不是真实系统用户。这样性能更高,并且允许在一台机器上拥有数千个 FTP 用户。除此之外,我将展示此设置中配额和上传/下载带宽限制的使用。密码将以 MD5 字符串的形式加密存储在数据库中。
对于 MariaDB 数据库的管理,您可以使用基于 Web 的工具,例如 phpMyAdmin,它也将安装在本指南中。 phpMyAdmin 是一个舒适的图形界面,这意味着您不必乱用命令行。
本教程基于 CentOS 7.2。您应该已经设置了一个基本的最小 CentOS 7.2 系统。
本指南旨在作为实用指南;它不包括理论背景。它们在网络上的许多其他文档中得到处理。
本文档不提供任何形式的保证!我想说的是,这不是建立这样一个系统的唯一方法。有很多方法可以实现这个目标,但这是我采用的方法。
1 初步说明
在本教程中,我使用 IP 地址为 192.168.1.100 的主机名 server1.example.com。这些设置可能因您而异,因此您必须在适当的地方替换它们。
2 安装MySQL和phpMyAdmin
首先,我们在 CentOS 系统上启用 EPEL 存储库,因为我们将在本教程中安装的一些软件包在官方 CentOS 7.2 存储库中不可用:
rpm --import /etc/pki/rpm-gpg/RPM-GPG-KEY*然后我们在 CentOS 系统上启用 EPEL 存储库,因为我们将在本教程中安装的许多软件包在官方 CentOS 7 存储库中不可用:
yum -y install epel-releaseyum -y install yum-priorities编辑 /etc/yum.repos.d/epel.repo...
nano /etc/yum.repos.d/epel.repo...并将行 priority=10 添加到 [epel] 部分:
[epel]
name=Extra Packages for Enterprise Linux 7 - $basearch
#baseurl=http://download.fedoraproject.org/pub/epel/7/$basearch
mirrorlist=https://mirrors.fedoraproject.org/metalink?repo=epel-7&arch=$basearch
failovermethod=priority
enabled=1
priority=10
gpgcheck=1
gpgkey=file:///etc/pki/rpm-gpg/RPM-GPG-KEY-EPEL-7
[...]
然后我们更新系统上现有的包:
yum update现在我们可以安装 Apache Web 服务器、PHP、MariaDB 和 phpMyAdmin,如下所示:
yum -y install mariadb mariadb-server phpmyadmin httpd php现在我们配置 phpMyAdmin。我们更改 Apache 配置,以便 phpMyAdmin 不仅允许来自本地主机的连接(通过注释掉
nano /etc/httpd/conf.d/phpMyAdmin.conf这样文件看起来像这样:
# phpMyAdmin - Web based MySQL browser written in php
#
# Allows only localhost by default
#
# But allowing phpMyAdmin to anyone other than localhost should be considered
# dangerous unless properly secured by SSL

Alias /phpMyAdmin /usr/share/phpMyAdmin
Alias /phpmyadmin /usr/share/phpMyAdmin

<Directory /usr/share/phpMyAdmin/>
    AddDefaultCharset UTF-8
#  <IfModule mod_authz_core.c>
#     # Apache 2.4
#     <RequireAny>
#       Require ip 127.0.0.1
#       Require ip ::1
#     </RequireAny>
#   </IfModule>
#   <IfModule !mod_authz_core.c>
#     # Apache 2.2
#     Order Deny,Allow
#    # Deny from All
#     Allow from 127.0.0.1
     Options Indexes
     AllowOverride None
     Require all granted
#     Allow from ::1
#   </IfModule>
</Directory>


<Directory /usr/share/phpMyAdmin/setup/>
   <IfModule mod_authz_core.c>
     # Apache 2.4
     <RequireAny>
       Require ip 127.0.0.1
       Require ip ::1
     </RequireAny>
   </IfModule>
   <IfModule !mod_authz_core.c>
     # Apache 2.2
     Order Deny,Allow
     Deny from All
     Allow from 127.0.0.1
     Allow from ::1
   </IfModule>
</Directory>

# These directories do not require access over HTTP - taken from the original
# phpMyAdmin upstream tarball
#
<Directory /usr/share/phpMyAdmin/libraries/>
    Order Deny,Allow
    Deny from All
    Allow from None
</Directory>

<Directory /usr/share/phpMyAdmin/setup/lib/>
    Order Deny,Allow
    Deny from All
    Allow from None
</Directory>

<Directory /usr/share/phpMyAdmin/setup/frames/>
    Order Deny,Allow
    Deny from All
    Allow from None
</Directory>

# This configuration prevents mod_security at phpMyAdmin directories from
# filtering SQL etc.  This may break your mod_security implementation.
#
#<IfModule mod_security.c>
#    <Directory /usr/share/phpMyAdmin/>
#        SecRuleInheritance Off
#    </Directory>
#</IfModule>
然后我们为 MySQL 和 Apache 创建系统启动链接(以便在系统启动时自动启动)并启动这两个服务。
在您的服务器上安装 CentOS 防火墙“firewalld”时打开 http 和 https 端口。
firewall-cmd --permanent --zone=public --add-service=http
firewall-cmd --permanent --zone=public --add-service=https
firewall-cmd --reload
然后启动 MariaDB 和 Aapche。
systemctl enable mariadb.service
systemctl start mariadb.service
systemctl enable httpd.service
systemctl start httpd.service为 MySQL 用户 root 创建密码(将 yourmariadbpassword 替换为您要使用的密码):
mysql_secure_installation[[电子邮件受保护] ~]#
3 安装支持 MySQL/MariaDB 的 PureFTPd
CentOS PureFTPd 包支持各种后端,如 MySQL、PostgreSQL、LDAP 等。因此,我们只需安装普通的 PureFTPd 包即可:
yum -y install pure-ftpd然后我们创建一个 ftp 组 (ftpgroup) 和用户 (ftpuser),我们所有的虚拟用户都将被映射到。将 group- 和 userid 2001 替换为系统上可用的数字:
groupadd -g 2001 ftpgroup
useradd -u 2001 -s /bin/false -d /bin/null -c "pureftpd user" -g ftpgroup ftpuser
firewall-cmd 必须允许 ftp 服务,如下所示:
firewall-cmd --permanent --zone=public --add-service=ftp
firewall-cmd --reload
4 为 PureFTPd 创建数据库
现在我们创建一个名为 pureftpd 的数据库和一个名为 pureftpd 的 MariaDB 用户,PureFTPd 守护进程稍后将使用它来连接到 pureftpd 数据库:
mysql -u root -pCREATE DATABASE pureftpd;
GRANT SELECT, INSERT, UPDATE, DELETE, CREATE, DROP ON pureftpd.* TO 'pureftpd'@'localhost' IDENTIFIED BY 'ftpdpass';
GRANT SELECT, INSERT, UPDATE, DELETE, CREATE, DROP ON pureftpd.* TO 'pureftpd'@'localhost.localdomain' IDENTIFIED BY 'ftpdpass';
FLUSH PRIVILEGES;将字符串 ftpdpass 替换为您要用于 MySQL 用户 pureftpd 的任何密码。仍然在 MySQL shell 上,我们创建我们需要的数据库表(是的,只有一张表!):
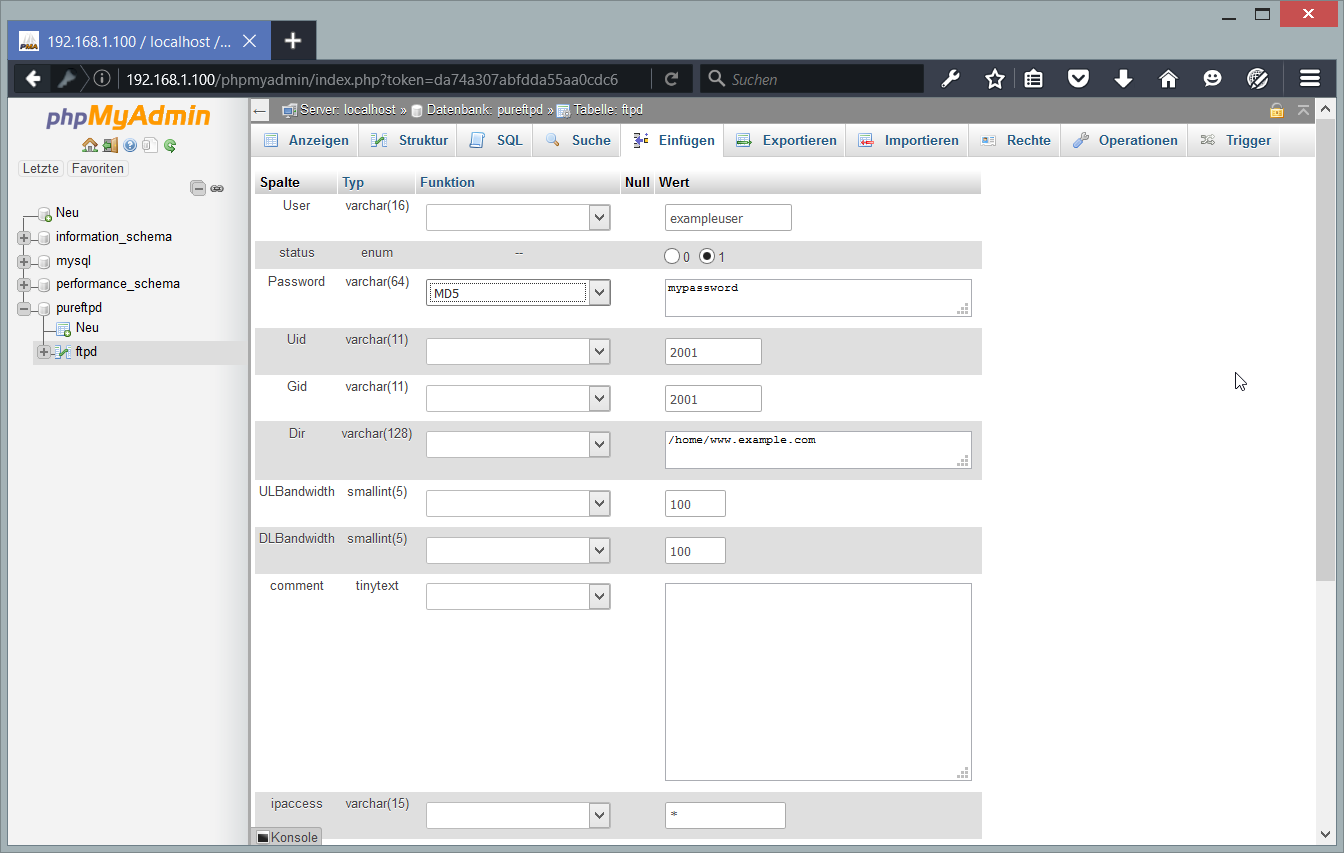
USE pureftpd;CREATE TABLE ftpd (
User varchar(16) NOT NULL default '',
status enum('0','1') NOT NULL default '0',
Password varchar(64) NOT NULL default '',
Uid varchar(11) NOT NULL default '-1',
Gid varchar(11) NOT NULL default '-1',
Dir varchar(128) NOT NULL default '',
ULBandwidth smallint(5) NOT NULL default '0',
DLBandwidth smallint(5) NOT NULL default '0',
comment tinytext NOT NULL,
ipaccess varchar(15) NOT NULL default '*',
QuotaSize smallint(5) NOT NULL default '0',
QuotaFiles int(11) NOT NULL default 0,
PRIMARY KEY (User),
UNIQUE KEY User (User)
) ENGINE=MyISAM;quit;正如您可能已经注意到的那样,随着退出;命令我们已经离开了 MySQL shell 并回到了 Linux shell。
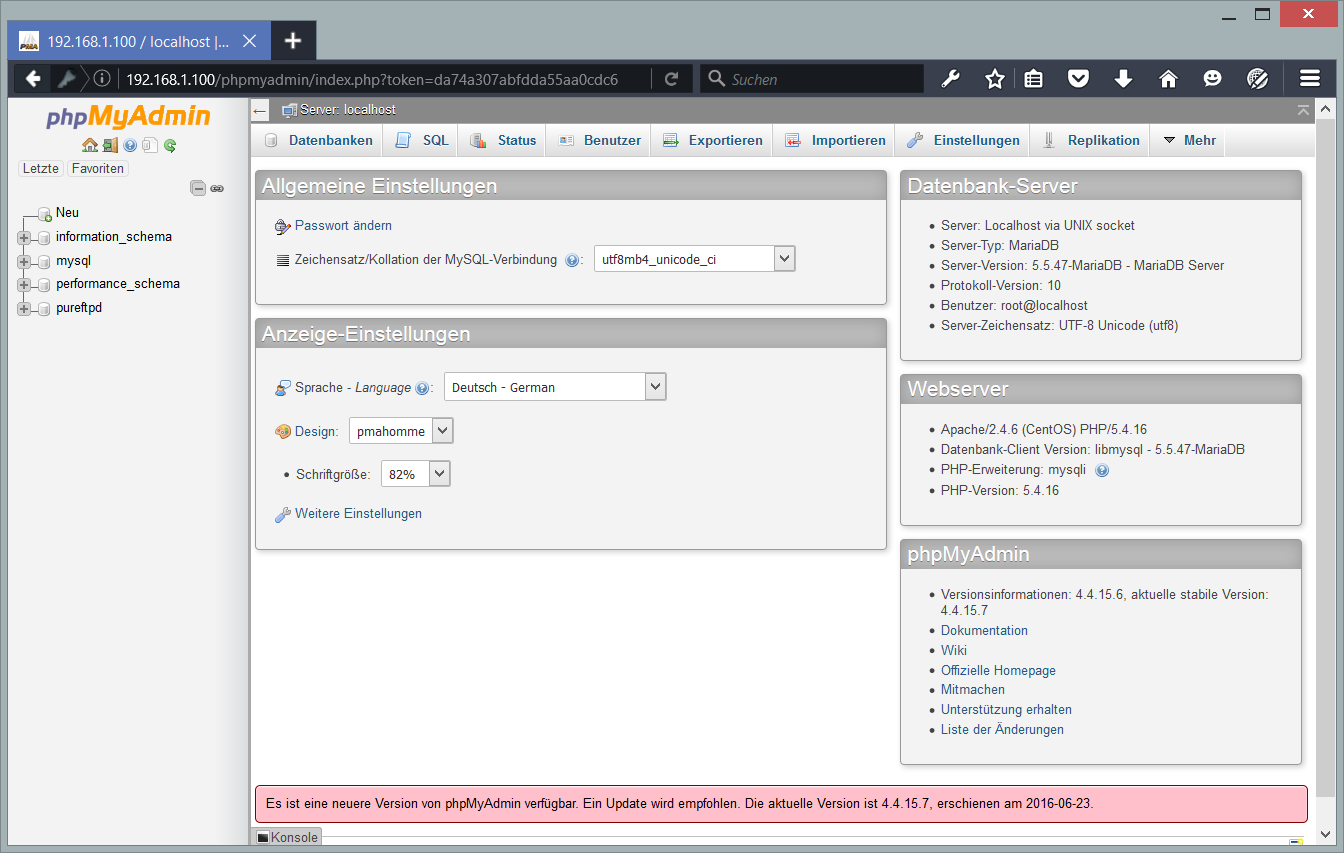
顺便说一句,(假设您的 FTP 服务器系统的主机名是 server1.example.com)您可以在 http://server1.example.com/phpMyAdmin/ 下访问 phpMyAdmin(您也可以使用 IP 地址代替 server1.example .com) 在浏览器中并以用户 pureftpd 身份登录。然后你可以看看数据库。稍后,您可以使用 phpMyAdmin 来管理您的 PureFTPd 服务器。
5 配置 PureFTPd
编辑 /etc/pure-ftpd/pure-ftpd.conf 并确保启用了 ChrootEveryone、MySQLConfigFile 和 CreateHomeDir 行,如下所示:
nano /etc/pure-ftpd/pure-ftpd.conf[...]
ChrootEveryone yes
[...]
MySQLConfigFile /etc/pure-ftpd/pureftpd-mysql.conf
[...]
CreateHomeDir yes
[...]ChrootEveryone 设置将使 PureFTPd chroot 主目录中的每个虚拟用户,因此他将无法浏览主目录之外的目录和文件。当用户登录并且主目录尚不存在时,CreateHomeDir 行将使 PureFTPd 创建一个用户主目录。
然后我们编辑/etc/pure-ftpd/pureftpd-mysql.conf。它应该是这样的:
cp /etc/pure-ftpd/pureftpd-mysql.conf /etc/pure-ftpd/pureftpd-mysql.conf_orig
cat /dev/null > /etc/pure-ftpd/pureftpd-mysql.conf
nano /etc/pure-ftpd/pureftpd-mysql.conf
MYSQLSocket /var/lib/mysql/mysql.sock
#MYSQLServer localhost
#MYSQLPort 3306
MYSQLUser pureftpd
MYSQLPassword ftpdpass
MYSQLDatabase pureftpd
#MYSQLCrypt md5, cleartext, crypt() or password() - md5 is VERY RECOMMENDABLE uppon cleartext
MYSQLCrypt md5
MYSQLGetPW SELECT Password FROM ftpd WHERE User="\L" AND status="1" AND (ipaccess = "*" OR ipaccess LIKE "\R")
MYSQLGetUID SELECT Uid FROM ftpd WHERE User="\L" AND status="1" AND (ipaccess = "*" OR ipaccess LIKE "\R")
MYSQLGetGID SELECT Gid FROM ftpd WHERE User="\L"AND status="1" AND (ipaccess = "*" OR ipaccess LIKE "\R")
MYSQLGetDir SELECT Dir FROM ftpd WHERE User="\L"AND status="1" AND (ipaccess = "*" OR ipaccess LIKE "\R")
MySQLGetBandwidthUL SELECT ULBandwidth FROM ftpd WHERE User="\L"AND status="1" AND (ipaccess = "*" OR ipaccess LIKE "\R")
MySQLGetBandwidthDL SELECT DLBandwidth FROM ftpd WHERE User="\L"AND status="1" AND (ipaccess = "*" OR ipaccess LIKE "\R")
MySQLGetQTASZ SELECT QuotaSize FROM ftpd WHERE User="\L"AND status="1" AND (ipaccess = "*" OR ipaccess LIKE "\R")
MySQLGetQTAFS SELECT QuotaFiles FROM ftpd WHERE User="\L"AND status="1" AND (ipaccess = "*" OR ipaccess LIKE "\R")确保在 MYSQLPassword! 行中将字符串 ftpdpass 替换为 MySQL 用户 pureftpd 的真实密码!请注意,我们使用 md5 作为 MYSQLCrypt 方法,这意味着我们会将用户密码作为 MD5 字符串存储在数据库中,这比使用纯文本密码更安全!
现在我们为 PureFTPd 创建系统启动链接并启动它:
systemctl enable pure-ftpd.service
systemctl start pure-ftpd.service
6 填充数据库并测试服务器
要填充数据库,您可以使用 MySQL shell:
mysql -u root -pUSE pureftpd;现在我们创建状态为 1 的用户 exampleuser(这意味着他的 ftp 帐户处于活动状态)、密码 secret(将使用 MySQL 的 MD5 函数加密存储)、UID 和 GID 2001(使用用户的 userid 和 groupid/您在第二步结束时创建的组!),主目录 /home/www.example.com,上传和下载带宽为 100 KB/秒。 (每秒千字节数)和 50 MB 的配额:
INSERT INTO `ftpd` (`User`, `status`, `Password`, `Uid`, `Gid`, `Dir`, `ULBandwidth`, `DLBandwidth`, `comment`, `ipaccess`, `QuotaSize`, `QuotaFiles`) VALUES ('exampleuser', '1', MD5('secret'), '2001', '2001', '/home/www.example.com', '100', '100', '', '*', '50', '0');quit;现在在您的工作站上打开您的 FTP 客户端程序(如果您在 Windows 系统上,则为 FileZilla 或在 Linux 桌面上为 gFTP)并尝试连接。作为主机名,您使用 server1.example.com(或系统的 IP 地址),用户名是 exampleuser,密码是秘密的。
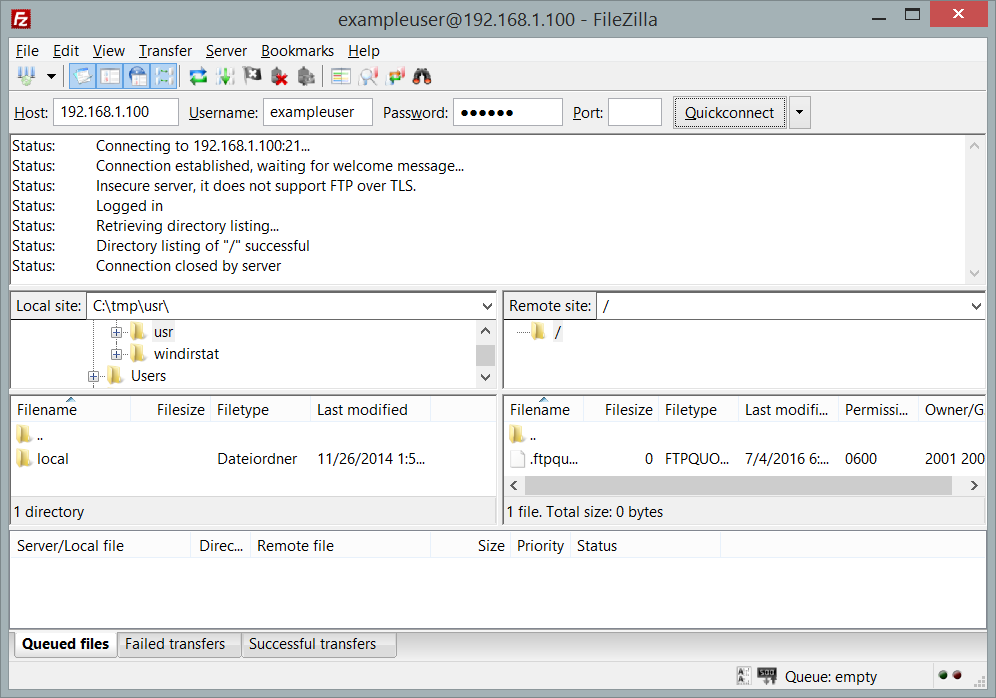
如果您能够连接 - 恭喜!如果不是,则出现问题。
现在,如果你跑
ls -l /home您应该会看到目录 /home/www.example.com(exampleusers 主目录)已自动创建,并且由 ftpuser 和 ftpgroup(我们在第二步结束时创建的用户/组)拥有:
[ ~]#7 数据库管理
对于大多数人来说,如果他们有 MySQL 的图形前端,那就更容易了;因此您也可以使用 phpMyAdmin(在本例中位于 http://server1.example.com/phpMyAdmin/)来管理 pureftpd 数据库。
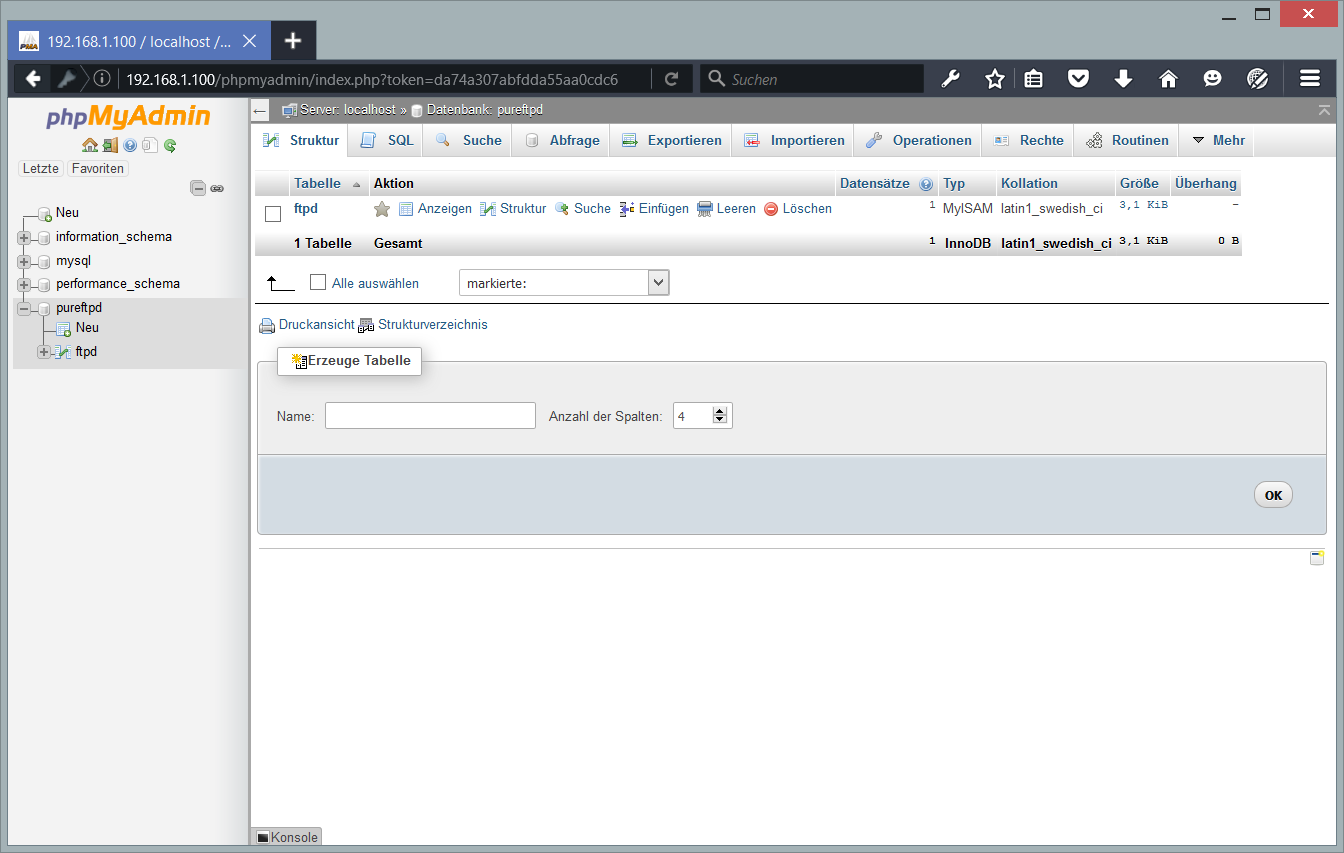
每当你想创建一个新用户时,你必须在表 ftpd 中创建一个条目,所以我将在这里解释这个表的列:
FTPD表:
8 匿名 FTP
如果你想创建一个匿名的 ftp 帐户(一个任何人都可以不用密码登录的 ftp 帐户),你需要一个用户和一个名为 ftp 的组。两者都在您安装 pure-ftpd 软件包时自动创建,因此您无需手动创建它们。但是,ftps homedir 默认是 /var/ftp,但我想在 /home/ftp 中创建匿名 ftp 目录(普通用户的 ftp 目录也在 /home 中,例如 /home/www.example.com)。但是,当然,如果您愿意,可以将 /var/ftp 目录用于匿名 ftp。
如果你想使用 /home/ftp,打开 /etc/passwd 并将 ftp 用户主目录从 /var/ftp 更改为 /home/ftp(如果你想使用 /var/ftp,请不要这样做):
nano /etc/passwd[...]
#ftp:x:14:50:FTP User:/var/ftp:/sbin/nologin
ftp:x:14:50:FTP User:/home/ftp:/sbin/nologin
[...]然后将 /var/ftp 移动到 /home(如果你想使用 /var/ftp,请不要这样做):
mv /var/ftp /home然后我们创建目录 /home/ftp/incoming 允许匿名用户上传文件。我们将/home/ftp/incoming 目录赋予311 的权限,这样用户可以上传,但不能看到或下载该目录下的任何文件。 /home/ftp 目录将具有 555 权限,允许查看和下载文件:
chown ftp:nobody /home/ftp
cd /home/ftp
mkdir incoming
chown ftp:nobody incoming/
chmod 311 incoming/
cd ../
chmod 555 ftp/
匿名用户将能够登录,他们将被允许从 /home/ftp 下载文件,但上传将仅限于 /home/ftp/incoming(一旦文件上传到 /home/ftp/incoming,它不能从那里读取或下载;服务器管理员必须先将它移动到 /home/ftp 以便其他人可以使用它)。
现在我们必须为匿名 ftp 配置 PureFTPd。打开 /etc/pure-ftpd/pure-ftpd.conf 并确保其中包含以下设置:
nano /etc/pure-ftpd/pure-ftpd.conf[...]
NoAnonymous no
[...]
AntiWarez no
[...]
AnonymousBandwidth 8
[...]
AnonymousCantUpload no
[...](AnonymousBandwidth 设置是可选的 - 它允许您限制匿名用户的上传和下载带宽。8 表示 8 KB/秒。使用您喜欢的任何值,或者如果您不想限制带宽,则注释掉该行。)
最后,我们重启 PureFTPd:
systemctl restart pure-ftpd.service9 下载这个CentOS 7.2服务器作为虚拟机
此设置可作为 ova/ovf 格式的虚拟机下载(与 VMWare 和 Virtualbox 兼容)供 howtoforge 订阅者使用。
VM 的登录详细信息
- 根密码是:howtoforge
- “管理员”用户的密码是:howtoforge
请在首次登录时更改这两个密码。
- VM 的 IP 地址是 192.168.1.100
10个链接
- PureFTPd:http://www.pureftpd.org/
- MySQL:http://www.mysql.com/
- phpMyAdmin:http://www.phpmyadmin.net/
- CentOS:http://centos.org/