如何在 Rocky Linux 8 上使用 Docker 安装 Koel Music Streaming Server
在此页
- 先决条件
- 第 1 步 - 配置防火墙
- 第 2 步 - 安装 Docker
- 第 3 步 - 安装 Docker Compose
- 第 4 步 - 创建 Koel 应用密钥
- 第 5 步 - 创建 Koel 环境文件
- 第 6 步 - 创建 Koel Docker Compose 文件
- 第 7 步 - 启动 Koel 容器
- 第一次初始化 Koel
- 更改管理员密码
Koel 是一种基于 Web 的音频流服务,使用 Laravel PHP 框架编写。它允许您流式传输您的个人音乐收藏并从世界任何地方访问它。它支持多种媒体格式,包括 AAC、OGG、WMA、FLAC 和 APE。
在本教程中,您将学习如何在 Rocky Linux 8 机器上使用 Docker 安装 Koel Music Streaming Server。
先决条件
-
A Server running Rocky Linux 8.5.
-
A non-root user with sudo privileges.
-
Update everything.
$ sudo dnf update -
Install essential packages.
$ sudo dnf install yum-utils nano curl -
A custom domain name pointing to the server like
koel.example.com.
第 1 步 - 配置防火墙
第一步是配置防火墙。 Rocky Linux 使用 Firewalld 防火墙。检查防火墙状态。
$ sudo firewall-cmd --state
running
防火墙适用于不同的区域,公共区域是我们将使用的默认区域。列出防火墙上所有活动的服务和端口。
$ sudo firewall-cmd --permanent --list-services它应该显示以下输出。
cockpit dhcpv6-client ssh允许 HTTP 和 HTTPS 端口。
$ sudo firewall-cmd --permanent --add-service=http
$ sudo firewall-cmd --permanent --add-service=https
重新检查防火墙的状态。
$ sudo firewall-cmd --permanent --list-services您应该会看到类似的输出。
cockpit dhcpv6-client http https ssh重新加载防火墙以启用更改。
$ sudo firewall-cmd --reload第 2 步 - 安装 Docker
Rocky Linux 附带旧版本的 Docker。要安装最新版本,首先,安装官方 Docker 存储库。
$ sudo yum-config-manager \
    --add-repo \
    https://download.docker.com/linux/centos/docker-ce.repo
安装最新版本的 Docker。
$ sudo dnf install docker-ce docker-ce-cli containerd.io启用并运行 Docker 守护进程。
$ sudo systemctl enable docker --now验证它是否正在运行。
? docker.service - Docker Application Container Engine
   Loaded: loaded (/usr/lib/systemd/system/docker.service; enabled; vendor preset: disabled)
   Active: active (running) since Sat 2022-04-02 13:26:08 UTC; 2s ago
     Docs: https://docs.docker.com
 Main PID: 21152 (dockerd)
    Tasks: 7
   Memory: 30.9M
   CGroup: /system.slice/docker.service
           ??21152 /usr/bin/dockerd -H fd:// --containerd=/run/containerd/containerd.sock
...
默认情况下,Docker 需要 root 权限。如果您想避免每次运行
docker命令时都使用sudo,请将您的用户名添加到docker组。$ sudo usermod -aG docker $(whoami)您需要注销服务器并以同一用户身份重新登录才能启用此更改。
第 3 步 - 安装 Docker Compose
下载 Docker Compose 的最新稳定版本。
$ sudo curl -L "https://github.com/docker/compose/releases/download/1.29.2/docker-compose-$(uname -s)-$(uname -m)" -o /usr/local/bin/docker-compose将可执行权限应用于 Docker Compose 二进制文件。
$ sudo chmod +x /usr/local/bin/docker-compose测试安装。
$ docker-compose --version
docker-compose version 1.29.2, build 5becea4c
安装 Docker-compose Bash Completion 脚本。
$ sudo curl \
    -L https://raw.githubusercontent.com/docker/compose/1.29.2/contrib/completion/bash/docker-compose \
    -o /etc/bash_completion.d/docker-compose
重新加载您的配置文件设置以使 bash-completion 工作。
$ source ~/.bashrc第 4 步 - 创建 Koel 应用密钥
我们将通过短时间运行容器来生成 Koels App 密钥。运行以下命令以运行容器并访问其 shell。
$ docker run -it --rm phanan/koel bash进入容器后,运行以下命令生成应用程序密钥。
$ php artisan key:generate --force使用新生成的应用程序密钥输出修改后的环境文件。
$ cat .env
APP_KEY=base64:fjtO7aVHHKWfk4DThKqf1nci6o2DuMkNd90TKX6Gj+4=
复制键值并退出容器 shell。
$ exit第 5 步 - 创建 Koel 环境文件
为 Koel 创建一个目录。
$ mkdir ~/koel切换到目录。
$ cd ~/koel创建音乐目录。
$ mkdir music创建并打开
.env文件。$ nano .env将以下代码粘贴到其中。
APP_NAME=Koel

# A random 32-char string. You can leave this empty if use php artisan koel:init.
APP_KEY=base64:fjtO7aVHHKWfk4DThKqf1nci6o2DuMkNd90TKX6Gj+4=

# The ABSOLUTE path to your media. This value can always be changed later via the web interface.
MEDIA_PATH=/music

APP_ENV=production
APP_DEBUG=true
APP_URL=https://koel.example.com

# The maximum scan time, in seconds. Increase this if you have a huge library.
# Note: This setting doesn't have effect when scanning via koel:sync.
APP_MAX_SCAN_TIME=600

# The memory limit, in MB, used by the scanning process.
# For example, if you want to set a memory limit of 2048MB, enter "2048" (without
# quotes) here.
MEMORY_LIMIT=512

# The streaming method.
# Can be either 'php' (default), 'x-sendfile', or 'x-accel-redirect'
# See https://docs.koel.dev/#streaming-music for more information.
# Note: This setting doesn't have effect if the media needs transcoding (e.g. FLAC).
STREAMING_METHOD=x-sendfile

# If you want Koel to integrate with Last.fm, set the API details here.
# See https://docs.koel.dev/3rd-party.html#last-fm for more information
LASTFM_API_KEY=
LASTFM_API_SECRET=

# If you want to use Amazon S3 with Koel, fill the info here and follow the
# installation guide at https://docs.koel.dev/aws-s3.html
AWS_ACCESS_KEY_ID=
AWS_SECRET_ACCESS_KEY=
AWS_REGION=

# If you want Koel to integrate with YouTube, set the API key here.
# See https://docs.koel.dev/3rd-party.html#youtube for more information.
YOUTUBE_API_KEY=

# You can also configure Koel to use a CDN to serve the media files.
# This url must be mapped to the home URL of your Koel's installation.
# No trailing slash, please.
CDN_URL=

# The bit rate of the output mp3 stream. Higher value results in better quality,
# but slower streaming and more bandwidth.
OUTPUT_BIT_RATE=128

# Whether to allow song downloading.
# Note that if you're downloading more than one song, Koel will zip them up
# using PHP's ZipArchive. So if the module isn't available in the current
# environment, such a download will (silently) fail.
ALLOW_DOWNLOAD=true

# If this is set to true, the query to get artist, album, and song information will be cached.
# This can give a boost to Koel's boot time, especially if your library is huge.
# However, the cache deserialization process can be memory sensitive, so if you encounter
# errors, try setting this to false.
CACHE_MEDIA=true

# Koel attempts to detect if your website use HTTPS and generates secure URLs accordingly.
# If this attempts for any reason, you can force it by setting this value to true.
FORCE_HTTPS=true

# The variables below are Laravel-specific.
# You can change them if you know what you're doing. Otherwise, just leave them as-is.
APP_LOG_LEVEL=debug
BROADCAST_DRIVER=log
CACHE_DRIVER=file
SESSION_DRIVER=file
QUEUE_DRIVER=sync
通过按 Ctrl + X 并在出现提示时输入 Y 来保存文件。
大多数设置在上面是不言自明的。需要配置以下设置才能使其正常工作。将上一步中生成的应用密钥粘贴到
APP_KEY变量中。在APP_URL下输入您的域名,并根据您的服务器资源设置以 MB 为单位的内存限制。我们已将流媒体方法设置为x-sendfile,因为 Koels docker image 使用 Apache 并预先配置了它。FORCE_HTTPS设置设置为 true,因为我们将使用 Nginx 作为负载均衡器,并使用 Lets Encrypt SSL 为 Koel 提供网络服务。如果您想将它们与 Koel 一起使用,请配置其他服务。第 6 步 - 创建 Koel Docker Compose 文件
创建并打开文件
docker-compose.yml进行编辑。$ nano docker-compose.yml将以下代码粘贴到其中。
version: '3.3'

services:
  koel:
    image: phanan/koel
    container_name: koel
    depends_on:
      - koeldb
    restart: unless-stopped
    ports:
      - 8080:80
    environment:
      - DB_CONNECTION=mysql
      - DB_HOST=koeldb
      - DB_USERNAME=koel
      - DB_PASSWORD=koelpassword
      - DB_DATABASE=koel
    volumes:
      - ./music:/music
      - ./.env:/var/www/html/.env
      - covers:/var/www/html/public/img/covers
      - search_index:/var/www/html/storage/search-indexes

  koeldb:
    image: mysql/mysql-server:8.0
    restart: unless-stopped
    volumes:
      - db:/var/lib/mysql
    environment:
      - MYSQL_ROOT_PASSWORD=rootpassword
      - MYSQL_DATABASE=koel
      - MYSQL_USER=koel
      - MYSQL_PASSWORD=koelpassword

volumes:
  db:
    driver: local
  covers:
    driver: local
  search_index:
    driver: local
通过按 Ctrl + X 并在出现提示时输入 Y 来保存文件。
上述文件启动基于 Koel 和 MySQLs docker 镜像的容器。它将 Koel 暴露给您机器上的端口 8080。音乐和环境文件被安装到容器上的相应位置。音乐封面和搜索索引的目录以及 MySQL 数据作为本地卷安装。为变量
MYSQL_ROOT_PASSWORD、MYSQL_PASSWORD选择一个强密码,并将这些值与上面文件中 Koel 容器的变量匹配。要将 Koel 容器与数据库容器链接,请确保DB_HOST和depends_on变量以数据库容器服务名称命名。第 7 步 - 启动 Koel 容器
使用以下命令启动 Koel 容器。
$ docker-compose up -d第一次初始化Koel
登录到 Koel Container shell。以下命令中的
koel是指通过上述Docker compose 文件中的container_name变量设置的容器名称。如果您没有设置容器名称,则必须先找到容器的名称并在以下命令中使用它。$ docker exec --user www-data -it koel bash运行以下命令创建管理员帐户并初始化数据库。
$ php artisan koel:init --no-assets更改管理员密码
Koel 使用以下凭据创建默认管理员帐户。
email:
password: KoelIsCool
您可以在容器 shell 中使用以下命令更改管理员帐户的密码。
$ php artisan koel:admin:change-password退出容器外壳。
$ exit第 8 步 - 安装 SSL
要使用 Lets Encrypt 安装 SSL 证书,我们需要安装 Certbot 工具。
首先,您需要下载并安装 EPEL 存储库。
$ sudo dnf install epel-release运行以下命令来安装 Certbot。
$ sudo dnf install certbot生成 SSL 证书。
$ sudo certbot certonly --standalone --agree-tos --no-eff-email --staple-ocsp --preferred-challenges http -m -d koel.example.com上面的命令会将证书下载到服务器上的
/etc/letsencrypt/live/koel.example.com目录。生成 Diffie-Hellman 组证书。
$ sudo openssl dhparam -out /etc/ssl/certs/dhparam.pem 4096为 Lets Encrypt 自动更新创建一个挑战网站根目录。
$ sudo mkdir -p /var/lib/letsencrypt创建 Cron 作业以更新 SSL。它将每天运行以检查证书并在需要时更新证书。为此,首先,创建文件
/etc/cron.daily/certbot-renew并打开它进行编辑。$ sudo nano /etc/cron.daily/certbot-renew粘贴以下代码。
#!/bin/sh
certbot renew --cert-name koel.example.com --webroot -w /var/lib/letsencrypt/ --post-hook "systemctl reload nginx"
通过按 Ctrl + X 并在出现提示时输入 Y 来保存文件。
更改任务文件的权限以使其可执行。
$ sudo chmod +x /etc/cron.daily/certbot-renew第 9 步 - 安装 Nginx
我们将安装最新版本的 Nginx。创建并打开文件
/etc/yum.repos.d/nginx.repo进行编辑。$ sudo nano /etc/yum.repos.d/nginx.repo在其中粘贴以下行。
[nginx-stable]
name=nginx stable repo
baseurl=http://nginx.org/packages/centos/$releasever/$basearch/
gpgcheck=1
enabled=1
gpgkey=https://nginx.org/keys/nginx_signing.key
module_hotfixes=true

[nginx-mainline]
name=nginx mainline repo
baseurl=http://nginx.org/packages/mainline/centos/$releasever/$basearch/
gpgcheck=1
enabled=0
gpgkey=https://nginx.org/keys/nginx_signing.key
module_hotfixes=true
通过按 Ctrl + X 并在出现提示时输入 Y 来保存文件。
安装 Nginx。
$ sudo dnf install nginx验证安装。
$ nginx -v
nginx version: nginx/1.20.2
启用并启动 Nginx 服务。
$ sudo systemctl enable nginx --now创建并打开文件
/etc/nginx/conf.d/koel.conf进行编辑。$ sudo nano /etc/nginx/conf.d/koel.conf将以下代码粘贴到其中。
# Redirect all non-encrypted to encrypted
server {
    listen 80;
    listen [::]:80;
    server_name koel.example.com;
    return 301 https://$host$request_uri;
}

server {
    listen 443 ssl http2;
    listen [::]:443 ssl http2;

    server_name koel.example.com;

    ssl_certificate     /etc/letsencrypt/live/koel.example.com/fullchain.pem;
    ssl_certificate_key /etc/letsencrypt/live/koel.example.com/privkey.pem;
    ssl_trusted_certificate /etc/letsencrypt/live/koel.example.com/chain.pem;
    ssl_session_timeout 1d;
    ssl_session_cache shared:MozSSL:10m;
    ssl_session_tickets off;
    ssl_stapling on;
    ssl_stapling_verify on;
    ssl_dhparam /etc/ssl/certs/dhparam.pem;

    ssl_protocols TLSv1.2 TLSv1.3;
    ssl_ciphers ECDHE-ECDSA-AES128-GCM-SHA256:ECDHE-RSA-AES128-GCM-SHA256:ECDHE-ECDSA-AES256-GCM-SHA384:ECDHE-RSA-AES256-GCM-SHA384:ECDHE-ECDSA-CHACHA20-POLY1305:ECDHE-RSA-CHACHA20-POLY1305:DHE-RSA-AES128-GCM-SHA256:DHE-RSA-AES256-GCM-SHA384;

    access_log /var/log/nginx/koel.example.com.access.log main;
    error_log  /var/log/nginx/koel.example.com.error.log;

    location / {
        proxy_set_header X-Forwarded-For $proxy_add_x_forwarded_for;
        proxy_set_header X-Forwarded-Proto $scheme;
        proxy_set_header X-Forwarded-Port $server_port;
        proxy_set_header X-Forwarded-Host $host;
        client_max_body_size 400M;
    	proxy_pass  http://localhost:8080;
    	proxy_http_version 1.1;
        proxy_set_header Host $host;
    }
}
完成后,按 Ctrl + X 并在出现提示时输入 Y 来保存文件。上面的配置允许 Nginx 作为代理服务器并绑定到 localhost 上的 8080 端口。
打开文件
/etc/nginx/nginx.conf进行编辑。$ sudo nano /etc/nginx/nginx.conf在行
include /etc/nginx/conf.d/*.conf;之前添加以下行。server_names_hash_bucket_size 64;通过按 Ctrl + X 并在出现提示时输入 Y 来保存文件。
验证 Nginx 配置文件语法。
$ sudo nginx -t
nginx: the configuration file /etc/nginx/nginx.conf syntax is ok
nginx: configuration file /etc/nginx/nginx.conf test is successful
重新启动 Nginx 服务以启用新配置。
$ sudo systemctl restart nginx第 10 步 - 访问 Koel
您可以通过在浏览器中访问 URL
https://koel.example.com来访问 Koel。您将看到以下登录屏幕。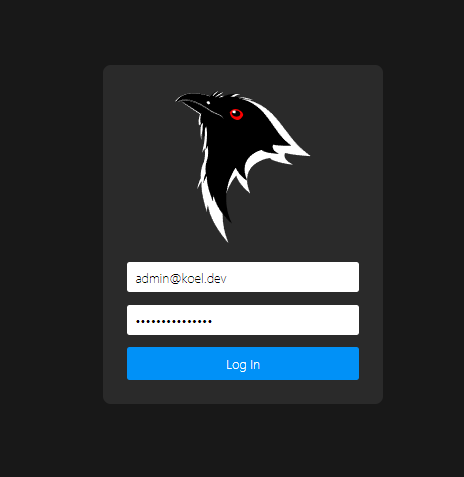
输入
[email作为您的用户名和您在登录前设置的密码。成功登录后将出现以下仪表板。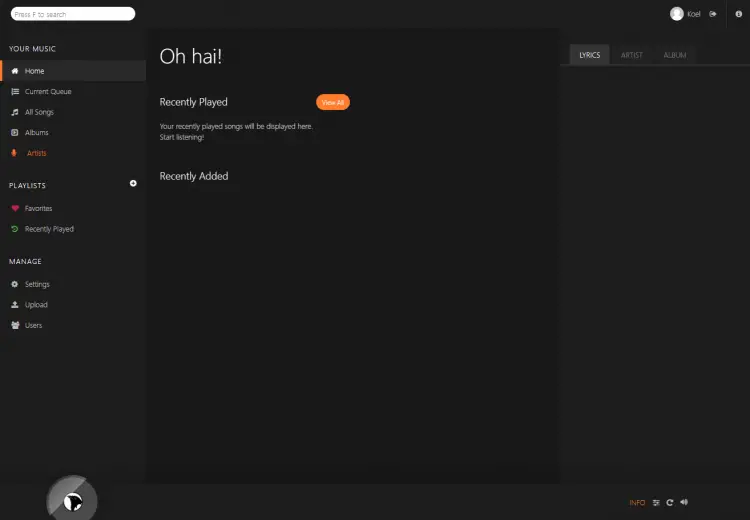
第 11 步 - 导入音乐
将要导入的音乐文件复制到系统的
~/koel/music文件夹中。您可以使用scp命令将文件从本地 PC 导入到服务器。$ scp test.mp3 <yourserverIP>:/home/user/koel/music将文件复制到
~/koel/music文件夹后,运行以下命令将音乐导入 Koel。$ docker exec --user www-data koel php artisan koel:sync音乐将显示在 Koels 网页界面中,您可以开始播放了。
Koels 网络界面还允许您直接上传歌曲。
第 12 步 - 更新 Koel
切换到 Koel 目录。
$ cd ~/koel拉取最新的 Koel Docker 镜像。
$ docker-compose pull关闭容器。
$ docker-compose down --remove-orphans使用更新的图像启动容器。
$ docker-compose up -d验证 Docker 容器。
$ docker ps结论
在 Rocky Linux 服务器上使用 Docker 安装 Koel Music Streaming Service 的教程到此结束。如果您有任何问题,请在下面的评论中发表。