在 CentOS 7 上使用 PostgreSQL 和 Nginx 安装 Mattermost
松弛替代。 Mattermost 是防火墙后的现代通信。
作为专有 SaaS 消息传递的替代方案,Mattermost 将您所有的团队通信集中在一个地方,使其可以在任何地方搜索和访问。
Mattermost 是“兼容 Slack,而非 Slack 受限”,支持 Slack 传入和传出 webhook 集成的超集,包括与现有 Slack 集成的兼容性。您可以从现有的 Slack 团队导入用户、公共频道历史记录,甚至主题设置颜色进入 Mattermost。
本指南中使用的名称、变量和帐户
local IP of server                 : 192.168.2.100
FQDN of server                     : mattermost.example.com
Name of mattermost database        : mattermost
User to access mattermost database : mmuser
Password for mmuser within database: DBAss47slX3
先决条件
这篇 Howto 解释了在 CentOS7 上使用 PostgreSQL 作为数据库后端安装 Mattermost。出于本指南的目的,我们假设我们将所有内容都安装在一台服务器上,但对于有经验的用户来说,拆卸部件并将每个组件(例如数据库服务器)安装在不同的机器上会很容易。安装是使用 root 用户完成的,但您当然也可以使用 启用 sudo 的用户。
我们还假设服务器的 IP 地址为 192.168.2.100,DNS 解析为 mattermost.example.com。因此,在本 HowTo 中您阅读到 192.168.2.100 或 mattermost.example.com 的任何地方都将其替换为您服务器的 IP 地址。
在开始之前,您需要最低安装 CentOS7。安装后,确保正确设置电子邮件(后缀配置),以便您的系统能够发送电子邮件(例如,通过智能主机或类似的解决方案)。
在继续之前请做一些小检查:
尝试从您服务器上的终端发送邮件:
[(将 [email 替换为您的服务器应该能够发送到的电子邮件地址)。确保您收到了来自系统的电子邮件!
验证 mattermost.example.com 的名称解析
从另一台计算机(不是我们尝试设置的服务器)尝试 ping mattermost.example.com。你应该得到一个积极的结果:
C:\>ping mattermost.example.com
Pinging mattermost.witron.com [192.168.2.100] with 32 bytes of data:
Reply from 192.168.2.100: bytes=32 time<1ms TTL=64
Reply from 192.168.2.100: bytes=32 time<1ms TTL=64
Reply from 192.168.2.100: bytes=32 time<1ms TTL=64
Reply from 192.168.2.100: bytes=32 time<1ms TTL=64

Ping statistics for 192.168.2.100:
Packets: Sent = 4, Received = 4, Lost = 0 (0% loss),
Approximate round trip times in milli-seconds:
Minimum = 0ms, Maximum = 0ms, Average = 0ms
验证互联网连接
我们现在将安装包 wget(我们稍后需要)。
[ ~] yum -y install wget并用它来确定我们的公共 ip。所以我们可以检查我们的互联网连接。
[ ~] wget http://ipinfo.io/ip -qO -
46.101.122.124
结果应该是您的公共 IP 地址。
检查防火墙状态并暂时禁用它
请检查您的 CentOS7 安装是否启用了 firewalld。您可以通过键入来验证这一点
[ ~] systemctl status firewalld如果它显示类似
活动:活动(运行)自...
请使用这 2 个命令将其关闭并禁用它。
[ ~] systemctl disable firewalld在本教程的最后,您将找到有关如何重新启用 firewalld 以及如何正确设置它以与 Mattermost 一起使用的说明。
如果您通过了上述所有检查,或者您知道您有一个可用于本教程的系统,您现在可以继续。
安装 PostgreSQL 数据库服务器
我们将使用 PostgreSQL 作为 Mattermost 的数据库后端。使用以下命令安装它:
[ ~] yum -y install postgresql-server postgresql-contrib安装后我们必须初始化数据库。
[ ~] postgresql-setup initdb
Initializing database ... OK
然后启动 PostgreSQL 并启用它自动启动。
[ ~]# systemctl enable postgresql
Created symlink from /etc/systemd/system/multi-user.target.wants/postgresql.service to /usr/lib/systemd/system/postgresql.service.
请通过执行验证 PostgreSQL 是否正在运行。
[ ~]# systemctl status postgresql它应该报告与此类似的内容(确保文本中某处有 Active: active (running))。
? postgresql.service - PostgreSQL database server
Loaded: loaded (/usr/lib/systemd/system/postgresql.service; enabled; vendor preset: disabled)
Active: active (running) since Fri 2016-03-04 11:37:50 CET; 44s ago
Main PID: 17660 (postgres)
CGroup: /system.slice/postgresql.service
??17660 /usr/bin/postgres -D /var/lib/pgsql/data -p 5432
??17661 postgres: logger process
??17663 postgres: checkpointer process
??17664 postgres: writer process
??17665 postgres: wal writer process
??17666 postgres: autovacuum launcher process
??17667 postgres: stats collector process

Mar 04 11:37:48 mattermost systemd[1]: Starting PostgreSQL database server...
Mar 04 11:37:50 mattermost systemd[1]: Started PostgreSQL database server.
Mar 04 11:37:59 mattermost systemd[1]: Started PostgreSQL database server.
创建mattermost数据库和数据库用户
PostgreSQL 自动创建了名为 postgres 的用户和组。我们使用用户 postgres 连接到数据库引擎并设置数据库和可以访问它的用户。
以用户 postgres 启动提示:
[ ~]# sudo -i -u postgres您的提示现在将更改为:
-bash-4.2$现在让我们连接到数据库服务器。
-bash-4.2$ psql
psql (9.2.15)
Type "help" for help.
postgres=#
在 PostgreSQL 提示符下,我们现在创建一个名为 mattermost 的数据库。
postgres=# CREATE DATABASE mattermost;
CREATE DATABASE
现在我们创建一个用户 mmuser,密码为 DBAss47slX3。
postgres=# CREATE USER mmuser WITH PASSWORD 'DBAss47slX3';
CREATE ROLE
通过键入以下内容授予用户对 Mattermost 数据库的访问权限:
postgres=# GRANT ALL PRIVILEGES ON DATABASE mattermost to mmuser;
GRANT
postgres=#
然后我们可以通过键入以下命令退出 PostgreSQL 提示符:
postgres=# \q
-bash-4.2$
然后退出我们以 postgres 用户身份启动的 shell。
-bash-4.2$ exit
logout
[ ~]#
允许通过用户名/密码从本地主机访问 PostgreSQL 数据库
稍后,我们最重要的实例想要与 PostgreSQL 数据库对话并使用用户名和密码进行身份验证。为此,我们需要稍微更改 PostgreSQL 配置。打开文件:
vi /var/lib/pgsql/data/pg_hba.conf使用 vi 或 nano 之类的编辑器并更改行:
host all all 127.0.0.1/32 ident到:
host all all 127.0.0.1/32 md5保存文件,然后重新启动 Postgresql。
[ ~]# systemctl restart postgresql我们应该通过使用我们之前创建的用户和密码连接到数据库服务器来验证我们是否正确地做到了这一点(如果您在服务器上使用了不同的密码,请使用您的密码):
[ ~]#我们的 PostgreSQL 服务器和数据库现在已为 Mattermost 做好准备!
下载并解压缩 Mattermost
让我们使用 wget 从他们的 Github 存储库(在创建本教程时版本 v2.0.0 是当前版本)直接下载 Mattermost 服务器的副本。
[ ~]# wget -q "https://github.com/mattermost/platform/releases/download/v2.0.0/mattermost.tar.gz" -O mattermost.tar.gz现在让我们提取存档并将提取的文件放到它们的目标位置(在本例中我们使用 /opt/mattermost)。
[ ~]# mv mattermost /opt安装 Mattermost
创建一个运行 Mattermost 守护进程的用户
稍后我们将作为守护进程运行 Mattermost。因此,我们在我们的系统上设置了一个名为 mattermost 的新用户。稍后它将运行最重要的实例。执行以下命令创建系统用户和组 mattermost:
[ ~]# useradd -r mattermost -U -s /sbin/nologin为 Mattermost 创建数据存储文件夹
Mattermost 想要存储它的一些数据,例如。上传的文件等在一个文件夹中。所以我们需要创建那个文件夹。它可以位于硬盘驱动器上的任何位置,但用户必须能够访问 mattermost。我选择使用 /opt/mattermost/data。使用以下命令创建文件夹:
[ ~]# mkdir -p /opt/mattermost/data设置 mattermost 目录的所有者
现在我们将 mattermost 目录的组和所有者设置为我们之前创建的用户和组:
[ ~]# chmod -R g+w /opt/mattermost为 mattermost 配置数据库连接
为了告诉 Mattermost 它应该如何连接到我们的 PostgreSQL 数据库,我们需要编辑它的配置文件:
/opt/mattermost/config/config.json请找到 SqlSettings 部分并将其更改为我们的需要:
之前
"SqlSettings": {
 "DriverName": "mysql",
 "DataSource": "mmuser:(dockerhost:3306)/mattermost_test?charset=utf8mb4,utf8",
 "DataSourceReplicas": [],
 "MaxIdleConns": 10,
 "MaxOpenConns": 10,
 "Trace": false,
 "AtRestEncryptKey": "7rAh6iwQCkV4cA1Gsg3fgGOXJAQ43QVg"
 },
之后
"SqlSettings": {
 "DriverName": "postgres",
 "DataSource": "postgres://mmuser::5432/mattermost?sslmode=disable&connect_timeout=10",
 "DataSourceReplicas": [],
 "MaxIdleConns": 10,
 "MaxOpenConns": 10,
 "Trace": false,
 "AtRestEncryptKey": "7rAh6iwQCkV4cA1Gsg3fgGOXJAQ43QVg"
 },
您可以保留 AtRestEncryptKey 原样!
为 mattermost 配置电子邮件连接
同样,我们需要编辑其配置文件
/opt/mattermost/config/config.json找到 EmailSettings 部分并将其更改为我们的需要:
之前
 "EmailSettings": {
 "EnableSignUpWithEmail": true,
 "EnableSignInWithEmail": true,
 "EnableSignInWithUsername": false,
 "SendEmailNotifications": false,
 "RequireEmailVerification": false,
 "FeedbackName": "",
 "FeedbackEmail": "",
 "SMTPUsername": "",
 "SMTPPassword": "",
 "SMTPServer": "",
 "SMTPPort": "",
 "ConnectionSecurity": "",
 "InviteSalt": "bjlSR4QqkXFBr7TP4oDzlfZmcNuH9YoS",
 "PasswordResetSalt": "vZ4DcKyVVRlKHHJpexcuXzojkE5PZ5eL",
 "SendPushNotifications": false,
 "PushNotificationServer":
},
之后
 "EmailSettings": {
 "EnableSignUpWithEmail": true,
 "EnableSignInWithEmail": true,
 "EnableSignInWithUsername": false,
 "SendEmailNotifications": false,
 "RequireEmailVerification": false,
 "FeedbackName": "",
 "FeedbackEmail": "",
 "SMTPUsername": "",
 "SMTPPassword": "",
 "SMTPServer": "127.0.0.1",
 "SMTPPort": "25",
 "ConnectionSecurity": "",
 "InviteSalt": "bjlSR4QqkXFBr7TP4oDzlfZmcNuH9YoS",
 "PasswordResetSalt": "vZ4DcKyVVRlKHHJpexcuXzojkE5PZ5eL",
 "SendPushNotifications": false,
 "PushNotificationServer": ""
 },
我们使用 127.0.0.1 和端口 25 是因为我们使用的是已配置为能够向外部发送电子邮件的本地 postfix 安装。如果您的设置与此处不同,则必须设置正确的值!
配置 mattermost 只监听内部接口 (127.0.0.1)
默认情况下,最重要的服务器实例将侦听端口 8065 (:8065) 上的所有接口。因为我们想在 mattermost 前面放一个 Nginx-Server,所以我们改变了这个行为,让它只监听 localhost (127.0.0.1:8065)。
换行就行
"ListenAddress": ":8065",到
"ListenAddress": "127.0.0.1:8065",在 config.json 文件中。
测试 Mattermost 服务器
我们现在可以通过从命令行运行它来测试我们最重要的服务器是否会启动。请确保,您这样做是因为用户最重要。如果您不小心以 root 身份执行此操作,则必须再次修复 mattermost 文件夹的权限!
[ ~]# su - mattermost -s /bin/bash

Last login: Fri Mar 4 12:47:52 CET 2016 on pts/0
su: warning: cannot change directory to /home/mattermost: No such file or directory
-bash-4.2$
现在切换到最重要的安装目录:
-bash-4.2$ cd /opt/mattermost/bin/并从命令行运行 mattermost:
-bash-4.2$ ./platform输出应与此类似:
[2016/03/04 13:00:10 CET] [INFO] Loaded system translations for 'en' from '/opt/mattermost/i18n/en.json'
[2016/03/04 13:00:10 CET] [INFO] Current version is 2.0.0 (5950/Sat Feb 13 15:42:01 UTC 2016/c71c5cef632c7dc68072167c6fe091a60835fa02)
[2016/03/04 13:00:10 CET] [INFO] Enterprise Enabled: false
[2016/03/04 13:00:10 CET] [INFO] Current working directory is /opt/mattermost/bin
[2016/03/04 13:00:10 CET] [INFO] Loaded config file from /opt/mattermost/config/config.json
[2016/03/04 13:00:10 CET] [INFO] Server is initializing...
[2016/03/04 13:00:10 CET] [INFO] Pinging sql master database
[2016/03/04 13:00:10 CET] [INFO] Pinging sql replica-0 database
[2016/03/04 13:00:10 CET] [DEBG] Deleting any unused pre-release features
[2016/03/04 13:00:10 CET] [INFO] The database schema has been set to version 2.0.0
[2016/03/04 13:00:10 CET] [DEBG] Initializing user api routes
[2016/03/04 13:00:10 CET] [DEBG] Initializing team api routes
[2016/03/04 13:00:10 CET] [DEBG] Initializing channel api routes
[2016/03/04 13:00:10 CET] [DEBG] Initializing post api routes
[2016/03/04 13:00:10 CET] [DEBG] Initializing web socket api routes
[2016/03/04 13:00:10 CET] [DEBG] Initializing file api routes
[2016/03/04 13:00:10 CET] [DEBG] Initializing command api routes
[2016/03/04 13:00:10 CET] [DEBG] Initializing admin api routes
[2016/03/04 13:00:10 CET] [DEBG] Initializing oauth api routes
[2016/03/04 13:00:10 CET] [DEBG] Initializing webhook api routes
[2016/03/04 13:00:10 CET] [DEBG] Initializing preference api routes
[2016/03/04 13:00:10 CET] [DEBG] Initializing license api routes
[2016/03/04 13:00:10 CET] [DEBG] Parsing server templates at /opt/mattermost/api/templates/
[2016/03/04 13:00:10 CET] [DEBG] Initializing web routes
[2016/03/04 13:00:10 CET] [DEBG] Using static directory at /opt/mattermost/web/static/
[2016/03/04 13:00:10 CET] [DEBG] Parsing templates at /opt/mattermost/web/templates/
[2016/03/04 13:00:10 CET] [INFO] Starting Server...
[2016/03/04 13:00:10 CET] [INFO] Server is listening on 127.0.0.1:8065
[2016/03/04 13:00:10 CET] [INFO] RateLimiter is enabled
[2016/03/04 13:00:10 CET] [DEBG] Checking for security update from Mattermost
[2016/03/04 13:00:10 CET] [EROR] Failed to get security update information from Mattermost.
使用 Ctrl+C 停止最重要的服务器
然后退出我们以 mattermost 用户身份启动的 shell:
-bash-4.2$ exit
logout
[ ~]#
如果您的 mattermost 实例没有启动,请仔细阅读输出。我自己遇到了很多问题,因为我在 config.json 中忘记了一个简单的逗号。还要确保您没有在您的 dbusers 密码中使用特殊字符,尤其是没有 @ 符号。一开始这让我很奇怪!
如果您不小心以 root 身份运行了上述命令并且这也可能有效,您必须重新修复 mattermost 文件夹的权限。如果遇到此错误,请使用此命令:
[ ~]# chown -R mattermost:mattermost /opt/mattermost如果一切顺利,我们现在可以继续了。
将 Mattermost 设置为守护进程
要将 Mattermost 设置为守护进程,请创建一个文件
/etc/systemd/system/mattermost.service内容如下:
[Unit]
Description=Mattermost
After=syslog.target network.target

[Service]
Type=simple
WorkingDirectory=/opt/mattermost/bin
User=mattermost
ExecStart=/opt/mattermost/bin/platform
PIDFile=/var/spool/mattermost/pid/master.pid

[Install]
WantedBy=multi-user.target
然后重新加载守护进程文件:
[ ~]# systemctl daemon-reload我们现在可以启动/停止/启用/禁用此服务,就像我们过去所做的那样。
因此,让我们启动 Mattermost,获取其状态,然后将其作为服务启用(自动启动)。
启动mattermost守护进程
[ ~]# systemctl start mattermost.service验证最重要的状态
[ ~]# systemctl status mattermost.service
? mattermost.service - Mattermost
Loaded: loaded (/etc/systemd/system/mattermost.service; disabled; vendor preset: disabled)
 Active: active (running) since Fri 2016-03-04 14:03:40 CET; 4s ago
Main PID: 18573 (platform)
CGroup: /system.slice/mattermost.service
??18573 /opt/mattermost/bin/platform
...
...确保它活动(运行)!
为自动启动启用守护程序
[ ~]# systemctl enable mattermost.service
Created symlink from /etc/systemd/system/multi-user.target.wants/mattermost.service to /etc/systemd/system/mattermost.service.
现在我们可以通过执行以下命令来确定 Mattermost 是否正在监听 127.0.0.1:8065:
[ config]# curl -s "http://127.0.0.1:8065" | grep -b "2015 Mattermost"我们应该得到包含 2015 Mattermost 的单行。
11343: <span class="pull-right footer-link copyright">© 2015 Mattermost, Inc.</span>如果是这样,我们可以确定 Mattermost 服务器实例正在运行,我们可以继续。
修复 SELinux 相关权限问题
CentOS7 上默认启用 SELinux。我们可以完全关闭它,但最好重新配置它并允许我们的 Mattermost 服务器执行。
只需输入以下 2 个命令来修复 SELinux 权限:
[ config]# setsebool -P httpd_can_network_connect 1设置 Nginx 服务器
我们将在我们的 Mattermost 服务器实例前面放置一个 Nginx 服务器。
主要好处是:
- 端口映射:80 到:8065
- 标准请求日志
- 稍后切换到 SSL 时有更多选项
启用 epel 存储库
Nginx 不在 CentOS 的默认存储库中。所以我们需要先启用epel仓库。这是一个简单的任务,只需输入:
[ config]# yum -y install epel-release && yum update安装nginx
启用 epel-release 后,我们可以使用以下命令简单地安装 nginx:
[ config]# yum -y install nginx这将安装 nginx 及其所有依赖项。
配置nginx
配置 Nginx 的方法有很多种。本教程将只展示如何为 Nginx 创建一个非常简单的设置,它只在端口 80 上托管我们的 Mattermost 服务器。
更改 Nginx 默认配置文件
通过执行以下命令创建当前 nginx.conf 的备份:
[ config]# cp /etc/nginx/nginx.conf /etc/nginx/nginx.conf.bak然后将 /etc/nginx/nginx.conf 替换为以下内容:
# For more information on configuration, see:
# * Official English Documentation: http://nginx.org/en/docs/
# * Official Russian Documentation: http://nginx.org/ru/docs/

user nginx;
worker_processes auto;
error_log /var/log/nginx/error.log;
pid /run/nginx.pid;

events {
 worker_connections 1024;
}

http {
 log_format main '$remote_addr - $remote_user [$time_local] "$request" '
 '$status $body_bytes_sent "$http_referer" '
 '"$http_user_agent" "$http_x_forwarded_for"';

 access_log /var/log/nginx/access.log main;

 sendfile on;
 tcp_nopush on;
 tcp_nodelay on;
 keepalive_timeout 65;
 types_hash_max_size 2048;

 include /etc/nginx/mime.types;
 default_type application/octet-stream;

 # Load modular configuration files from the /etc/nginx/conf.d directory.
 # See http://nginx.org/en/docs/ngx_core_module.html#include
 # for more information.
 include /etc/nginx/conf.d/*.conf;

 server {
 server_name mattermost.example.com;
 location / {
 client_max_body_size 50M;
 proxy_set_header Upgrade $http_upgrade;
 proxy_set_header Connection "upgrade";
 proxy_set_header Host $http_host;
 proxy_set_header X-Real-IP $remote_addr;
 proxy_set_header X-Forwarded-For $proxy_add_x_forwarded_for;
 proxy_set_header X-Forwarded-Proto $scheme;
 proxy_set_header X-Frame-Options SAMEORIGIN;
 proxy_pass http://127.0.0.1:8065;
 }
 }
}
请确保您使用本文档前面所述的正确主机名。
要验证我们的配置文件中没有任何语法错误,请运行以下命令来检查语法:
[ config]# nginx -t
nginx: the configuration file /etc/nginx/nginx.conf syntax is ok
nginx: configuration file /etc/nginx/nginx.conf test is successful
启动并启用 Nginx 作为守护进程
启动 Nginx
[ config]# systemctl start nginx检查状态
[ config]# systemctl status nginx确保它至少输出一行显示:
...
Active: active (running)...
...
作为守护进程启用
[ config]# systemctl enable nginx
Created symlink from /etc/systemd/system/multi-user.target.wants/nginx.service to /usr/lib/systemd/system/nginx.service.
如果一切顺利,你现在应该有一个运行在 Nginx 后面的 Mattermost 安装。通过在浏览器中打开以下 URL 来验证它:
Mattermost 登录屏幕应该会出现!
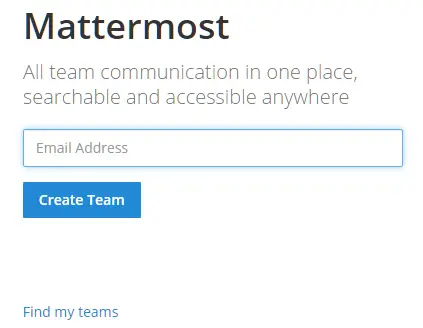
现在您可以通过输入您的电子邮件地址并创建一个帐户来继续设置您的 Mattermost 安装。
防火墙
在本教程的前面,我们禁用了 firewalld。如果您想重新启用它但又想保持端口 80 处于打开状态(我们目前通过 Nginx 将其用于 Mattermost),只需执行以下操作:
启动并重新启用 Firewalld
[ config]# systemctl enable firewalld
Created symlink from /etc/systemd/system/dbus-org.fedoraproject.FirewallD1.service to /usr/lib/systemd/system/firewalld.service.
Created symlink from /etc/systemd/system/basic.target.wants/firewalld.service to /usr/lib/systemd/system/firewalld.service.
在防火墙中打开端口 80
[ config]# firewall-cmd --reload
success
现在你的 Mattermost 安装应该可以访问了,甚至 Firewalld 也在运行!
概括
我希望您发现本教程有用并且有效。在生产环境中,您应该为您的 Mattermost 网站创建/使用证书并通过 Nginx 启用 https。这可以通过稍微修改此 Howto 轻松完成。