如何在 Rocky Linux 8 上使用免费的 Lets Encrypt SSL 安装 Webmin
在此页
- 先决条件
- 安装 Webmin
- 将 Nginx 配置为 Webmin 的反向代理
- 在 Webmin 上启用 SSL
- 配置 Webmin
- 配置防火墙
- 访问 Webmin 界面
- 结论
Webmin 是一个免费、开源和基于 Web 的 Linux 管理工具,允许您通过 Web 浏览器配置 Linux 系统。它是用 Perl 编写的,提供了一个用户友好的 Web 界面,可以实时监控 CPU 和 RAM。使用 Webmin,您可以执行多项管理任务,包括用户帐户管理、包管理、防火墙管理、创建 cron 作业等。
在本教程中,我将向您展示如何在 Rocky Linux 8 上安装带有 Nginx 的 Webmin 和 Lets Encrypt SSL。
先决条件
- 一台运行 Rocky Linux 8 的服务器。
- 用服务器 IP 指向的有效域名。
- 在服务器上配置了根密码。
安装 Webmin
Webmin 是用 Perl 语言编写的,因此您需要在系统中安装 Perl。运行以下命令来安装 Perl:
dnf install perl -y接下来,使用以下命令下载最新版本的 Webmin tarball:
wget https://www.webmin.com/download/webmin-current.tar.gz下载 Webmin 后,使用以下命令解压缩下载的文件:
tar xvf webmin-current.tar.gz接下来,创建一个 Webmin 安装目录并运行以下脚本来安装 Webmin:
mkdir -p /usr/local/webmin
./webmin-1.984/setup.sh /usr/local/webmin/
系统将要求您提供配置目录的路径、管理员用户名和密码,如下所示:
***********************************************************************

        Welcome to the Webmin setup script, version 1.984
***********************************************************************
Webmin is a web-based interface that allows Unix-like operating
systems and common Unix services to be easily administered.

Installing Webmin from /root/webmin-1.984 to /usr/local/webmin/ ...

***********************************************************************
Webmin uses separate directories for configuration files and log files.
Unless you want to run multiple versions of Webmin at the same time
you can just accept the defaults.

Config file directory [/etc/webmin]:
Log file directory [/var/webmin]:

***********************************************************************
Webmin is written entirely in Perl. Please enter the full path to the
Perl 5 interpreter on your system.

Full path to perl (default /usr/bin/perl):

Testing Perl ...
Perl seems to be installed ok

***********************************************************************
Operating system name:    Rocky Linux
Operating system version: 8.5

***********************************************************************
Webmin uses its own password protected web server to provide access
to the administration programs. The setup script needs to know :
 - What port to run the web server on. There must not be another
   web server already using this port.
 - The login name required to access the web server.
 - The password required to access the web server.
 - If the webserver should use SSL (if your system supports it).
 - Whether to start webmin at boot time.

Web server port (default 10000):
Login name (default admin): admin
Login password:
Password again:
Use SSL (y/n): n
Start Webmin at boot time (y/n): y
***********************************************************************
***********************************************************************
Webmin has been installed and started successfully. Use your web
browser to go to

  http://rockylinux:10000/

and login with the name and password you entered previously.
默认情况下,Webmin 监听端口 10000。您可以使用以下命令查看:
ss -antpl | grep 10000您将获得以下输出:
LISTEN 0 128 0.0.0.0:10000 0.0.0.0:* users:(("miniserv.pl",pid=6601,fd=7))
将 Nginx 配置为 Webmin 的反向代理
使用 Nginx 作为 Webmin 的反向代理是个好主意。首先,使用以下命令安装 Nginx 包:
dnf install nginx -y接下来,使用以下命令创建 Nginx 虚拟主机配置文件:
nano /etc/nginx/conf.d/webmin.conf添加以下行:
server {
       listen 80;
       server_name webmin.linuxbuz.com;

       access_log /var/log/nginx/webmin.access;
       error_log /var/log/nginx/webmin.error;

       location / {
              proxy_pass http://127.0.0.1:10000;
              #proxy_set_header Host $http_host;
              proxy_set_header X-Real-IP $remote_addr;
              proxy_set_header X-Forwarded-For $proxy_add_x_forwarded_for;
              proxy_set_header X-Forwarded-Proto $scheme;
        }
}
保存并关闭文件,然后验证 Nginx 是否存在任何语法错误:
nginx -t您将获得以下输出:
nginx: the configuration file /etc/nginx/nginx.conf syntax is ok
nginx: configuration file /etc/nginx/nginx.conf test is successful
接下来,启动 Nginx 服务并使其在系统重启时启动:
systemctl start nginx
systemctl enable nginx
您可以使用以下命令检查 Webmin 的状态:
systemctl status nginx您应该看到以下输出:
? nginx.service - The nginx HTTP and reverse proxy server
   Loaded: loaded (/usr/lib/systemd/system/nginx.service; disabled; vendor preset: disabled)
   Active: active (running) since Sat 2022-02-12 08:20:04 UTC; 17s ago
  Process: 7051 ExecStart=/usr/sbin/nginx (code=exited, status=0/SUCCESS)
  Process: 7050 ExecStartPre=/usr/sbin/nginx -t (code=exited, status=0/SUCCESS)
  Process: 7048 ExecStartPre=/usr/bin/rm -f /run/nginx.pid (code=exited, status=0/SUCCESS)
 Main PID: 7053 (nginx)
    Tasks: 2 (limit: 11412)
   Memory: 3.7M
   CGroup: /system.slice/nginx.service
           ??7053 nginx: master process /usr/sbin/nginx
           ??7054 nginx: worker process

Feb 12 08:20:03 rockylinux systemd[1]: Starting The nginx HTTP and reverse proxy server...
Feb 12 08:20:04 rockylinux nginx[7050]: nginx: the configuration file /etc/nginx/nginx.conf syntax is ok
Feb 12 08:20:04 rockylinux nginx[7050]: nginx: configuration file /etc/nginx/nginx.conf test is successful
Feb 12 08:20:04 rockylinux systemd[1]: nginx.service: Failed to parse PID from file /run/nginx.pid: Invalid argument
Feb 12 08:20:04 rockylinux systemd[1]: Started The nginx HTTP and reverse proxy server.
在 Webmin 上启用 SSL
建议使用 Lets Encrypt SSL 来保护 Webmin。首先,您需要安装 Certbot 客户端来管理 Lets Encrypt SSL。您可以使用以下命令安装它:
dnf install epel-release -y
dnf install python3-certbot-nginx -y
接下来,运行 certbot 命令在 Webmin 域上下载并安装 Lets Encrypt SSL。
certbot --nginx -d webmin.linuxbuz.com系统会要求您提供有效的电子邮件地址并接受服务条款:
Saving debug log to /var/log/letsencrypt/letsencrypt.log
Enter email address (used for urgent renewal and security notices)
 (Enter 'c' to cancel):

- - - - - - - - - - - - - - - - - - - - - - - - - - - - - - - - - - - - - - - -
Please read the Terms of Service at
https://letsencrypt.org/documents/LE-SA-v1.2-November-15-2017.pdf. You must
agree in order to register with the ACME server. Do you agree?
- - - - - - - - - - - - - - - - - - - - - - - - - - - - - - - - - - - - - - - -
(Y)es/(N)o: Y

- - - - - - - - - - - - - - - - - - - - - - - - - - - - - - - - - - - - - - - -
Would you be willing, once your first certificate is successfully issued, to
share your email address with the Electronic Frontier Foundation, a founding
partner of the Let's Encrypt project and the non-profit organization that
develops Certbot? We'd like to send you email about our work encrypting the web,
EFF news, campaigns, and ways to support digital freedom.
- - - - - - - - - - - - - - - - - - - - - - - - - - - - - - - - - - - - - - - -
(Y)es/(N)o: Y
Account registered.
Requesting a certificate for webmin.linuxbuz.com

Successfully received certificate.
Certificate is saved at: /etc/letsencrypt/live/webmin.linuxbuz.com/fullchain.pem
Key is saved at:         /etc/letsencrypt/live/webmin.linuxbuz.com/privkey.pem
This certificate expires on 2022-05-13.
These files will be updated when the certificate renews.
Certbot has set up a scheduled task to automatically renew this certificate in the background.

Deploying certificate
Successfully deployed certificate for webmin.linuxbuz.com to /etc/nginx/conf.d/webmin.conf
Congratulations! You have successfully enabled HTTPS on https://webmin.linuxbuz.com
We were unable to subscribe you the EFF mailing list because your e-mail address appears to be invalid. You can try again later by visiting https://act.eff.org.

- - - - - - - - - - - - - - - - - - - - - - - - - - - - - - - - - - - - - - - -
If you like Certbot, please consider supporting our work by:
 * Donating to ISRG / Let's Encrypt:   https://letsencrypt.org/donate
 * Donating to EFF:                    https://eff.org/donate-le
- - - - - - - - - - - - - - - - - - - - - - - - - - - - - - - - - - - - - - - -
配置 Webmin
接下来,您需要编辑 Webmin 配置文件并定义受信任的引荐来源网址。
nano /etc/webmin/config添加以下行:
referers=webmin.linuxbuz.com
保存并关闭文件,然后编辑 miniserv.conf 文件并在 Webmin 中禁用 HTTPS 模式:
nano /etc/webmin/miniserv.conf添加以下行:
ssl=0
allow=127.0.0.1
完成后保存并关闭文件。
接下来,使用以下命令获取 Webmin 进程 ID:
ps -ef | grep webmin您将获得以下输出:
root        6601       1  0 08:12 ?        00:00:00 /usr/bin/perl /usr/local/webmin//miniserv.pl /etc/webmin/miniserv.conf
root        7553    1117  0 08:24 pts/0    00:00:00 grep --color=auto webmin
接下来,使用 kill 命令杀死 Webmin 进程。
kill -9 6601接下来,使用 systemd 启动 Webmin 服务并使其在系统重启时启动:
systemctl start webmin
systemctl enable webmin
接下来,使用以下命令检查 Webmin 的状态:
systemctl status webmin您将获得以下输出:
? webmin.service - Webmin
   Loaded: loaded (/usr/lib/systemd/system/webmin.service; enabled; vendor preset: disabled)
   Active: active (running) since Sat 2022-02-12 08:25:05 UTC; 54s ago
  Process: 7560 ExecStart=/etc/webmin/start (code=exited, status=0/SUCCESS)
 Main PID: 7561 (miniserv.pl)
    Tasks: 1 (limit: 11412)
   Memory: 23.9M
   CGroup: /system.slice/webmin.service
           ??7561 /usr/bin/perl /usr/local/webmin//miniserv.pl /etc/webmin/miniserv.conf

Feb 12 08:25:05 rockylinux systemd[1]: Starting Webmin...
Feb 12 08:25:05 rockylinux start[7560]: Starting Webmin server in /usr/local/webmin/
Feb 12 08:25:05 rockylinux webmin[7560]: Webmin starting
Feb 12 08:25:05 rockylinux systemd[1]: webmin.service: Can't open PID file /var/webmin/miniserv.pid (yet?) after start: No such file or direc>
Feb 12 08:25:05 rockylinux systemd[1]: Started Webmin.
配置防火墙
如果你的服务器上安装了firewalld防火墙。然后,您需要允许端口 80 和 443 通过防火墙。您可以使用以下命令允许它们:
firewall-cmd --add-port=80/tcp --permanent
firewall-cmd --add-port=443/tcp --permanent
最后,重新加载防火墙服务以应用更改:
firewall-cmd --reload访问 Webmin 界面
现在,打开您的 Web 浏览器并使用 URL https://webmin.linuxbuz.com 访问 Webmin 界面。您将被重定向到 Webmin 登录页面:
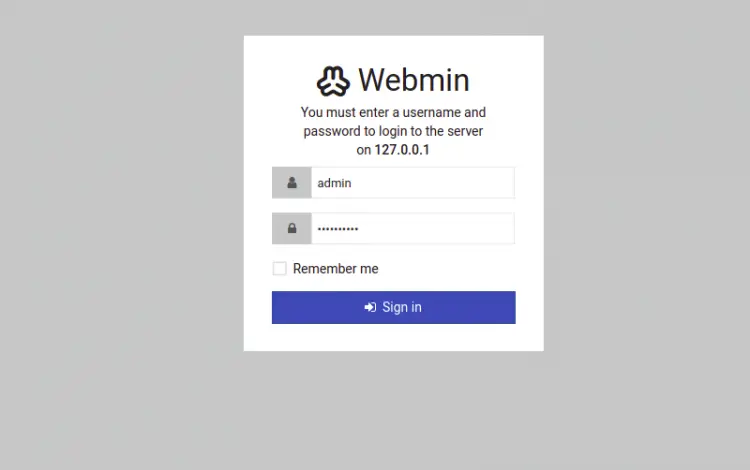
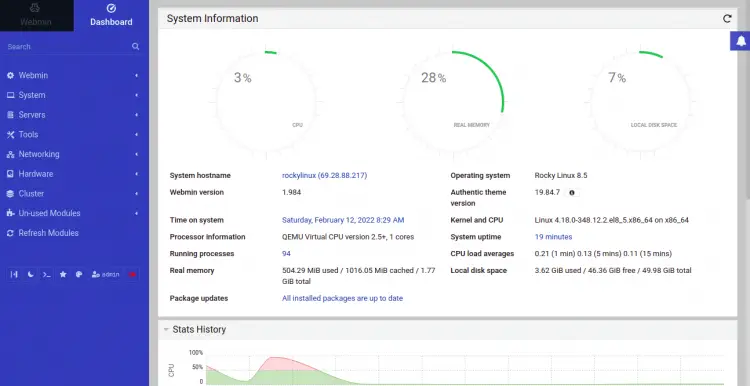
提供您的管理员用户名和密码,然后单击“登录”按钮。您应该在以下页面上看到 Webmin 仪表板:
结论
恭喜!您已经在 Rocky Linux 8 上成功安装了带有 Nginx 的 Webmin 和 Lets Encrypt SSL。您现在可以通过 Web 浏览器轻松管理您的 Linux 系统。如果您有任何问题,请随时问我。