在 Debian 上使用 Munin 和 Monit 进行服务器监控
本教程适用于这些操作系统版本
- Debian 7(喘息)
在此页
- 1 条初步说明
- 2 安装和配置 Munin
- 3 密码保护 Munin 输出目录(可选但强烈推荐)
- 4 在 Munin 中启用其他模块
在本文中,我将介绍如何使用 Munin 和 Monit 监控您的 Debian 8 (Jessie) 服务器。 munin 无需太多配置即可生成有关服务器几乎每个方面(平均负载、内存使用率、CPU 使用率、MySQL 吞吐量、eth0 流量等)的精美小图形,而 Monit 会检查 Apache、MySQL、Postfix 等服务的可用性并获取如果发现服务未按预期运行,则采取适当的措施(例如重新启动)。两者的结合为您提供全面监控:让您识别当前或即将出现的问题的图形(例如“我们很快需要更大的服务器,我们的平均负载正在迅速增加。”),以及确保可用性的看门狗监控服务。
虽然 Munin 可以让你监控多台服务器,但我们这里只讨论安装它的系统的监控。
本教程是为 Debian 8 (Jessie) 编写的,但配置应该适用于其他发行版,如 Ubuntu,只需稍作改动。
我想首先说明,这不是建立这样一个系统的唯一方法。有很多方法可以实现这个目标,但这是我采取的方法。我不保证这对你有用!
1 初步说明
我们的系统主机名是 server1.example.com,我们有一个网站 www.example.com,其文档根目录为 /var/www/www.example.com/web。
在开始安装 Munin 之前确保系统是最新的,运行:
apt-get update
apt-get upgrade
Apache 用于显示 Munin 页面,Munin 图形缩放功能需要 apache fcgid 模块。使用 apt 安装 apache 和 fcgid 模块。
apt-get install apache2 libcgi-fast-perl libapache2-mod-fcgid在 apache 中启用 fcgid 模块。
a2enmod fcgid2 安装和配置 Munin
要在 Debian Jessie 上安装 Munin,我们这样做:
apt-get install munin munin-node munin-plugins-extra 当服务器运行 MySQL 或 MariaDB 时,启用一些额外的 Munin 插件来监控 MySQL:
cd /etc/munin/plugins
ln -s /usr/share/munin/plugins/mysql_ mysql_
ln -s /usr/share/munin/plugins/mysql_bytes mysql_bytes
ln -s /usr/share/munin/plugins/mysql_innodb mysql_innodb
ln -s /usr/share/munin/plugins/mysql_isam_space_ mysql_isam_space_
ln -s /usr/share/munin/plugins/mysql_queries mysql_queries
ln -s /usr/share/munin/plugins/mysql_slowqueries mysql_slowqueries
ln -s /usr/share/munin/plugins/mysql_threads mysql_threads
接下来,我们必须编辑 Munin 配置文件 /etc/munin/munin.conf。取消对 dbdir、htmldir、logdir、rundir 和 tmpldir 行的注释(默认值很好)。我们希望 Munin 在 HTML 输出中使用名称 server1.example.com 而不是 localhost.localdomain,因此我们在简单主机树部分中将 localhost.localdomain 替换为 server1.example.com。没有注释,更改后的文件如下所示:
nano /etc/munin/munin.conf# Example configuration file for Munin, generated by 'make build'
# The next three variables specifies where the location of the RRD
# databases, the HTML output, logs and the lock/pid files. They all
# must be writable by the user running munin-cron. They are all
# defaulted to the values you see here.
#
dbdir /var/lib/munin
htmldir /var/cache/munin/www
logdir /var/log/munin
rundir /var/run/munin
# Where to look for the HTML templates
#
tmpldir /etc/munin/templates
# Where to look for the static www files
#
#staticdir /etc/munin/static
# temporary cgi files are here. note that it has to be writable by
# the cgi user (usually nobody or httpd).
#
# cgitmpdir /var/lib/munin/cgi-tmp
# (Exactly one) directory to include all files from.
includedir /etc/munin/munin-conf.d
[...]
# a simple host tree
[server1.example.com]
address 127.0.0.1
use_node_name yes
[...]我们应该找到 Munin 的 Apache 2.4 配置文件 /etc/munin/apache24.conf - 它为 munins HTML 输出目录 /var/cache/munin/www 定义了一个名为 munin 的别名,这意味着我们可以从该服务器上的所有网站访问 munin通过使用相对路径 /munin(例如 http://www.example.com/munin)。
默认情况下不启用 apache Munin 配置,这已从 DebianWheezy 更改为 Jessie。新的配置目录是 /etc/apache2/conf-enabled 而不是 /etc/apache2/conf.d ,后者在 Wheezy 和 Squeeze 等旧版本中使用。
运行这些命令以启用配置并将配置加载到 apache 中。
cd /etc/apache2/conf-enabled/
ln -s /etc/munin/apache24.conf munin.conf
service apache2 restart
确保注释掉 Require local 这一行并添加 Require all granted 和 Options FollowSymLinks SymLinksIfOwnerMatch 而不是(否则你将只能从本地主机访问 Munin 输出):
nano /etc/munin/apache24.confAlias /munin /var/cache/munin/www
<Directory /var/cache/munin/www>
# Require local
Require all granted
Options FollowSymLinks SymLinksIfOwnerMatch
Options None
</Directory>
ScriptAlias /munin-cgi/munin-cgi-graph /usr/lib/munin/cgi/munin-cgi-graph
<Location /munin-cgi/munin-cgi-graph>
# Require local
Require all granted
Options FollowSymLinks SymLinksIfOwnerMatch
<IfModule mod_fcgid.c>
SetHandler fcgid-script
</IfModule>
<IfModule !mod_fcgid.c>
SetHandler cgi-script
</IfModule>
</Location>重启阿帕奇:
service apache2 restart然后重启 Munin:
service munin-node restart现在等待几分钟,以便 Munin 可以生成第一个输出,然后在浏览器中访问 http://www.example.com/munin/,您会看到第一个统计信息:
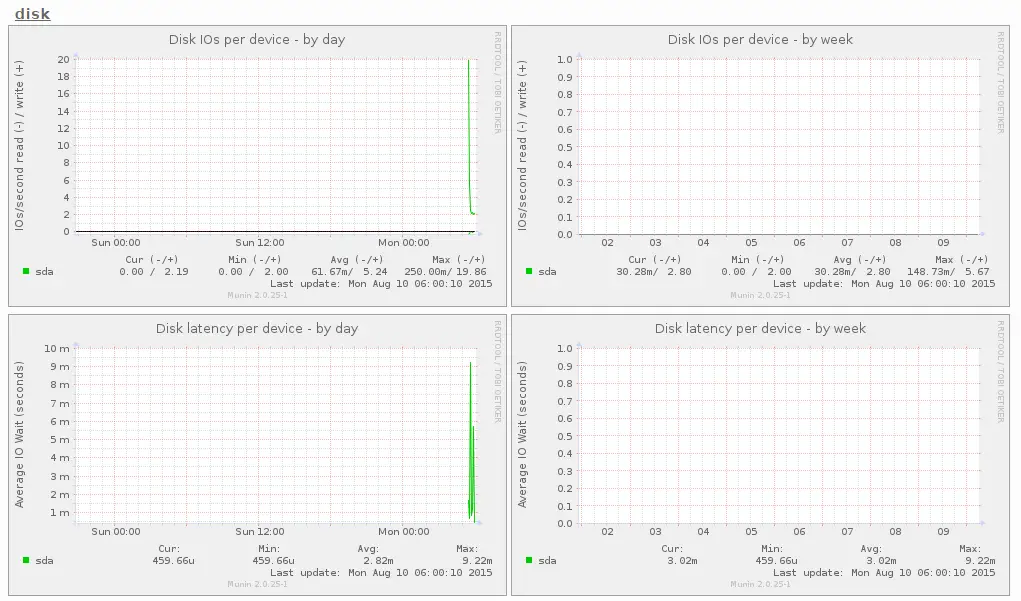
(这只是 munin 制作的众多图形中的一小部分……)
3 密码保护 Munin 输出目录(可选但强烈推荐)
现在用密码保护 munin 输出目录是一个好主意,除非您希望每个人都能够看到关于您的服务器的每一个小统计信息。
为此,我们必须创建密码文件 /etc/munin/munin-htpasswd。我们想使用用户名 admin 登录,所以我们这样做:
htpasswd -c /etc/munin/munin-htpasswd admin输入管理员密码。然后再次打开 /etc/munin/apache24.conf ...
nano /etc/munin/apache24.conf...注释掉 \Require all granted 并添加我用红色标记的行:
Alias /munin /var/cache/munin/www
<Directory /var/cache/munin/www>
 # Require local
 # Require all granted
 AuthUserFile /etc/munin/munin-htpasswd
 AuthName "Munin"
 AuthType Basic
 Require valid-user
 Options None
</Directory>

ScriptAlias /munin-cgi/munin-cgi-graph /usr/lib/munin/cgi/munin-cgi-graph
<Location /munin-cgi/munin-cgi-graph>
 # Require local
 # Require all granted
 AuthUserFile /etc/munin/munin-htpasswd
 AuthName "Munin"
 AuthType Basic
 Require valid-user
 <IfModule mod_fcgid.c>
 SetHandler fcgid-script
 </IfModule>
 <IfModule !mod_fcgid.c>
 SetHandler cgi-script
 </IfModule>
</Location>
然后重新启动 Apache:
service apache2 restart4 在 Munin 中启用附加模块
Munin 命令 \munin-node-configure --suggest\ 可用于获取可在服务器上启用的其他 Munin 模块的建议。跑步:
munin-node-configure --suggest输出应与此类似:
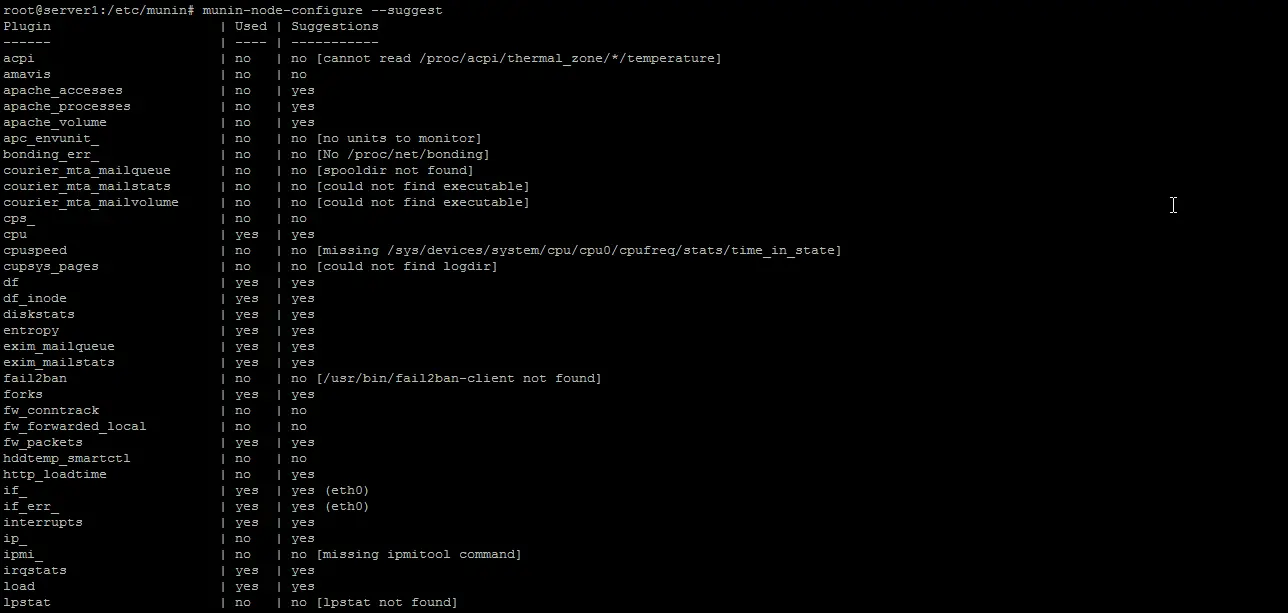
“已使用”列显示模块是否启用,“建议”列显示服务器是否运行可由该模块监控的服务。在 /etc/munin/plugins 中为模块创建符号链接以启用它。
在这里,我将启用 apache_* 模块,例如:
cd /etc/munin/plugins
ln -s /usr/share/munin/plugins/apache_accesses
ln -s /usr/share/munin/plugins/apache_processes
ln -s /usr/share/munin/plugins/apache_volume
重新启动 Munin 以加载新配置。
service munin-node restart