如何在 Alma Linux 8 上安装 Mattermost
在此页
- 先决条件
- 安装 MySQL 服务器
- 为 Mattermost 创建数据库
- 在 Alma Linux 8 上安装 Mattermost
- 为 Mattermost 创建一个 Systemd 服务文件
- 将 Nginx 配置为 Mattermost 的反向代理
- 配置防火墙
- 访问 Mattermost 网络用户界面
- 结论
Mattermost 是一个免费、开源且安全的平台,用于跨工具和团队进行通信、协作和工作流编排。它是一种自托管聊天服务,专为组织和公司实施内部聊天服务而设计。它提供了几个有用的功能,包括一对一消息传递、无限搜索历史记录、文件共享、双因素身份验证、通知等。如果您正在寻找 Slack 的替代解决方案,那么 Mattermost 是您的最佳选择。
在本教程中,我们将向您展示如何在 Alma Linux 8 上使用 Nginx 安装 Mattermost。
先决条件
- 一台运行 Alma Linux 8 的服务器。
- 用您的服务器 IP 指向的有效域名。
- 在服务器上配置了根密码。
安装 MySQL 服务器
Mattermost 使用 MySQL 作为数据库后端。所以MySQL必须安装在你的服务器上。您可以通过运行以下命令来安装它:
dnf install mysql-server -y安装 MySQL 服务器后,使用以下命令启动并启用 MySQL 服务:
systemctl start mysqld
systemctl enable mysqld
现在,您可以通过运行以下脚本来保护 MySQL 安装:
mysql_secure_installation如下所示回答所有问题以设置 MySQL root 密码并确保安装安全:
Press y|Y for Yes, any other key for No: N
Please set the password for root here.
New password:
Re-enter new password:
Remove anonymous users? (Press y|Y for Yes, any other key for No) : Y
Disallow root login remotely? (Press y|Y for Yes, any other key for No) : Y
Remove test database and access to it? (Press y|Y for Yes, any other key for No) : Y
Reload privilege tables now? (Press y|Y for Yes, any other key for No) : Y
为 Mattermost 创建数据库
接下来,您需要为 Mattermost 创建一个数据库和用户。首先,使用以下命令登录MySQL:
mysql -u root -p登录后,使用以下命令创建数据库和用户:
mysql> CREATE DATABASE matterdb;
mysql> CREATE USER 'matteruser'@'localhost' IDENTIFIED BY 'password';
接下来,授予 Mattermost 数据库的所有权限:
mysql> GRANT ALL PRIVILEGES ON matterdb.* TO ;接下来,使用以下命令刷新权限并退出 MySQL:
mysql> FLUSH PRIVILEGES;
mysql> EXIT;
完成后,您可以继续下一步。
在 Alma Linux 8 上安装 Mattermost
首先,使用以下命令创建一个专用用户来运行 Mattermost:
useradd --system --user-group mattermost接下来,使用以下命令下载最新版本的 Mattermost:
wget https://releases.mattermost.com/6.0.2/mattermost-6.0.2-linux-amd64.tar.gz下载完成后,使用以下命令解压缩下载的文件:
tar -xf mattermost-6.0.2-linux-amd64.tar.gz接下来,将提取的目录移动到 /opt:
mv mattermost /opt接下来,为 Mattermost 创建一个数据目录,并更改 Mattermost 的所有权和权限:
mkdir /opt/mattermost/data
chown -R mattermost:mattermost /opt/mattermost
chmod -R g+w /opt/mattermost
接下来,编辑 Mattermost 配置文件:
nano /opt/mattermost/config/config.json定义您的 Mattermost 网站 URL,如下所示:
"SiteURL": "http://mattermost.example.com",
接下来,找到以下几行:
    "DriverName": "postgres",
    "DataSource": "postgres://mmuser:/mattermost_test?sslmode=disable&connect_timeout=10",
并且,将它们替换为以下行:
    "DriverName": "mysql",
    "DataSource": "matteruser:(localhost:3306)/matterdb?charset=utf8mb4,utf8&readTimeout=30s&writeTimeout=30s",
完成后保存并关闭文件。
为 Mattermost 创建系统服务文件
接下来,您需要创建一个 systemd 服务文件来管理 Mattermost 服务。您可以通过运行以下命令来创建它:
nano /etc/systemd/system/mattermost.service添加以下行:
[Unit]
Description=Mattermost
After=syslog.target network.target mysqld.service

[Service]
Type=notify
WorkingDirectory=/opt/mattermost
User=mattermost
ExecStart=/opt/mattermost/bin/mattermost
PIDFile=/var/spool/mattermost/pid/master.pid
TimeoutStartSec=3600
LimitNOFILE=49152

[Install]
WantedBy=multi-user.target
保存并关闭文件,然后使用以下命令重新加载 systemd 守护进程:
systemctl daemon-reload接下来,启动 Mattermost 服务并使其在系统重启时启动:
systemctl start mattermost
systemctl enable mattermost
您现在可以使用以下命令检查 Mattermost 服务的状态:
systemctl status mattermost您将获得以下输出:
? mattermost.service - Mattermost
   Loaded: loaded (/etc/systemd/system/mattermost.service; disabled; vendor preset: disabled)
   Active: active (running) since Sat 2022-01-15 14:12:29 UTC; 7s ago
 Main PID: 15201 (mattermost)
    Tasks: 32 (limit: 11411)
   Memory: 265.2M
   CGroup: /system.slice/mattermost.service
           ??15201 /opt/mattermost/bin/mattermost
           ??15298 plugins/com.mattermost.plugin-channel-export/server/dist/plugin-linux-amd64
           ??15299 plugins/com.mattermost.nps/server/dist/plugin-linux-amd64
           ??15308 plugins/playbooks/server/dist/plugin-linux-amd64
           ??15313 plugins/focalboard/server/dist/plugin-linux-amd64

Jan 15 14:12:26 almalinux8 mattermost[15201]: {"timestamp":"2022-01-15 14:12:26.344 Z","level":"info","msg":"Sent notification of next survey>
Jan 15 14:12:26 almalinux8 mattermost[15201]: {"timestamp":"2022-01-15 14:12:26.402 Z","level":"info","msg":"Post.Message has size restrictio>
Jan 15 14:12:26 almalinux8 mattermost[15201]: {"timestamp":"2022-01-15 14:12:26.499 Z","level":"info","msg":"info [2022-01-15 14:12:26.497 Z]>
Jan 15 14:12:26 almalinux8 mattermost[15201]: {"timestamp":"2022-01-15 14:12:26.537 Z","level":"info","msg":"\n    -- collation of mattermost>
Jan 15 14:12:28 almalinux8 mattermost[15201]: {"timestamp":"2022-01-15 14:12:28.297 Z","level":"info","msg":"debug [2022-01-15 14:12:28.295 Z>
Jan 15 14:12:28 almalinux8 mattermost[15201]: {"timestamp":"2022-01-15 14:12:28.804 Z","level":"info","msg":"info [2022-01-15 14:12:28.803 Z]>
Jan 15 14:12:29 almalinux8 systemd[1]: Started Mattermost.
Jan 15 14:12:29 almalinux8 mattermost[15201]: {"timestamp":"2022-01-15 14:12:29.149 Z","level":"info","msg":"Starting Server...","caller":"ap>
Jan 15 14:12:29 almalinux8 mattermost[15201]: {"timestamp":"2022-01-15 14:12:29.150 Z","level":"info","msg":"Server is listening on [::]:8065>
Jan 15 14:12:29 almalinux8 mattermost[15201]: {"timestamp":"2022-01-15 14:12:29.150 Z","level":"info","msg":"Sending systemd READY notificati>
至此,Mattermost 已启动并运行在 8065 端口上。您可以使用以下命令查看它:
ss -antpl | grep 8065您将获得以下输出:
LISTEN 0 128 *:8065 *:* users:(("mattermost",pid=15201,fd=35))
完成后,您可以继续下一步。
将 Nginx 配置为 Mattermost 的反向代理
建议安装和配置 Nginx 作为 Mattermost 的反向代理。为此,您需要将 Nginx 服务器安装到您的服务器。您可以通过运行以下命令来安装它:
dnf install nginx -y安装 Nginx 后,使用以下命令创建 Nginx 虚拟主机配置文件:
nano /etc/nginx/conf.d/mattermost.conf添加以下行:
 server {
        listen       80;
        server_name  mattermost.example.com;

        # Load configuration files for the default server block.
        include /etc/nginx/default.d/*.conf;

        location / {
	proxy_pass http://localhost:8065/;
            index  index.html index.htm;
        }

        error_page 404 /404.html;
            location = /40x.html {
        }

        error_page 500 502 503 504 /50x.html;
            location = /50x.html {
        }
    }
保存并关闭文件,然后验证 Nginx 是否存在任何配置错误:
nginx -t如果一切正常,您将获得以下输出:
nginx: the configuration file /etc/nginx/nginx.conf syntax is ok
nginx: configuration file /etc/nginx/nginx.conf test is successful
现在,启动并启用 Nginx 服务以在系统重启时启动:
systemctl start nginx
systemctl enable nginx
您可以使用以下命令检查 Nginx 的状态:
systemctl status nginx您将获得以下输出:
? nginx.service - The nginx HTTP and reverse proxy server
   Loaded: loaded (/usr/lib/systemd/system/nginx.service; disabled; vendor preset: disabled)
   Active: active (running) since Sat 2022-01-15 14:14:05 UTC; 7s ago
  Process: 15356 ExecStart=/usr/sbin/nginx (code=exited, status=0/SUCCESS)
  Process: 15354 ExecStartPre=/usr/sbin/nginx -t (code=exited, status=0/SUCCESS)
  Process: 15351 ExecStartPre=/usr/bin/rm -f /run/nginx.pid (code=exited, status=0/SUCCESS)
 Main PID: 15358 (nginx)
    Tasks: 2 (limit: 11411)
   Memory: 3.8M
   CGroup: /system.slice/nginx.service
           ??15358 nginx: master process /usr/sbin/nginx
           ??15359 nginx: worker process

Jan 15 14:14:05 almalinux8 systemd[1]: nginx.service: Succeeded.
Jan 15 14:14:05 almalinux8 systemd[1]: Stopped The nginx HTTP and reverse proxy server.
Jan 15 14:14:05 almalinux8 systemd[1]: Starting The nginx HTTP and reverse proxy server...
Jan 15 14:14:05 almalinux8 nginx[15354]: nginx: the configuration file /etc/nginx/nginx.conf syntax is ok
Jan 15 14:14:05 almalinux8 nginx[15354]: nginx: configuration file /etc/nginx/nginx.conf test is successful
Jan 15 14:14:05 almalinux8 systemd[1]: nginx.service: Failed to parse PID from file /run/nginx.pid: Invalid argument
Jan 15 14:14:05 almalinux8 systemd[1]: Started The nginx HTTP and reverse proxy server.
此时,Nginx 已安装并配置为服务 Mattermost。您现在可以继续下一步。
配置防火墙
接下来,您需要允许端口 80 通过防火墙。您可以通过运行以下命令来允许它:
firewall-cmd --add-service=http --permanent接下来,重新加载防火墙以应用更改:
firewall-cmd --reload完成后,您可以继续下一步。
访问 Mattermost Web UI
现在,打开您的网络浏览器并使用 URL http://mattermost.example.com 访问 Mattermost 网络界面。您将被重定向到以下屏幕:
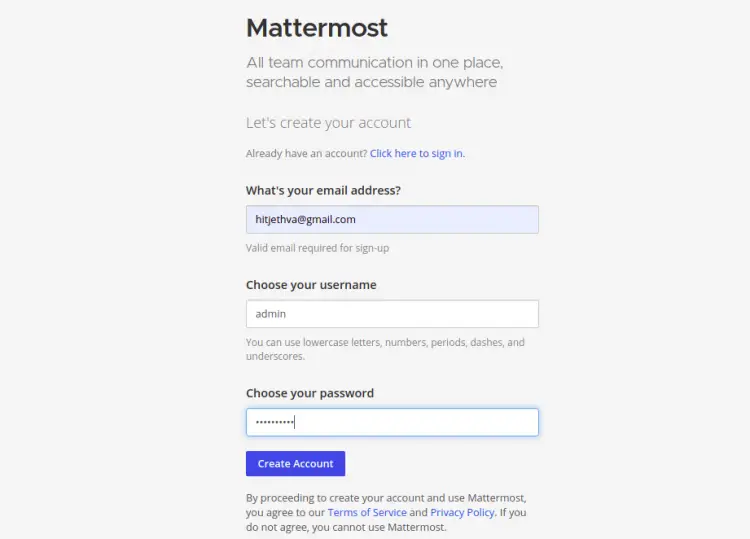
提供您的电子邮件地址、管理员用户名、密码,然后单击“创建帐户”按钮。您将看到以下屏幕:
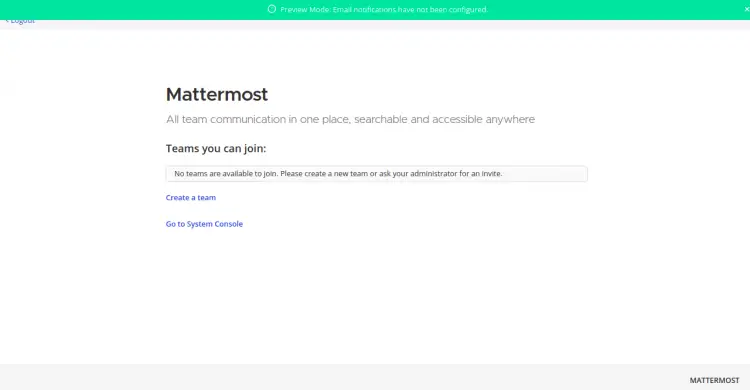
单击创建团队。您将看到以下屏幕:
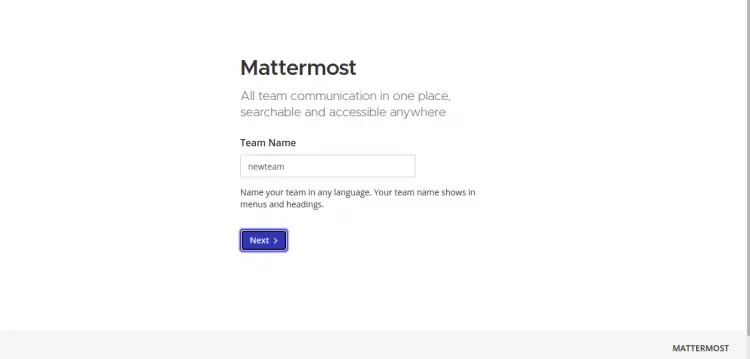
提供您的团队名称,然后单击“下一步”按钮。您将看到以下屏幕:
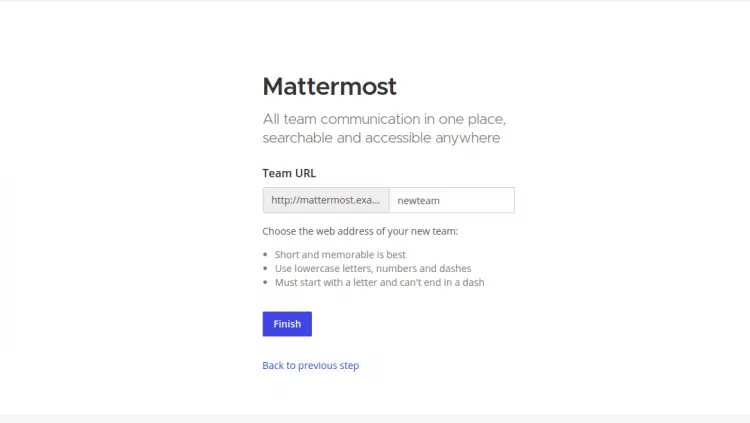
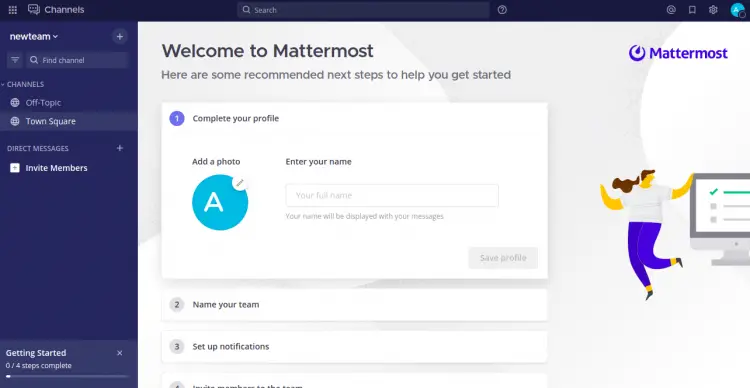
提供您的 Mattermost 团队 URL,然后单击“完成”按钮。您将在以下屏幕上获得 Mattermost 仪表板:
结论
在上面的指南中,您学习了如何在 Alma Linux 8 上使用 Nginx 安装 Mattermost 聊天服务。您现在可以在您的组织中实施 Mattermost 并开始将其用作内部聊天。如果您有任何问题,请随时问我。