如何在 Debian 11 上安装 Bugzilla 错误跟踪器
在此页
- 先决条件
- 安装所需的依赖项
- 安装 Apache 和 MariaDB
- 配置 MariaDB 数据库
- 安装和配置 Bugzilla
- 为 Bugzilla 配置 Apache
- 访问 Bugzilla 网络界面
- 结论
Bugzilla 是一个免费的开源错误跟踪系统,它使我们能够跟踪错误并与我们组织中的开发人员和其他团队协作。它帮助我们有效地跟踪他们产品中的错误、问题和其他变更请求。由于其强大的功能,它被全球数以千计的组织采用。它是用 Perl 编写的,使用 MySQL/MariaDB 作为数据库后端。
在这篇文章中,我将解释如何在 Debian 11 上安装 Bugzilla。
先决条件
- 运行 Debian 11 的服务器。
- 用您的服务器 IP 指向的有效域名。
- 在您的服务器上配置了根密码。
安装所需的依赖项
首先,使用以下命令将所有系统包更新到更新版本:
apt-get update -y接下来,使用以下命令安装所有必需的 Perl 模块:
apt-get install build-essential libdatetime-timezone-perl libappconfig-perl libdate-calc-perl libtemplate-perl libmime-tools-perl libdatetime-perl libemail-sender-perl libemail-mime-perl libemail-mime-perl libdbi-perl libdbd-mysql-perl libcgi-pm-perl libmath-random-isaac-perl libmath-random-isaac-xs-perl libapache2-mod-perl2 libapache2-mod-perl2-dev libchart-perl libxml-perl libxml-twig-perl perlmagick libgd-graph-perl libtemplate-plugin-gd-perl libsoap-lite-perl libhtml-scrubber-perl libjson-rpc-perl libdaemon-generic-perl libtheschwartz-perl libtest-taint-perl libauthen-radius-perl libhtml-formattext-withlinks-perl libgd-dev graphviz sphinx-common rst2pdf libemail-address-perl libemail-reply-perl libfile-slurp-perl libencode-detect-perl libmodule-build-perl libnet-ldap-perl libfile-which-perl libauthen-sasl-perl libfile-mimeinfo-perl -y完成后,您可以继续下一步。
安装 Apache 和 MariaDB
接下来,通过运行以下命令安装 Apache 和 MariaDB 数据库服务器:
apt-get install apache2 mariadb-server mariadb-client -y安装完这两个包后,使用以下命令启动 Apache 和 MariaDB 服务:
systemctl start apache2
systemctl start mariadb
完成后,您可以继续下一步。
配置 MariaDB 数据库
接下来,您需要为 Bugzilla 创建数据库和用户。
首先,使用下面给出的命令登录到 MariaDB shell:
mysql登录后,使用以下命令创建数据库和用户:
MariaDB [(none)]> CREATE DATABASE bugzilla;
MariaDB [(none)]> CREATE USER 'buguser'@'localhost' IDENTIFIED BY 'password';
接下来,使用以下命令授予 Bugzilla 数据库的所有权限:
MariaDB [(none)]> GRANT ALL PRIVILEGES ON bugzilla.* TO 'buguser'@'localhost';接下来,使用以下命令刷新权限并退出 MariaDB shell:
MariaDB [(none)]> FLUSH PRIVILEGES;
MariaDB [(none)]> EXIT;
接下来,编辑 MariaDB 默认配置文件并调整一些配置:
nano /etc/mysql/mariadb.conf.d/50-server.cnf在 [mysqld] 中添加以下行:
max_allowed_packet=16M
ft_min_word_len=2
保存并关闭该字段,重新启动 MariaDB 服务以应用更改:
systemctl restart mariadb安装和配置 Bugzilla
首先,使用以下命令下载最新版本的 Bugzilla:
wget https://ftp.mozilla.org/pub/mozilla.org/webtools/bugzilla-5.0.6.tar.gz下载完成后,为 Bugzilla 创建目录并将下载的文件解压缩到 Bugzilla 目录:
mkdir /var/www/html/bugzilla
tar xf bugzilla-5.0.6.tar.gz -C /var/www/html/bugzilla --strip-components=1
接下来,编辑 Bugzilla 目录中的 localconfig 文件:
cd /var/www/html/bugzilla
nano localconfig
进行以下更改:
$create_htaccess = 1;
$webservergroup = 'www-data';
$use_suexec = 1;
$db_driver = 'mysql';
$db_host = 'localhost';
$db_name = 'bugzilla';
$db_user = 'buguser';
$db_pass = 'password';
保存并关闭文件,然后运行以下命令来设置 Bugzilla:
./checksetup.plEnter the e-mail address of the administrator:
Enter the real name of the administrator: Hitesh Jethva
Enter a password for the administrator account:
Please retype the password to verify:
is now set up as an administrator.
Creating initial dummy product 'TestProduct'...
Now that you have installed Bugzilla, you should visit the 'Parameters'
page (linked in the footer of the Administrator account) to ensure it
is set up as you wish - this includes setting the 'urlbase' option to
the correct URL.
checksetup.pl complete.
接下来,运行以下命令来安装所有必需的 Perl 模块:
/usr/bin/perl install-module.pl --all接下来,将 Bugzilla 目录的所有权更改为 www-data:
chown -R www-data:www-data /var/www/html/bugzilla/接下来,使用以下命令验证 Bugzilla 设置:
./checksetup.pl如果一切正常,您将获得以下输出:
* APACHE MODULES                                                      *
***********************************************************************
* Some Apache modules allow to extend Bugzilla functionalities.       *
* These modules can be enabled in the Apache configuration file       *
* (usually called httpd.conf or apache2.conf).                        *
* - mod_headers, mod_env and mod_expires permit to automatically      *
*   refresh the browser cache of your users when upgrading Bugzilla.  *
* - mod_rewrite permits to write shorter URLs used by the REST API.   *
* - mod_version permits to write rules in .htaccess specific to       *
*   Apache 2.2 or 2.4.                                                *
* The modules you need to enable are:                                 *
*                                                                     *
*    mod_expires, mod_headers, mod_rewrite                            *
*                                                                     *
***********************************************************************
Reading ./localconfig...

OPTIONAL NOTE: If you want to be able to use the 'difference between two
patches' feature of Bugzilla (which requires the PatchReader Perl module
as well), you should install patchutils from:

    patchutils

Checking for            DBD-mysql (v4.001)    ok: found v4.050
Checking for                MySQL (v5.0.15)   ok: found v10.5.12-MariaDB-0+deb11u1

Removing existing compiled templates...
Precompiling templates...done.
Fixing file permissions...

Now that you have installed Bugzilla, you should visit the 'Parameters'
page (linked in the footer of the Administrator account) to ensure it
is set up as you wish - this includes setting the 'urlbase' option to
the correct URL.
checksetup.pl complete.
完成后,您可以继续下一步。
为 Bugzilla 配置 Apache
接下来,您需要为 Bugzilla 创建一个 Apache 虚拟主机配置文件。
nano /etc/apache2/sites-available/bugzilla.conf添加以下行:
<VirtualHost *:80>
ServerName bugzilla.example.com
DocumentRoot /var/www/html/bugzilla/

<Directory /var/www/html/bugzilla/>
AddHandler cgi-script .cgi
Options +Indexes +ExecCGI
DirectoryIndex index.cgi
AllowOverride Limit FileInfo Indexes Options AuthConfig
</Directory>

ErrorLog /var/log/apache2/bugzilla.error_log
CustomLog /var/log/apache2/bugzilla.access_log common
</VirtualHost>
保存并关闭文件,然后激活 Bugzilla 虚拟主机并使用以下命令启用其他所需的模块:
a2ensite bugzilla.conf
a2enmod headers env rewrite expires cgi
接下来,重新启动 Apache 服务以应用配置更改:
systemctl restart apache2您可以使用以下命令检查 Apache 的状态:
systemctl status apache2您将获得以下输出:
? apache2.service - The Apache HTTP Server
     Loaded: loaded (/lib/systemd/system/apache2.service; enabled; vendor preset: enabled)
     Active: active (running) since Sun 2021-12-19 08:57:08 UTC; 7s ago
       Docs: https://httpd.apache.org/docs/2.4/
    Process: 43005 ExecStart=/usr/sbin/apachectl start (code=exited, status=0/SUCCESS)
   Main PID: 43011 (apache2)
      Tasks: 56 (limit: 4679)
     Memory: 13.5M
        CPU: 46ms
     CGroup: /system.slice/apache2.service
             ??43011 /usr/sbin/apache2 -k start
             ??43012 /usr/sbin/apache2 -k start
             ??43013 /usr/sbin/apache2 -k start
             ??43014 /usr/sbin/apache2 -k start

Dec 19 08:57:08 taiga systemd[1]: Starting The Apache HTTP Server...
完成后,您可以继续下一步。
访问 Bugzilla Web 界面
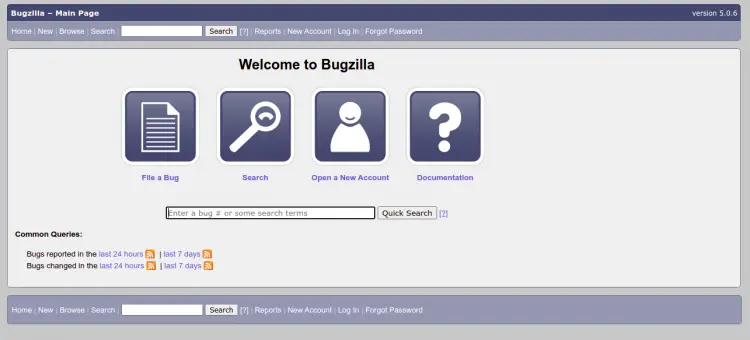
现在,打开您的 Web 浏览器并使用 URL http://bugzilla.example.com 访问 Bugzilla Web 界面。您应该看到以下屏幕:
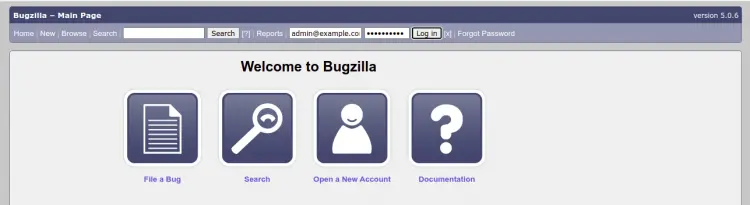
单击“登录”按钮。您应该看到以下屏幕:
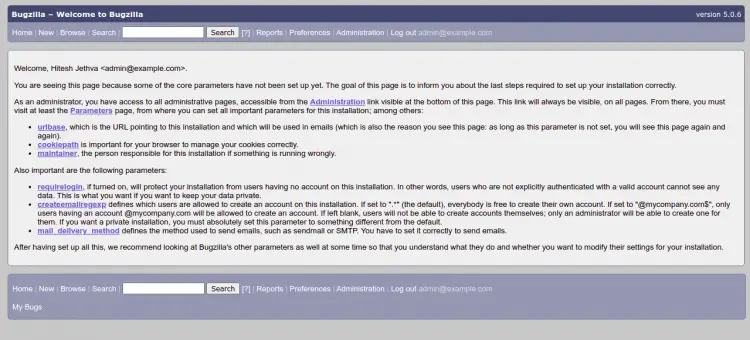
提供您的管理员电子邮件、密码,然后单击“登录”按钮。您应该在以下屏幕上看到 Bugzilla 仪表板:
结论
恭喜!您已经在 Debian 11 上成功安装了带有 Apache 的 Bugzilla。您现在可以在您的开发环境中实施 Bugzilla 来管理和跟踪您的项目。如果您有任何问题,请随时问我。