如何在 Debian 11 上安装和配置 WildFly (JBoss)
本教程适用于这些操作系统版本
- Debian 11(Bullseye)
- Debian 10(Buster)
在此页
- 先决条件
- 安装Java JDK
- 安装 Wildfly
- 启用 Wildfly 管理控制台
- 创建 Wildfly 管理员用户
- 安装 Nginx 并将其配置为反向代理
- 访问 Wildfly 网络用户界面
- 结论
Wildfly 是由 RedHat 开发的用 Java 编写的应用服务器。它是一个简单、轻量级且功能强大的服务器,带有 CLI 和管理控制台。它是开源的、跨平台的,并且基于可根据需要添加或删除的可插拔子系统。它提供了运行 Java Web 应用程序所需的所有功能。
在本教程中,我将向您展示如何在 Debian 11 上使用 Nginx 作为反向代理安装 Wildfly。
先决条件
- 运行 Debian 11 的服务器。
- 用您的服务器 IP 指向的有效域名。
- 在您的服务器上配置了根密码。
安装 Java JDK
Wildfly 是基于 Java 的应用程序,因此您的服务器上必须安装 Java。如果没有安装,您可以通过运行以下命令来安装它:
apt-get install default-jdk -y安装 Java 后,您可以使用以下命令对其进行验证:
java --version您应该在以下输出中看到 Java 版本:
openjdk 11.0.12 2021-07-20
OpenJDK Runtime Environment (build 11.0.12+7-post-Debian-2deb10u1)
OpenJDK 64-Bit Server VM (build 11.0.12+7-post-Debian-2deb10u1, mixed mode, sharing)
安装 Wildfly
首先,使用以下命令创建一个用户和组来运行 Wildfly 应用程序:
groupadd -r wildfly
useradd -r -g wildfly -d /opt/wildfly -s /sbin/nologin wildfly
接下来,使用 wget 命令下载最新版本的 Wildfly:
wget https://github.com/wildfly/wildfly/releases/download/25.0.1.Final/wildfly-25.0.1.Final.zip下载完成后,使用以下命令解压缩下载的文件:
unzip wildfly-25.0.1.Final.zip接下来,使用以下命令将提取的目录移动到 /opt:
mv wildfly-25.0.1.Final /opt/wildfly接下来,更改 /opt/wildfly 目录的所有权:
chown -RH wildfly:wildfly /opt/wildfly接下来,使用以下命令在 /etc 中创建一个 Wildfly 配置目录:
mkdir -p /etc/wildfly接下来,将所有必需的文件从 Wildfly 目录复制到 /etc/wildfly 目录:
cp /opt/wildfly/docs/contrib/scripts/systemd/wildfly.conf /etc/wildfly/
cp /opt/wildfly/docs/contrib/scripts/systemd/wildfly.service /etc/systemd/system/
cp /opt/wildfly/docs/contrib/scripts/systemd/launch.sh /opt/wildfly/bin/
接下来,为所有shell脚本文件设置执行权限:
chmod +x /opt/wildfly/bin/*.sh接下来,使用以下命令重新加载 systemd 守护进程:
systemctl daemon-reload接下来,使用以下命令启动并启用 Wildfly 服务:
systemctl start wildfly
systemctl enable wildfly
要检查 Wildfly 服务状态,请运行以下命令:
systemctl status wildfly您将获得以下输出:
? wildfly.service - The WildFly Application Server
   Loaded: loaded (/etc/systemd/system/wildfly.service; disabled; vendor preset: enabled)
   Active: active (running) since Fri 2021-12-10 14:55:07 UTC; 6s ago
 Main PID: 20928 (launch.sh)
    Tasks: 59 (limit: 4701)
   Memory: 171.6M
   CGroup: /system.slice/wildfly.service
           ??20928 /bin/bash /opt/wildfly/bin/launch.sh standalone standalone.xml 0.0.0.0
           ??20929 /bin/sh /opt/wildfly/bin/standalone.sh -c standalone.xml -b 0.0.0.0
           ??21022 java -D[Standalone] -server -Xms64m -Xmx512m -XX:MetaspaceSize=96M -XX:MaxMetaspaceSize=256m -Djava.net.preferIPv4Stack=tru

Dec 10 14:55:07 debian11 systemd[1]: Started The WildFly Application Server.
启用 Wildfly 管理控制台
默认情况下,Wildfly 管理控制台处于禁用状态。建议启用它来管理 Wildfly 应用程序。
您可以通过编辑 Wildfly 配置文件来启用它:
nano /etc/wildfly/wildfly.conf更改以下行:
WILDFLY_BIND=127.0.0.1
WILDFLY_CONSOLE_BIND=127.0.0.1
保存并关闭文件,然后编辑 Wildfly 启动器脚本并启用管理控制台。
nano /opt/wildfly/bin/launch.sh更改文件如下所示:
if [[ "$1" == "domain" ]]; then
    $WILDFLY_HOME/bin/domain.sh -c $2 -b $3 -bmanagement $4
else
    $WILDFLY_HOME/bin/standalone.sh -c $2 -b $3 -bmanagement $4
fi
保存并关闭文件,然后编辑 Wildfly systemd 文件:
nano /etc/systemd/system/wildfly.service更改以下行:
ExecStart=/opt/wildfly/bin/launch.sh $WILDFLY_MODE $WILDFLY_CONFIG $WILDFLY_BIND $WILDFLY_CONSOLE_BIND
保存并关闭文件,然后重新加载 systemd 守护进程以应用配置更改:
systemctl daemon-reload接下来,重新启动 Wildfly 服务以应用更改:
systemctl restart wildfly您还可以使用以下命令检查 Wildfly 的状态:
systemctl status wildfly您将获得以下输出:
? wildfly.service - The WildFly Application Server
   Loaded: loaded (/etc/systemd/system/wildfly.service; disabled; vendor preset: enabled)
   Active: active (running) since Fri 2021-12-10 14:57:22 UTC; 3s ago
 Main PID: 21182 (launch.sh)
    Tasks: 64 (limit: 4701)
   Memory: 205.6M
   CGroup: /system.slice/wildfly.service
           ??21182 /bin/bash /opt/wildfly/bin/launch.sh standalone standalone.xml 127.0.0.1 127.0.0.1
           ??21183 /bin/sh /opt/wildfly/bin/standalone.sh -c standalone.xml -b 127.0.0.1 -bmanagement 127.0.0.1
           ??21282 java -D[Standalone] -server -Xms64m -Xmx512m -XX:MetaspaceSize=96M -XX:MaxMetaspaceSize=256m -Djava.net.preferIPv4Stack=tru

Dec 10 14:57:22 debian11 systemd[1]: Started The WildFly Application Server.
至此,Wildfly 已经启动,并监听 8080 和 9990 端口,可以通过以下命令查看:
ss -plnt您将获得以下输出:
State        Recv-Q       Send-Q             Local Address:Port             Peer Address:Port
LISTEN       0            128                      0.0.0.0:22                    0.0.0.0:*           users:(("sshd",pid=678,fd=3))
LISTEN       0            128                    127.0.0.1:8443                  0.0.0.0:*           users:(("java",pid=21282,fd=485))
LISTEN       0            50                     127.0.0.1:9990                  0.0.0.0:*           users:(("java",pid=21282,fd=487))
LISTEN       0            80                     127.0.0.1:3306                  0.0.0.0:*           users:(("mysqld",pid=12461,fd=21))
LISTEN       0            128                    127.0.0.1:8080                  0.0.0.0:*           users:(("java",pid=21282,fd=476))
LISTEN       0            128                         [::]:22                       [::]:*           users:(("sshd",pid=678,fd=4))
完成后,您可以继续下一步。
创建 Wildfly 管理员用户
接下来,您还需要创建一个管理员用户来访问 Wildfly 管理控制台。您可以通过运行以下命令来创建它:
sh /opt/wildfly/bin/add-user.sh您将被要求选择用户类型:
What type of user do you wish to add?
 a) Management User (mgmt-users.properties)
 b) Application User (application-users.properties)
(a): a
键入 a 并按 Enter 键以添加管理用户。您将被要求定义您的用户名和密码,如下所示:
Enter the details of the new user to add.
Using realm 'ManagementRealm' as discovered from the existing property files.
Username : hitesh
Password recommendations are listed below. To modify these restrictions edit the add-user.properties configuration file.
 - The password should be different from the username
 - The password should not be one of the following restricted values {root, admin, administrator}
 - The password should contain at least 8 characters, 1 alphabetic character(s), 1 digit(s), 1 non-alphanumeric symbol(s)
Password :
Re-enter Password :
提供您的用户名、密码,然后按 Enter。您将被要求将用户添加到领域:
What groups do you want this user to belong to? (Please enter a comma separated list, or leave blank for none)[  ]:
About to add user 'hitesh' for realm 'ManagementRealm'
Is this correct yes/no? yes
键入 yes 并按 Enter 键继续。添加用户后,您将获得以下输出:
Added user 'hitesh' to file '/opt/wildfly/standalone/configuration/mgmt-users.properties'
Added user 'hitesh' to file '/opt/wildfly/domain/configuration/mgmt-users.properties'
Added user 'hitesh' with groups  to file '/opt/wildfly/standalone/configuration/mgmt-groups.properties'
Added user 'hitesh' with groups  to file '/opt/wildfly/domain/configuration/mgmt-groups.properties'
Is this new user going to be used for one AS process to connect to another AS process?
e.g. for a slave host controller connecting to the master or for a Remoting connection for server to server Jakarta Enterprise Beans calls.
yes/no? yes
To represent the user add the following to the server-identities definition
完成后,您可以继续下一步。
安装和配置 Nginx 作为反向代理
接下来,您需要将 Nginx 配置为反向代理,以通过 80 端口访问 Wildfly。
首先,使用以下命令安装 Nginx 包:
apt-get install nginx -y安装 Nginx 后,使用以下命令创建 Nginx 代理文件:
nano /etc/nginx/conf.d/proxy_headers.conf添加以下行:
proxy_set_header Host $host;
proxy_set_header X-Forwarded-Proto $scheme;
add_header Front-End-Https on;
add_header Cache-Control no-cache;
保存并关闭文件,然后为 Wildfly 创建一个 Nginx 虚拟主机配置文件:
nano /etc/nginx/conf.d/wildfly.conf添加以下行:
server {
  listen          80;
  server_name     wildfly.yourdomain.com;

  location / {
    include conf.d/proxy_headers.conf;
    proxy_pass http://127.0.0.1:8080;
  }

  location /management {
    include conf.d/proxy_headers.conf;
    proxy_pass http://127.0.0.1:9990/management;
  }

  location /console {
    include conf.d/proxy_headers.conf;
    proxy_pass http://127.0.0.1:9990/console;
  }

  location /logout {
    include conf.d/proxy_headers.conf;
    proxy_pass http://127.0.0.1:9990/logout;
  }

  location /error {
    include conf.d/proxy_headers.conf;
    proxy_pass http://127.0.0.1:9990;
  }

}
保存并关闭文件,然后使用以下命令验证 Nginx 是否存在任何语法错误:
nginx -t您应该看到以下输出:
nginx: the configuration file /etc/nginx/nginx.conf syntax is ok
nginx: configuration file /etc/nginx/nginx.conf test is successful
最后,重新启动 Nginx 服务以应用更改:
systemctl restart nginx您还可以使用以下命令检查 Nginx 状态:
systemctl status nginx您将获得以下输出:
? nginx.service - A high performance web server and a reverse proxy server
   Loaded: loaded (/lib/systemd/system/nginx.service; enabled; vendor preset: enabled)
   Active: active (running) since Fri 2021-12-10 15:12:26 UTC; 9s ago
     Docs: man:nginx(8)
  Process: 22115 ExecStartPre=/usr/sbin/nginx -t -q -g daemon on; master_process on; (code=exited, status=0/SUCCESS)
  Process: 22116 ExecStart=/usr/sbin/nginx -g daemon on; master_process on; (code=exited, status=0/SUCCESS)
 Main PID: 22117 (nginx)
    Tasks: 3 (limit: 4701)
   Memory: 3.8M
   CGroup: /system.slice/nginx.service
           ??22117 nginx: master process /usr/sbin/nginx -g daemon on; master_process on;
           ??22118 nginx: worker process
           ??22119 nginx: worker process

Dec 10 15:12:25 debian11 systemd[1]: Starting A high performance web server and a reverse proxy server...
Dec 10 15:12:26 debian11 systemd[1]: Started A high performance web server and a reverse proxy server.
此时,Nginx 已安装并配置为为 Wildfly 提供服务。您现在可以继续下一步。
访问 Wildfly 网页界面
现在,打开 Web 浏览器并使用 URL http://wildfly.yourdomain.com 访问 Wildfly 应用程序页面。您应该会在以下屏幕上看到 Wildfly 默认页面:

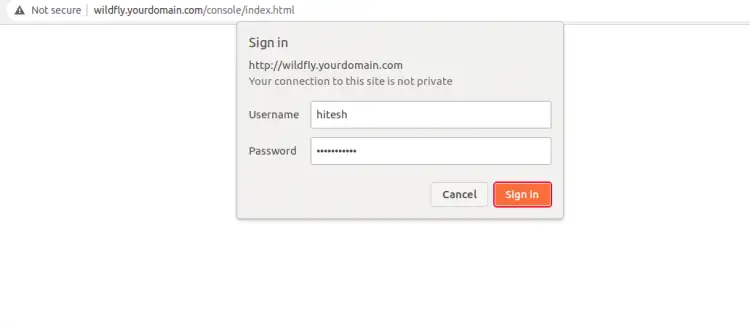
要访问 Wildfly 管理控制台,请在您的 Web 浏览器中键入 URL http://wildfly.yourdomain.com/console/。系统将要求您提供管理员用户名和密码,如下所示:
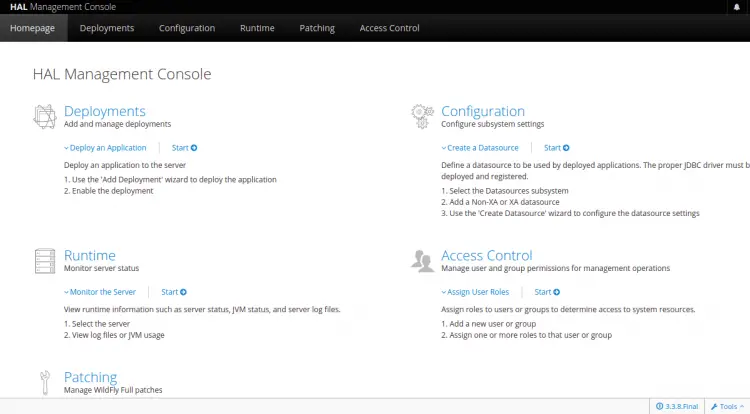
提供您的管理员用户名和密码,然后单击“登录”按钮。登录后,您应该会看到 Wildfly 管理仪表板:
结论
恭喜!您已经在 Debian 11 上成功安装了带有 Nginx 作为反向代理的 Wildfly。您现在可以使用 Wildfly 在互联网上托管您的 Java 应用程序。如果您有任何问题,请随时问我。