如何在 CentOS 8 上使用 Nginx 安装 Askbot 并使用 Lets Encrypt 确保安全
在此页
- 先决条件
- 安装所需的依赖项
- 安装和配置 PostgreSQL
- 安装和配置 Askbot
- 安装和配置 uWSGI
- 为 uWSGI 创建一个 Systemd 服务文件
- 安装和配置 Nginx
- 使用 Lets Encrypt SSL 保护 Askbot
- 配置防火墙和 SELinux
- 访问 Askbot
- 结论
Askbot 是一个免费的、开源的、高度可定制的问答论坛软件,用 Python 和 Django 编写。它简单、轻巧,与其他论坛软件 StackOverflow 和 YahooAnswers 非常相似。 Askbot 提供了大量功能,包括标签和类别、电子邮件通知、基于业力的系统、投票、内容审核等等。
在本教程中,我们将向您展示如何使用 Lets Encrypt SSL 在 CentOS 8 上安装 Askbot 论坛软件。
先决条件
- 一台运行 CentOS 8 的服务器。
- 在您的服务器上设置了根密码。
安装所需的依赖项
在开始之前,您需要在系统中安装一些必需的依赖项。
首先,使用以下命令安装“开发工具”:
dnf group install 'Development Tools'接下来,使用以下命令安装 EPEL 存储库和其他 Python 依赖项:
dnf install epel-release -y
dnf install python2-pip python2-devel python2-six -y
安装所有必需的软件包后,您可以继续下一步。
安装和配置 PostgreSQL
Askbot 使用 PostgreSQL 来存储他们的数据。所以你需要在你的系统中安装它。您可以使用以下命令安装它:
dnf install postgresql-server postgresql-devel postgresql-contrib -y安装后,使用以下命令初始化数据库:
postgresql-setup initdb您应该得到以下输出:
WARNING: using obsoleted argument syntax, try --help
WARNING: arguments transformed to: postgresql-setup --initdb --unit postgresql
 * Initializing database in '/var/lib/pgsql/data'
 * Initialized, logs are in /var/lib/pgsql/initdb_postgresql.log
接下来,使用以下命令启动 PostgreSQL 服务并使其在系统重启后启动:
systemctl start postgresql
systemctl enable postgresql
接下来,使用以下命令登录到 PostgreSQL shell:
su - postgres
[ ~]$ psql
输出:
psql (10.6)
Type "help" for help.
postgres=#
接下来,使用以下命令为 Askbot 创建数据库和用户:
postgres=# create database askbot;
postgres=# create user askbot with password 'password';
接下来,使用以下命令将所有权限授予 askbot:
postgres=# grant all privileges on database askbot to askbot;最后,使用以下命令退出 PostgreSQL shell:
postgres=# \q接下来,您需要为 PostgreSQL 配置本地用户身份验证。您可以通过编辑 pg_hba.conf 文件来完成:
nano /var/lib/pgsql/data/pg_hba.conf在以下行中将 peer 替换为 md5:
local   all             all                                    md5
host    all             all             127.0.0.1/32           md5
host    all             all             ::1/128                md5
完成后保存并关闭文件。然后,重新启动 PostgreSQL 服务以应用更改:
systemctl restart postgresql安装和配置 Askbot
在安装 Askbot 之前,您需要为 Askbot 创建一个用户。您可以创建一个新的 Askbot 用户并使用以下命令设置密码:
useradd -m -s /bin/bash askbot
passwd askbot
接下来,将 Askbot 用户添加到 wheel 组以进行 sudo 命令访问:
usermod -a -G wheel askbot接下来,使用以下命令安装 python virtualenv 包:
pip2 install virtualenv six安装后,将用户更改为 askbot,并使用以下命令为 Askbot 创建一个新的虚拟环境:
su - askbot
virtualenv askbot
您应该看到以下输出:
created virtual environment CPython2.7.16.final.0-64 in 663ms
  creator CPython2Posix(dest=/home/askbot/askbot, clear=False, global=False)
  seeder FromAppData(download=False, pip=latest, setuptools=latest, wheel=latest, via=copy, app_data_dir=/tmp/tmp9YFr7B/seed-app-data/v1)
  activators PythonActivator,CShellActivator,FishActivator,PowerShellActivator,BashActivator
接下来,将目录更改为 askbot 并使用以下命令激活虚拟环境:
cd askbot
source bin/activate
输出:
(askbot) [ askbot]$
接下来,使用以下命令安装 Askbot 和其他所需的依赖项:
pip2 install six==1.10.0
pip2 install askbot psycopg2
接下来,为您的应用程序创建一个新目录,将目录更改为您的应用程序并使用以下命令设置 Askbot:
mkdir myapp
cd myapp
askbot-setup
您应该看到以下输出:
Deploying Askbot - Django Q&A forum application
Problems installing? -> please email

To CANCEL - hit Ctr-C at any time

Enter directory path (absolute or relative) to deploy
askbot. To choose current directory - enter "."
> .
输入 \.\ 并按 Enter 键继续。您应该看到以下输出:
Please select database engine:
1 - for postgresql, 2 - for sqlite, 3 - for mysql, 4 - oracle
type 1/2/3/4: 1
键入 1 选择一个 postgresql 数据库引擎,然后按 Enter 键继续。您应该看到以下输出:
Please enter database name (required)
> askbot

Please enter database user (required)
> askbot

Please enter database password (required)
> password
提供您的 Askbot 数据库详细信息并按 Enter。安装完成后,您应该会看到以下输出:
Copying files:
* __init__.py
* manage.py
* urls.py
* django.wsgi
Creating settings file
settings file created

copying directories:  * doc
* cron
* upfiles

Done. Please find further instructions at http://askbot.org/doc/
接下来,使用以下命令生成 Askbot Django 静态文件和数据库:
python manage.py collectstatic
python manage.py syncdb
提供您想要的管理员用户名、电子邮件和密码,如下所示:
You have installed Django's auth system, and don't have any superusers defined.
Would you like to create one now? (yes/no): yes
Username (leave blank to use 'askbot'): askbotadmin
Email address:
Password:
Password (again):
Superuser created successfully.
安装和配置 uWSGI
接下来,您需要将 uWSGI 安装到您的系统中。 uWSGI 是一种用于运行基于 Python 的 Web 应用程序的软件工具。您可以使用以下命令安装它:
pip2 install uwsgi安装 uWSGI 后,使用以下命令为 uWSGI 创建一个新目录:
mkdir -p /etc/uwsgi/sites接下来,创建一个新的 uWSGI 配置文件,如下所示:
nano /etc/uwsgi/sites/askbot.ini添加以下行:
[uwsgi]

chdir = /home/askbot/askbot/myapp
home = /home/askbot/askbot
static-map = /m=/home/askbot/askbot/myapp/static
wsgi-file = /home/askbot/askbot/myapp/django.wsgi
master = true
processes = 5
# Askbot will running under the sock file
socket = /run/uwsgi/askbot.sock
chmod-socket = 664
uid = askbot
gid = nginx
vacuum = true
# uWSGI Log file
ogto = /var/log/uwsgi.log
为 uWSGI 创建一个 Systemd 服务文件
接下来,您需要创建一个 systemd 服务文件来管理 uWSGI 服务。您可以使用以下命令创建它:
nano /etc/systemd/system/uwsgi.service添加以下行:
[Unit]
Description=uWSGI service

[Service]
ExecStartPre=/bin/bash -c 'mkdir -p /run/uwsgi; chown askbot:nginx /run/uwsgi'
ExecStart=/bin/uwsgi --emperor /etc/uwsgi/sites
Restart=always
KillSignal=SIGQUIT
Type=notify
NotifyAccess=all

[Install]
WantedBy=multi-user.target
完成后保存并关闭文件。然后,使用以下命令重新加载 systemd 守护进程:
systemctl daemon-reload安装和配置 Nginx
接下来,您需要安装和配置 Nginx 来为您的 Askbot 应用程序提供服务。
首先,使用以下命令安装 Nginx 网络服务器:
dnf install nginx -y安装后,为 Askbot 创建一个新的虚拟主机配置文件:
nano /etc/nginx/conf.d/askbot.conf添加以下行:
server {
         listen 80;
         server_name askbot.linuxbuz.com;
         location / {
         include         uwsgi_params;
         uwsgi_pass	 unix:/run/uwsgi/askbot.sock;
    }
 }
保存并关闭文件。然后,启动 Nginx 和 uWSGI 服务,并使用以下命令使它们在系统重启后启动:
systemctl start nginx
systemctl enable nginx
systemctl start uwsgi
systemctl enable uwsgi
使用 Lets Encrypt SSL 保护 Askbot
接下来,您需要在系统中安装 Certbot 实用程序,以下载并安装 Lets Encrypt SSL for Askbot 域。
您可以使用以下命令安装 Certbot 客户端:
wget https://dl.eff.org/certbot-auto
mv certbot-auto /usr/local/bin/certbot-auto
chown root /usr/local/bin/certbot-auto
chmod 0755 /usr/local/bin/certbot-auto
接下来,使用以下命令为您的 Askbot 域获取并安装 SSL 证书:
certbot-auto --nginx -d askbot.linuxbuz.com上面的命令将首先在您的服务器上安装所有必需的依赖项。安装后,系统会要求您提供电子邮件地址并接受服务条款,如下所示:
Saving debug log to /var/log/letsencrypt/letsencrypt.log
Plugins selected: Authenticator nginx, Installer nginx
Enter email address (used for urgent renewal and security notices) (Enter 'c' to
cancel):

- - - - - - - - - - - - - - - - - - - - - - - - - - - - - - - - - - - - - - - -
Please read the Terms of Service at
https://letsencrypt.org/documents/LE-SA-v1.2-November-15-2017.pdf. You must
agree in order to register with the ACME server at
https://acme-v02.api.letsencrypt.org/directory
- - - - - - - - - - - - - - - - - - - - - - - - - - - - - - - - - - - - - - - -
(A)gree/(C)ancel: A

- - - - - - - - - - - - - - - - - - - - - - - - - - - - - - - - - - - - - - - -
Would you be willing to share your email address with the Electronic Frontier
Foundation, a founding partner of the Let's Encrypt project and the non-profit
organization that develops Certbot? We'd like to send you email about our work
encrypting the web, EFF news, campaigns, and ways to support digital freedom.
- - - - - - - - - - - - - - - - - - - - - - - - - - - - - - - - - - - - - - - -
(Y)es/(N)o: Y

Obtaining a new certificate
Performing the following challenges:
http-01 challenge for askbot.linuxbuz.com
Waiting for verification...
Cleaning up challenges
Deploying Certificate to VirtualHost /etc/nginx/conf.d/askbot.conf
接下来,选择是否将 HTTP 流量重定向到 HTTPS,如下所示:
Please choose whether or not to redirect HTTP traffic to HTTPS, removing HTTP access.
- - - - - - - - - - - - - - - - - - - - - - - - - - - - - - - - - - - - - - - -
1: No redirect - Make no further changes to the webserver configuration.
2: Redirect - Make all requests redirect to secure HTTPS access. Choose this for
new sites, or if you're confident your site works on HTTPS. You can undo this
change by editing your web server's configuration.
- - - - - - - - - - - - - - - - - - - - - - - - - - - - - - - - - - - - - - - -
Select the appropriate number [1-2] then [enter] (press 'c' to cancel): 2
键入 2 并按 Enter 键继续。安装完成后,您应该会看到以下输出:
Redirecting all traffic on port 80 to ssl in /etc/nginx/conf.d/askbot.conf

- - - - - - - - - - - - - - - - - - - - - - - - - - - - - - - - - - - - - - - -
Congratulations! You have successfully enabled https://askbot.linuxbuz.com

You should test your configuration at:
https://www.ssllabs.com/ssltest/analyze.html?d=askbot.linuxbuz.com
- - - - - - - - - - - - - - - - - - - - - - - - - - - - - - - - - - - - - - - -

IMPORTANT NOTES:
 - Congratulations! Your certificate and chain have been saved at:
   /etc/letsencrypt/live/askbot.linuxbuz.com/fullchain.pem
   Your key file has been saved at:
   /etc/letsencrypt/live/askbot.linuxbuz.com/privkey.pem
   Your cert will expire on 2020-06-11. To obtain a new or tweaked
   version of this certificate in the future, simply run certbot-auto
   again with the "certonly" option. To non-interactively renew *all*
   of your certificates, run "certbot-auto renew"
 - If you like Certbot, please consider supporting our work by:

   Donating to ISRG / Let's Encrypt:   https://letsencrypt.org/donate
   Donating to EFF:                    https://eff.org/donate-le
配置防火墙和 SELinux
接下来,您需要创建防火墙规则以允许来自外部网络的 HTTP 和 HTTPS 服务。您可以使用以下命令允许它:
firewall-cmd --permanent --add-service=httpfirewall-cmd --permanent --add-service=https
firewall-cmd --reloadCentOS 8 默认启用 SELinux。建议禁用它以便 Askbot 正常工作。您可以通过编辑 /etc/selinux/config 文件来禁用它:
nano /etc/selinux/config找到以下行:
SELINUX=enforcing
并且,将其替换为以下行:
SELINUX=disabled保存并关闭文件。然后,重新启动系统以应用更改:
访问问问机器人
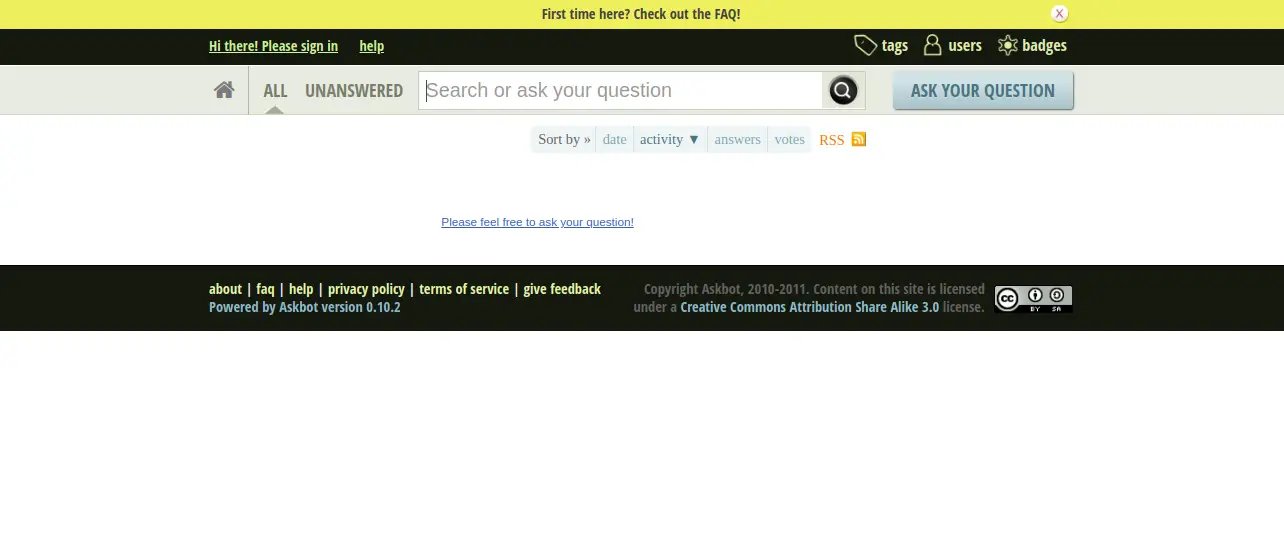
现在,打开您的 Web 浏览器并输入 URL https://askbot.linuxbuz.com。您将被重定向到以下屏幕:

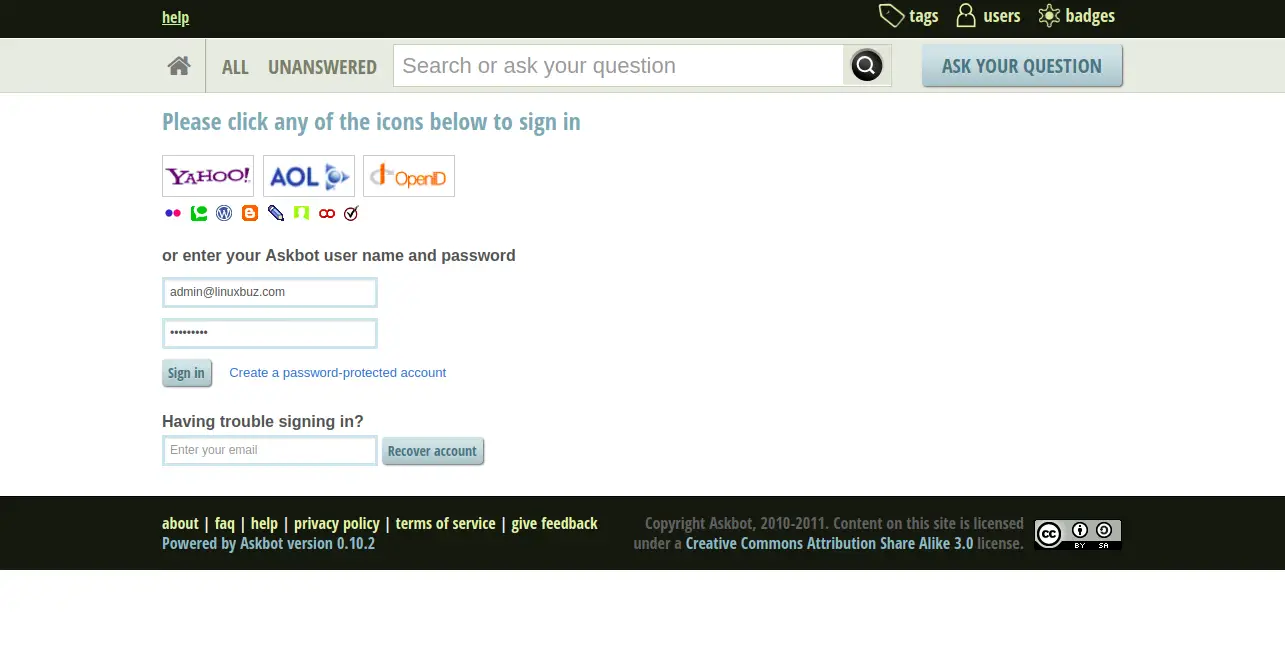
单击登录按钮。您应该在以下屏幕中看到 Askbot 登录页面:

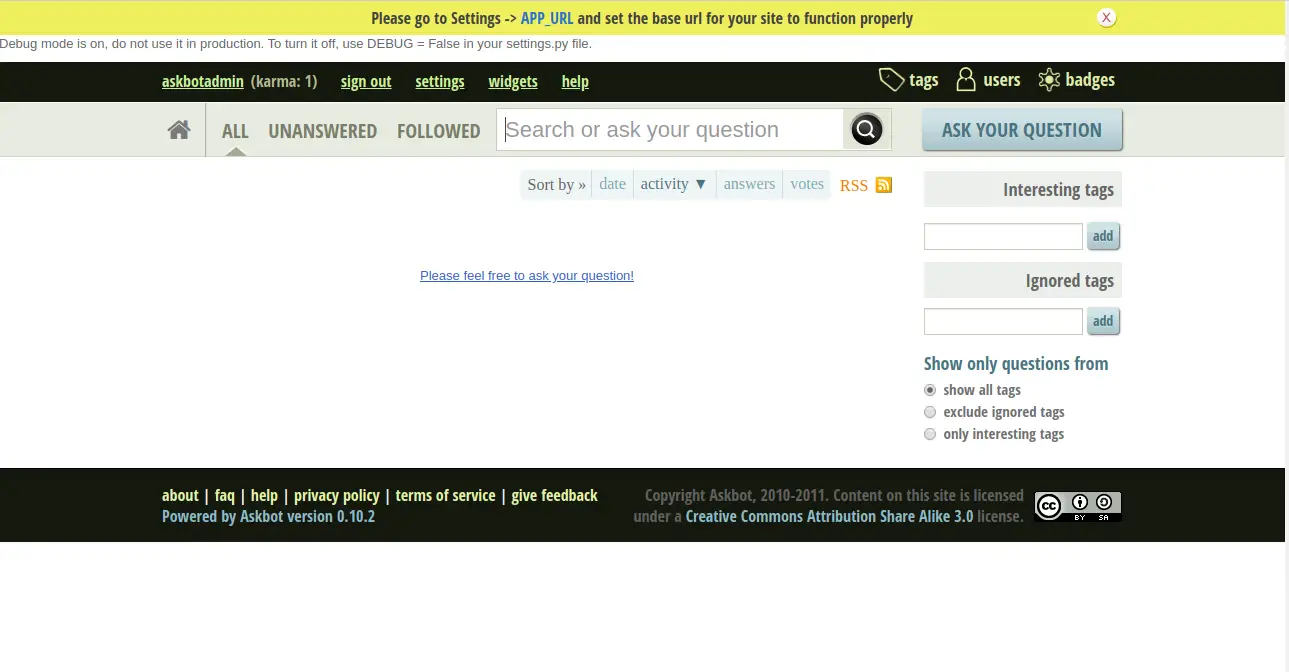
提供您的 Askbot 管理员用户名和密码,然后单击“登录”按钮。您应该在以下屏幕中看到 Askbot 仪表板:

结论
恭喜!您已经在 CentOS 8 上成功安装和配置了 Askbot 论坛,并使用 Lets Encrypt SSL 对其进行了保护。您现在可以开始使用 Askbot 创建问答。
