在 CentOS 8 上使用 Nginx 安装 LibModsecurity Web 应用防火墙
在此页
- 要求
- 开始
- 安装所需的存储库和依赖项
- 下载并编译 LibModsecurity
- 下载并编译带有 LibMod 安全支持的 Nginx
- 使用 ModSecurity 配置 Nginx
- 为 Nginx 创建一个 Systemd 服务文件
- 配置模式安全
- 测试 ModSecurity
- 结论
LibModSecurity 是一个免费的开源 Web 应用程序防火墙,可用于保护 Nginx 服务器免受各种网络攻击。它带有一个核心规则集,包括 SQL 注入、跨站点脚本、特洛伊木马等等。它的工作原理是实时监控 HTTP 流量并使用 OWASP ModSecurity 核心规则集对抗漏洞。它可以与 Apache、Nginx 和 IIS 一起使用,并且还兼容 Debian、Ubuntu 和 CentOS。
在本教程中,我们将向您展示如何在 CentOS 8 上下载和编译支持 Nginx 的 LibModSecurity。
要求
- 一台运行 CentOS 8 的服务器。
- 在服务器上配置了根密码。
入门
在开始之前,使用以下命令将您的服务器更新为最新版本:
dnf update一旦您的服务器是最新的,重新启动它以应用更改。
安装所需的存储库和依赖项
首先,在您的系统上安装 EPEL 和 REMI 存储库。您可以使用以下命令安装它们:
dnf install https://dl.fedoraproject.org/pub/epel/epel-release-latest-8.noarch.rpm
 dnf install https://rpms.remirepo.net/enterprise/remi-release-8.rpm
接下来,使用以下命令安装所有必需的依赖项:
dnf install gcc-c++ flex bison yajl curl-devel zlib-devel pcre-devel autoconf automake git curl make libxml2-devel pkgconfig libtool httpd-devel redhat-rpm-config wget openssl openssl-devel nano安装所有包后,您可以使用 PowerTool 存储库安装其他依赖项:
dnf --enablerepo=PowerTools install doxygen yajl-devel接下来,通过运行以下命令使用 REMI 存储库安装 GeoIP:
dnf --enablerepo=remi install GeoIP-devel安装所有软件包后,您可以继续下一步。
下载并编译 LibModsecurity
首先,您需要下载 LibModsecurity 源代码并在您的系统上编译它。为此,将目录更改为 /opt 并从 Git 存储库下载最新版本的 LibModsecurity:
cd /opt/
 git clone --depth 1 -b v3/master --single-branch https://github.com/SpiderLabs/ModSecurity
接下来,将目录更改为 ModSecurity 并使用以下命令下载 libInjection 代码:
cd ModSecurity
 git submodule init
 git submodule update
接下来,使用以下命令配置 LibModsecurity:
./build.sh
 ./configure
最后,使用以下命令编译并安装 LibModSecurity:
make
 make install
此时,LibModsecurity 已经安装到您的系统上。您现在可以继续安装具有 LibMod 安全支持的 Nginx。
下载并编译带有 LibModsecurity 支持的 Nginx
首先,您需要为 Nginx 创建一个系统用户和组。您可以使用以下命令创建它:
useradd -r -M -s /sbin/nologin -d /usr/local/nginx nginx接下来,您需要下载 Nginx 并使用 LibModsecurity 支持对其进行编译。
为此,首先使用以下命令从 Git 存储库下载 ModSecurity-nginx 连接器:
cd /opt
 git clone https://github.com/SpiderLabs/ModSecurity-nginx.git
接下来,使用以下命令下载最新稳定版本的 Nginx:
wget http://nginx.org/download/nginx-1.17.6.tar.gz下载后,使用以下命令解压缩下载的文件:
tar -xvzf nginx-1.17.6.tar.gz接下来,更改 Nginx 目录并使用以下命令对其进行配置:
cd nginx-1.17.6
 ./configure --user=nginx --group=nginx --with-pcre-jit --with-debug --with-http_ssl_module --with-http_realip_module --add-module=/opt/ModSecurity-nginx
接下来,使用以下命令安装 Nginx:
make
 make install
此时,Nginx 已经安装了 LibModsecurity 支持。您现在可以继续配置 Nginx。
使用 ModSecurity 配置 Nginx
首先,您需要将示例 ModSecurity 配置文件从 Nginx 源目录复制到 Nginx 配置目录。
您可以使用以下命令复制它们:
cp /opt/ModSecurity/modsecurity.conf-recommended /usr/local/nginx/conf/modsecurity.conf
 cp /opt/ModSecurity/unicode.mapping /usr/local/nginx/conf/
接下来,使用以下命令创建 Nginx 二进制文件到 /usr/sbin/ 路径的符号链接:
ln -s /usr/local/nginx/sbin/nginx /usr/sbin/接下来,使用以下命令创建 Nginx 日志目录:
mkdir /var/log/nginx接下来,使用以下命令打开 Nginx 配置文件:
nano /usr/local/nginx/conf/nginx.conf进行以下更改:
user  nginx;
worker_processes  1;
pid  /run/nginx.pid;
events {
    worker_connections  1024;
}


http {
    include	  mime.types;
    default_type  application/octet-stream;
    sendfile        on;
    keepalive_timeout  65;
    server {
	listen       80;
        server_name  your-server-ip;
        modsecurity  on;
        modsecurity_rules_file  /usr/local/nginx/conf/modsecurity.conf;
        access_log  /var/log/nginx/access.log;
        error_log  /var/log/nginx/error.log;
        location / {
            root   html;
            index  index.html index.htm;
        }
        error_page   500 502 503 504  /50x.html;
        location = /50x.html {
            root   html;
        }
    }
}
完成后保存并关闭文件。然后,使用以下命令检查 Nginx 是否存在任何语法错误:
nginx -t您应该看到以下输出:
nginx: the configuration file /usr/local/nginx/conf/nginx.conf syntax is ok
nginx: configuration file /usr/local/nginx/conf/nginx.conf test is successful
至此,Nginx 已经配置完成。您可以继续为 Nginx 创建一个 systemd 服务文件。
为 Nginx 创建一个 Systemd 服务文件
接下来,您需要创建一个 systemd 文件来管理 Nginx 服务。您可以使用以下命令创建它:
nano /etc/systemd/system/nginx.service添加以下行:
[Unit]
Description=The nginx server
After=network.target remote-fs.target nss-lookup.target

[Service]
Type=forking
PIDFile=/run/nginx.pid
ExecStartPre=/usr/bin/rm -f /run/nginx.pid
ExecStartPre=/usr/sbin/nginx -t
ExecStart=/usr/sbin/nginx
ExecReload=/bin/kill -s HUP $MAINPID
KillSignal=SIGQUIT
TimeoutStopSec=5
KillMode=mixed
PrivateTmp=true

[Install]
WantedBy=multi-user.target
完成后保存并关闭文件。然后,使用以下命令重新加载 systemd 守护进程:
systemctl daemon-reload接下来,使用以下命令启动 Nginx 服务并使其在系统重启后启动:
systemctl start nginx
 systemctl enable --now nginx
您应该看到以下输出:
Created symlink /etc/systemd/system/multi-user.target.wants/nginx.service → /etc/systemd/system/nginx.service.
接下来,使用以下命令验证 Nginx 服务:
systemctl status nginx您应该看到以下输出:
? nginx.service - The nginx HTTP and reverse proxy server
   Loaded: loaded (/etc/systemd/system/nginx.service; enabled; vendor preset: disabled)
   Active: active (running) since Mon 2019-12-30 10:20:01 EST; 41s ago
  Process: 17730 ExecStart=/usr/sbin/nginx (code=exited, status=0/SUCCESS)
  Process: 17728 ExecStartPre=/usr/sbin/nginx -t (code=exited, status=0/SUCCESS)
  Process: 17727 ExecStartPre=/usr/bin/rm -f /run/nginx.pid (code=exited, status=0/SUCCESS)
 Main PID: 17732 (nginx)
    Tasks: 2 (limit: 6102)
   Memory: 5.0M
   CGroup: /system.slice/nginx.service
           ??17732 nginx: master process /usr/sbin/nginx
           ??17733 nginx: worker process

Dec 30 10:20:00 nginx systemd[1]: Starting The nginx HTTP and reverse proxy server...
Dec 30 10:20:00 nginx nginx[17728]: nginx: the configuration file /usr/local/nginx/conf/nginx.conf syntax is ok
Dec 30 10:20:00 nginx nginx[17728]: nginx: configuration file /usr/local/nginx/conf/nginx.conf test is successful
Dec 30 10:20:01 nginx systemd[1]: nginx.service: Failed to parse PID from file /run/nginx.pid: Invalid argument
Dec 30 10:20:01 nginx systemd[1]: Started The nginx HTTP and reverse proxy server.
至此,Nginx 已经启动并运行。您现在可以继续配置 ModSecurity。
配置模式安全
默认情况下,ModSecurity 设置为仅检测模式。所以你需要打开 ModSecurity 规则引擎。您可以通过编辑文件 modsecurity.conf 来完成:
nano /usr/local/nginx/conf/modsecurity.conf找到以下行:
SecRuleEngine DetectionOnly
并且,将其替换为以下行:
SecRuleEngine On还可以找到以下行:
/var/log/modsec_audit.log并且,将其替换为以下行:
/var/log/nginx/modsec_audit.log完成后保存并关闭文件。
接下来,使用以下命令从 Git 存储库下载最新版本的 ModSecurity 核心规则集:
git clone https://github.com/SpiderLabs/owasp-modsecurity-crs.git /usr/local/nginx/conf/owasp-crs下载后,使用以下命令重命名 CRS 示例配置文件:
mv /usr/local/nginx/conf/owasp-crs/crs-setup.conf.example /usr/local/nginx/conf/owasp-crs/crs-setup.conf接下来,通过编辑文件 /usr/local/nginx/conf/modsecurity.conf 将 ModeSecurity 配置为使用这些规则:
nano /usr/local/nginx/conf/modsecurity.conf在文件末尾添加以下行:
Include owasp-crs/crs-setup.conf
Include owasp-crs/rules/*.conf
完成后保存并关闭文件。然后,重启 Nginx 服务以实现更改:
systemctl restart nginx测试 ModSecurity
ModSecurity 现已安装和配置。是时候测试它是否工作了。
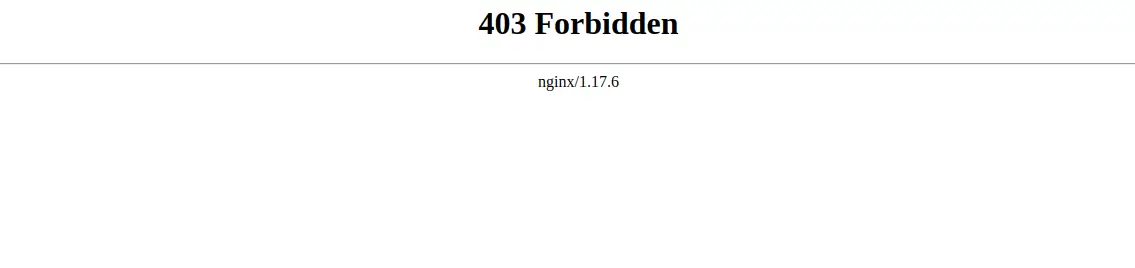
要针对命令注入测试 ModSecurity,请打开 Web 浏览器并键入 URL http://localhost/index.html?exec=/bin/bash。您应该在以下页面中看到 403 Forbidden 错误:
要针对 CSS 攻击测试 ModSecurity,请打开您的终端并运行以下命令:
curl http://localhost/?q="><script>alert(1)</script>"您应该得到以下输出:
<html>
<head><title>403 Forbidden</title></head>
<body>
<center><h1>403 Forbidden</h1></center>
<hr><center>nginx/1.17.6</center>
</body>
</html>
结论
恭喜!您已经成功下载并使用 Nginx 编译了 LibModSecurity。您的服务器现在可以免受各种攻击。有关详细信息,您可以访问 ModSecurity Doc 上的 ModSecurity 文档。