如何在 Debian 10 上使用 Graylog v3.1 监控日志文件
本教程适用于这些操作系统版本
- Debian 9(扩展版)
在此页
- 先决条件
- 第 1 步:使用 Debian Backport 更新系统
- 第 2 步 - 安装无头 Java 运行时 v11.00
- 第 4 步 - 安装 MongoDB v4.2
- 第 5 步:安装 Elasticsearch-OSS 6.x
- 第 6 步:安装 Graylog v3.1
- 第 7 步:配置 Graylog
- 第 8 步:测试 Graylog
- 第 9 步:登录 Graylog
- 结论
Graylog 是一个基于 Java、ElasticSearch 和 MongoDB 的免费开源日志管理工具。 Graylog 可用于从集中位置或分布式位置收集、索引和分析任何服务器日志。我们可以使用 Graylog 轻松监控任何异常活动以调试应用程序和日志。 Graylog 提供了一种强大的查询语言、警报能力、用于数据转换的处理管道等等。我们还可以通过 REST API 和附加组件扩展 Graylog 的功能。
目前,Debian 10 上还没有 Graylog v3.1 的官方指南。
在 Debian 10 上安装 Graylog v3.1 分为 9 个步骤:
- 第 1 步:使用 Debian Backport 存储库更新系统
- 第 2 步:安装一些帮助程序
- 第 3 步:安装无头 JAVA 运行时 v11.00
- 第 4 步:安装 MongoDB v4.2,这是一个用于存储配置和元信息的数据库。
- 第 5 步:安装 Elasticsearch-OSS 6.x:它存储所有传入消息并提供搜索工具。
- 第 6 步:安装 Graylog v3.1 - 它接收各种输入并记录下来,并提供用于分析和监控的 Web 界面。
- 第 7 步:配置 Graylog
- 第 8 步:测试 Graylog
- 第 9 步:登录 Graylog
先决条件
- 一个最小的 Debian 10。我们可以参考这个教程。
- 至少 4 GB RAM、2 核 CPU 和 20GB 磁盘
- 默认密码:KataLaluan
- 默认机密:SecretRahsiaSecreta
- 使用 \su -\ 进行根访问,Debian 最近更改了 su 命令的行为。现在 su 命令不替换 PATH。使用 \su -\ 代替。
第 1 步:使用 Debian Backport 更新系统
配置系统以使用 Debian backports 存储库
cat > /etc/apt/sources.list << EOF
deb http://ftp.debian.org/debian/ buster main contrib non-free
deb http://security.debian.org/debian-security buster/updates main contrib non-free
deb http://ftp.debian.org/debian/ buster-updates main contrib non-free
deb http://ftp.debian.org/debian buster-backports main contrib non-free
EOF
apt -y update
apt -y dist-upgrade
第 2 步 - 安装无头 Java 运行时 v11.00
Graylog 和 Elasticsearch 是基于 Java 的应用程序。因此,我们需要为您的系统安装 Java。默认情况下,最新版本的 Java 在 Debian 10 默认存储库中可用。我们可以通过运行以下命令来安装它:
apt -y install apt-transport-https default-jdk第 3 步 - 安装一些助手
在此过程中,我们需要安装一些有用的工具作为帮助程序:
- GnuPG - OpenPGP 标准的实施,有助于密钥管理系统
- wget - 一种使用最广泛使用的互联网协议 HTTP、HTTPS 和 FTP 检索文件的工具
apt -y install gnupg wget第 4 步 - 安装 MongoDB v4.2
默认情况下,MongoDB 在 Debian 10 默认存储库中不可用。所以我们需要将 MongoDB 存储库添加到系统中:
apt-key adv --keyserver hkp://keyserver.ubuntu.com:80 --recv 4B7C549A058F8B6B
echo "deb http://repo.mongodb.org/apt/debian buster/mongodb-org/4.2 main" | tee /etc/apt/sources.list.d/latest-mongodb.list
apt -y update
apt install -y mongodb-org
启用并重启 MongoDB 服务:
systemctl enable mongod.service
systemctl start mongod.service
第 5 步:安装 Elasticsearch-OSS 6.x
目前,Graylog v3.1 尚不支持 Elasticsearch-OSS 7.x
我们打算将 Elasticsearch 密钥和存储库添加到 Debian。使用 elastic.co 提供的 elasticsearch 存储库,我们可以通过运行以下命令来安装 Elasticsearch:
wget -qO - https://artifacts.elastic.co/GPG-KEY-elasticsearch | apt-key add -
echo "deb https://artifacts.elastic.co/packages/oss-6.x/apt stable main" | tee -a /etc/apt/sources.list.d/latest-elastic-6.x.list
apt -y update
apt -y install elasticsearch-oss
为集群名称配置 Elasticsearch
sed -i "s/#cluster.name: my-application/cluster.name: graylog-application/g" /etc/elasticsearch/elasticsearch.yml启用并重启 Elasticsearch 服务:
systemctl enable elasticsearch.service
systemctl start elasticsearch.service
第 6 步:安装 Graylog v3.1
我们将下载一个简单的 Graylog 包,帮助添加 Graylog 密钥和配置 Graylog 存储库
cd /tmp/
wget https://packages.graylog2.org/repo/packages/graylog-3.1-repository_latest.deb
dpkg -i graylog-3.1-repository_latest.deb
apt -y update
通过运行以下命令安装 Graylog:
apt -y install graylog-server第 7 步:配置 Graylog
散列密码,并复制散列。 \KataLaluan\ 是当前选择的密码。
echo 'KataLaluan' | tr -d '\n' | sha256sum | cut -d" " -f1在 Graylog 配置文件中添加哈希密码
sed -i "s/^root_password_sha2 =\$/root_password_sha2 = a25d2f6605c9e27f182d39b66a8b527eb7f2360e52b2ccc7614f8ac24e472bef/g" /etc/graylog/server/server.conf在 Graylog 配置文件中添加秘密,其最小长度为 16 个字符。
sed -i "s/^password_secret =\$/password_secret = SecretRahsiaSecreta/g" /etc/graylog/server/server.conf允许外部访问 graylog
sed -i "s/^#http_bind_address = 127.0.0.1:9000/http_bind_address = 0.0.0.0:9000/g" /etc/graylog/server/server.conf根据位置更改时区
sed -i "s/#root_timezone = UTC/root_timezone = Asia\/Kuala_Lumpur/g" /etc/graylog/server/server.conf启用并重启 Graylog 服务:
systemctl enable graylog-server.service
systemctl start graylog-server.service
如果 Graylog 在路由器后面,我们必须将路由器 WAN 的 IP 地址设置到 Graylog 配置中。它也可以是指向相同 IP 地址的 DNS A 记录
sed -i '/http_publish_uri =/c\http_publish_uri = http://graylog.linux教程:9000/' /etc/graylog/server/server.conf第 8 步:测试 Graylog
让我们使用一些原始命令测试 Graylog
apt -y install netcat curl这是一些要记录的示例命令。
echo "Hello Graylog, let's be friends." | nc -w 1 -u 127.0.0.1 9099下面是一些获取 Graylog 服务器 API 状态的示例命令。
curl -X GET http://localhost:9200
curl -XGET 'http://localhost:9200/_cluster/health?pretty=true'
下面是一些获取 Graylog 服务器日志的示例命令。
tail -f /var/log/graylog-server/server.log第 9 步:登录 Graylog
让我们使用 WebGUI。网址可以是:
- http://
:9000/ - http://
:9000/ - http://
:9000/ - http://
网址样本
- http://192.168.0.3:9000/
- http://104.26.2.165:9000/
- http://graylog.howtoforge:9000/
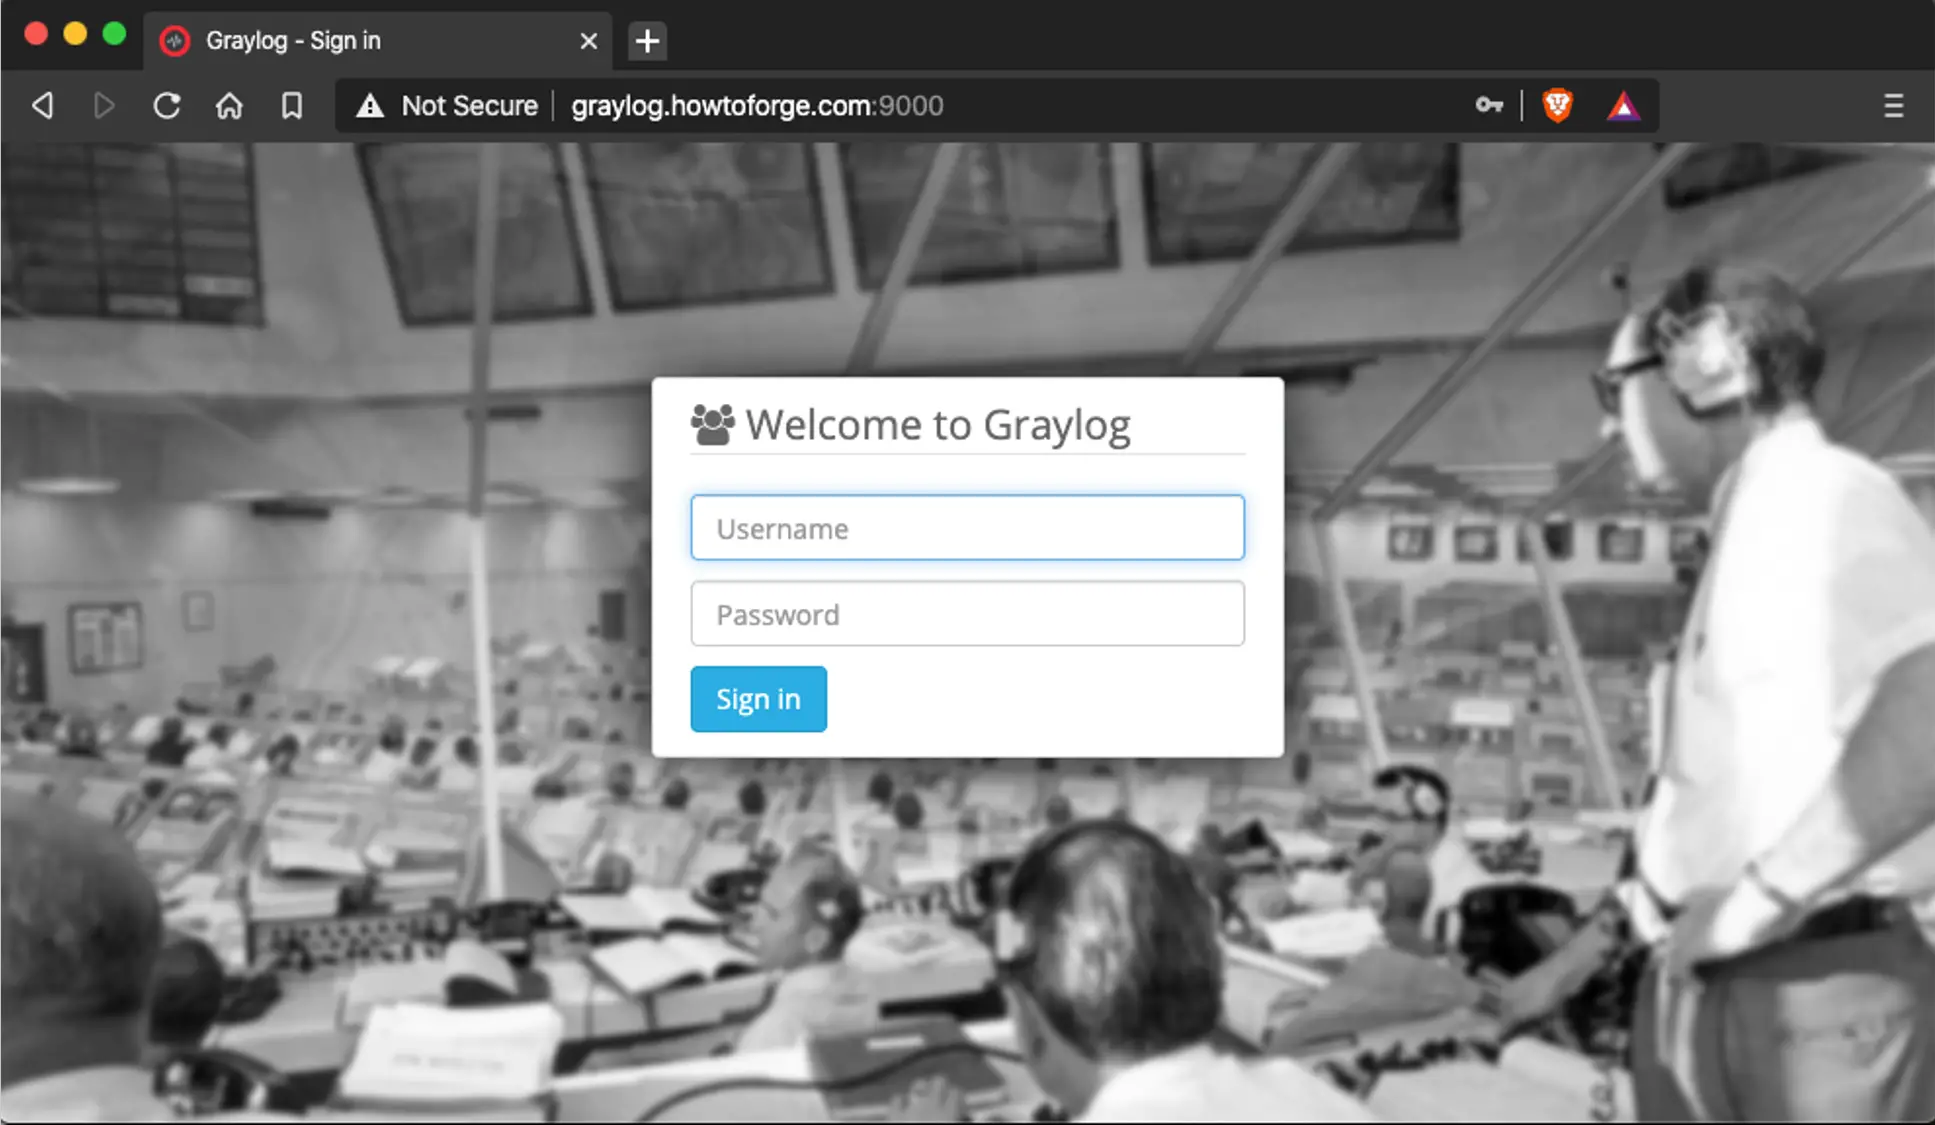
在浏览器中输入 URL 后,我们应该会看到以下登录页面,默认用户名是 admin,选择的密码是 KataLaluan,
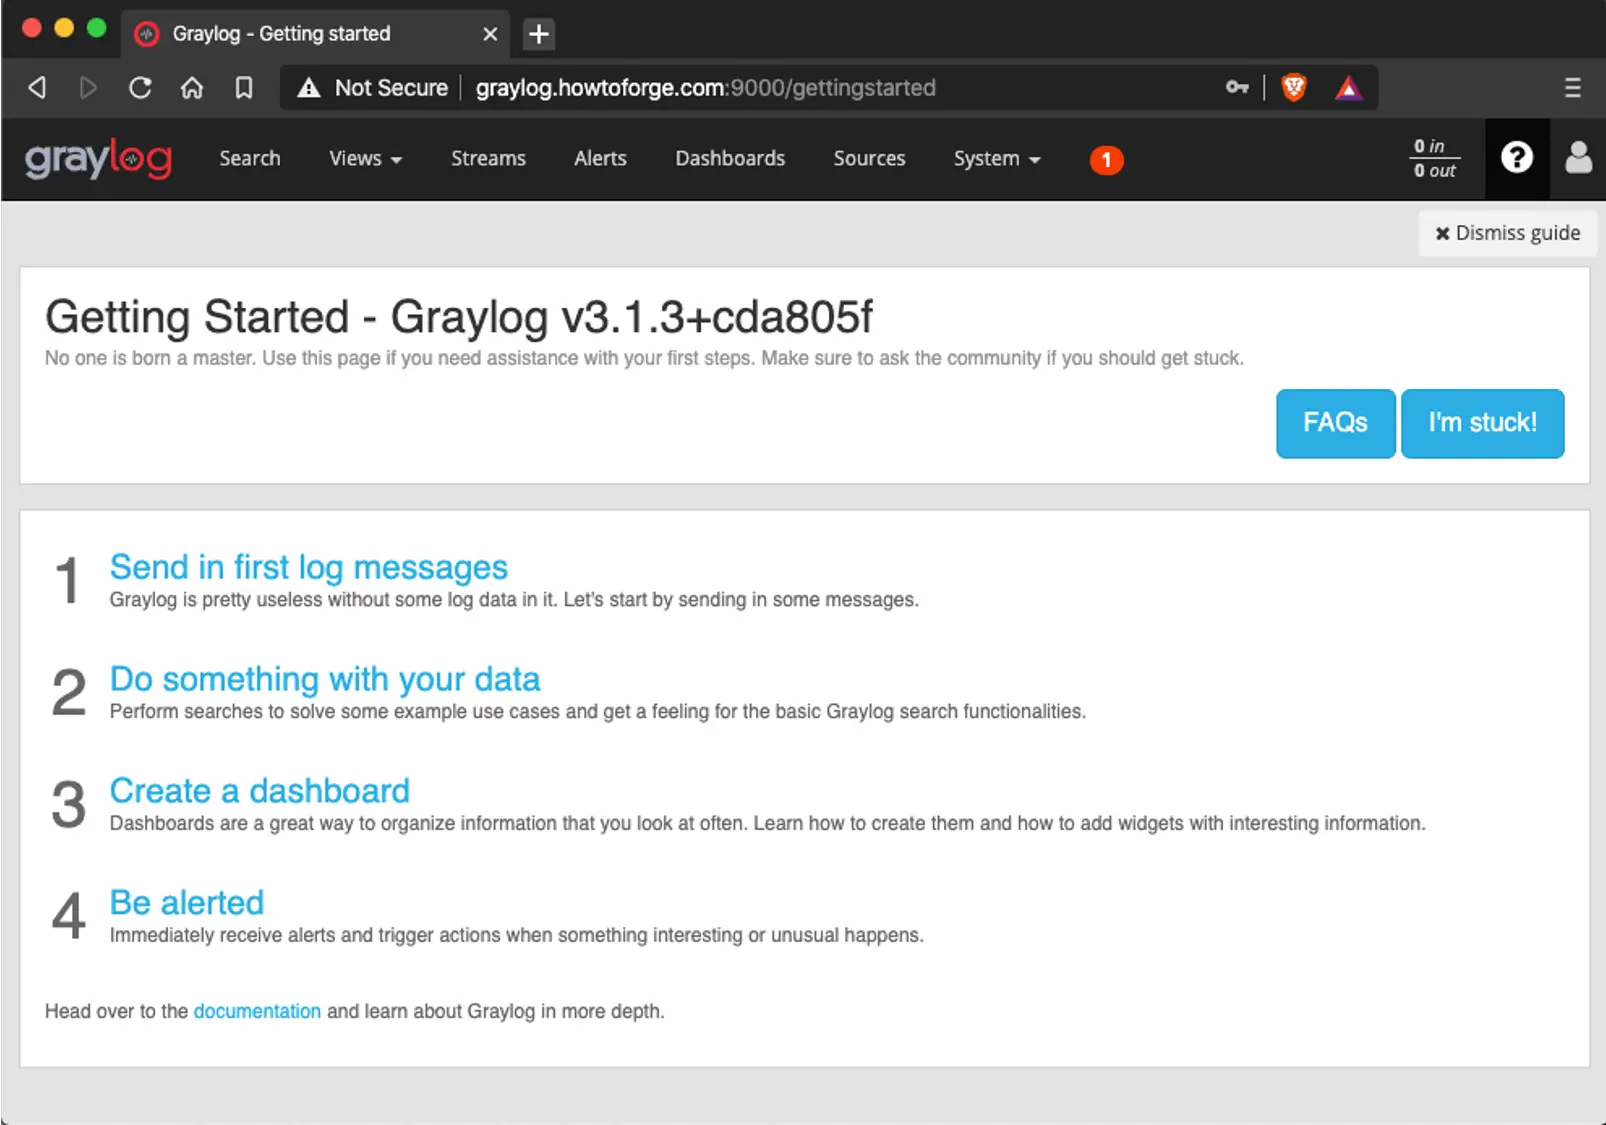
登录后,我们应该看到以下 Graylog 页面:
结论
完成,我们已经在 Debian 10 上成功安装和配置了 Graylog 3.1 服务器。现在我们可以轻松地在中心位置查看系统日志的日志和分析。从 Graylog 文档页面获取更多信息。如有任何问题,请发表评论和反馈。
快乐的记录。