如何在 Ubuntu 18.04 LTS 上安装带有 TLS 的 ProFTPD
在此页
- 要求
- 开始
- 安装 ProFTPD
- 使用 TLS 保护 ProFTPD
- 配置 ProFTPD 以使用 SSL
- 为 ProFTPD 创建用户
- 使用 FileZilla 访问 ProFTPD 服务器
ProFTPD 是一款免费、开源且最流行的 FTP 服务器,适用于类 Unix 操作系统。 ProFTPD 允许您在本地计算机和远程服务器之间创建 FTP 连接。它是一个多功能的 FTP 服务器,支持用于安全连接的 TLS (SSL)。
特征
- 支持 IPv4 和 IPv6。
- 支持 .ftpaccess 以确保每个目录的安全。
- 允许我们配置多个虚拟 FTP 服务器和匿名 FTP 服务。
- 提供对影子密码、utmp/wtmp、SSL/TLS 加密和 RADIUS 的支持。
- 既可以作为独立服务器运行,也可以从 inetd/xinetd 运行。
在本教程中,我们将学习如何在 Ubuntu 18.04 服务器上安装 ProFTPD 并使用 TLS 保护它
要求
- 一台运行 Ubuntu 18.04 的服务器。
- 在服务器上设置静态 IP 地址 192.168.0.101。
- 在您的服务器上设置了根密码。
入门
在开始之前,您需要使用最新版本更新您的系统。您可以通过运行以下命令来执行此操作:
apt-get update -y
 apt-get upgrade -y
服务器更新后,重新启动服务器以应用更改。
安装 ProFTPD
默认情况下,ProFTPD 在 Ubuntu 18.04 默认存储库中可用。您只需运行以下命令即可安装它:
apt-get install proftpd -y安装 ProFTPD 后,启动 ProFTPD 服务并使用以下命令使其在开机时启动:
systemctl start proftpd
 systemctl enable proftpd
您可以使用以下命令检查 ProFTPD 服务的状态:
systemctl status proftpd您应该看到以下输出:
? proftpd.service - LSB: Starts ProFTPD daemon
   Loaded: loaded (/etc/init.d/proftpd; generated)
   Active: active (running) since Sat 2019-05-25 09:18:19 UTC; 31s ago
     Docs: man:systemd-sysv-generator(8)
    Tasks: 1 (limit: 1114)
   CGroup: /system.slice/proftpd.service
           ??1927 proftpd: (accepting connections)

May 25 09:18:19 ubuntu1804 systemd[1]: Starting LSB: Starts ProFTPD daemon...
May 25 09:18:19 ubuntu1804 proftpd[1906]:  * Starting ftp server proftpd
May 25 09:18:19 ubuntu1804 proftpd[1906]:    ...done.
May 25 09:18:19 ubuntu1804 systemd[1]: Started LSB: Starts ProFTPD daemon.
ProFTPD 的默认配置文件位于 /etc/proftpd/proftpd.conf。您可以使用以下命令查看它:
cat /etc/proftpd/proftpd.conf您应该看到以下输出:
#
# /etc/proftpd/proftpd.conf -- This is a basic ProFTPD configuration file.
# To really apply changes, reload proftpd after modifications, if
# it runs in daemon mode. It is not required in inetd/xinetd mode.
#

# Includes DSO modules

Include /etc/proftpd/modules.conf

# Set off to disable IPv6 support which is annoying on IPv4 only boxes.
UseIPv6                         on
# If set on you can experience a longer connection delay in many cases.
IdentLookups                    off

ServerName                      "Debian"
# Set to inetd only if you would run proftpd by inetd/xinetd.
# Read README.Debian for more information on proper configuration.
ServerType                              standalone
DeferWelcome                    off

MultilineRFC2228                on
DefaultServer                   on
ShowSymlinks                    on

TimeoutNoTransfer               600
TimeoutStalled                  600
TimeoutIdle                     1200

DisplayLogin                    welcome.msg
DisplayChdir                    .message true
ListOptions                     "-l"

DenyFilter                      \*.*/

# Use this to jail all users in their homes
# DefaultRoot                   ~
# Port 21 is the standard FTP port.
Port                            21
MaxInstances                    30
# Set the user and group that the server normally runs at.
User                            proftpd
Group                           nogroup
# Umask 022 is a good standard umask to prevent new files and dirs
# (second parm) from being group and world writable.
Umask                           022  022
# Normally, we want files to be overwriteable.
AllowOverwrite                  on
TransferLog /var/log/proftpd/xferlog
SystemLog   /var/log/proftpd/proftpd.log
您可以根据需要更改上述设置,如下所示:
- ServerName:您可以将其更改为默认服务器名称。
- UseIPV6:您可以通过将其更改为关闭来禁用它。
- DefaultRoot:您可以取消注释此行以限制用户使用他们的主文件夹。
- 端口:您可以通过更改来定义自己的端口。
- SystemLog: 日志文件的默认位置。您可以根据您的要求更改它。
完成后,您可以继续下一步。
使用 TLS 保护 ProFTPD
ProFTPD 现已安装。现在,您需要使用 TLS 配置 ProFTPD 以实现安全的 FTP 连接。
在开始之前,您需要将 OpenSSL 安装到您的服务器上。您只需运行以下命令即可安装它:
apt-get install openssl -y安装完成后,使用以下命令为 ProFTPd 生成 SSL 证书:
openssl req -x509 -newkey rsa:1024 -keyout /etc/ssl/private/proftpd.key -out /etc/ssl/certs/proftpd.crt -nodes -days 365如下图所示回答所有问题:
Generating a 1024 bit RSA private key
.++++++
.......................++++++
writing new private key to '/etc/ssl/private/proftpd.key'
-----
You are about to be asked to enter information that will be incorporated
into your certificate request.
What you are about to enter is what is called a Distinguished Name or a DN.
There are quite a few fields but you can leave some blank
For some fields there will be a default value,
If you enter '.', the field will be left blank.
-----
Country Name (2 letter code) [AU]:IN
State or Province Name (full name) [Some-State]:GUJ
Locality Name (eg, city) []:Junagadh
Organization Name (eg, company) [Internet Widgits Pty Ltd]:IT
Organizational Unit Name (eg, section) []:IT
Common Name (e.g. server FQDN or YOUR name) []:HITESH
Email Address []:
上面的命令会生成两个文件/etc/ssl/private/proftpd.key 和/etc/ssl/certs/proftpd.crt。
接下来,使用以下命令为生成的文件提供适当的权限:
chmod 600 /etc/ssl/private/proftpd.key
 chmod 600 /etc/ssl/certs/proftpd.crt
完成后,您可以继续下一步。
配置 ProFTPD 以使用 SSL
接下来,您需要配置 ProFTPD 以使用 SSL 证书。您可以通过编辑 /etc/proftpd/proftpd.conf 文件来完成此操作:
nano /etc/proftpd/proftpd.conf取消注释以下行:
Include /etc/proftpd/tls.conf
完成后保存并关闭文件。然后,打开 /etc/proftpd/tls.conf 文件:
nano /etc/proftpd/tls.conf更改以下行:
TLSRSACertificateFile /etc/ssl/certs/proftpd.crt
TLSRSACertificateKeyFile /etc/ssl/private/proftpd.key
TLSEngine on
TLSLog /var/log/proftpd/tls.log
TLSProtocol SSLv23
TLSRequired on
TLSOptions NoCertRequest EnableDiags NoSessionReuseRequired
TLSVerifyClient off
完成后保存并关闭文件。然后,使用以下命令重新启动 ProFTPD 服务:
systemctl restart proftpd完成后,您可以继续下一步。
为 ProFTPD 创建用户
接下来,您需要创建一个 ProFTPD 用户来访问服务器。您可以使用以下命令执行此操作:
adduser ftp1如下图所示回答所有问题:
Adding user `ftp1' ...
Adding new group `ftp1' (1006) ...
Adding new user `ftp1' (1002) with group `ftp1' ...
Creating home directory `/home/ftp1' ...
Copying files from `/etc/skel' ...
Enter new UNIX password:
Retype new UNIX password:
passwd: password updated successfully
Changing the user information for ftp1
Enter the new value, or press ENTER for the default
	Full Name []:
	Room Number []:
	Work Phone []:
	Home Phone []:
	Other []:
Is the information correct? [Y/n] Y
完成后,您可以继续下一步。
使用 FileZilla 访问 ProFTPD 服务器
ProFTPD 现已安装和配置,是时候从客户端系统通过 FileZilla 访问 ProFTPD 了。
首先,您需要在客户端系统上安装 FileZilla。您只需运行以下命令即可安装它:
apt-get install filezilla -y安装完成后,您可以从 Unity dash 中打开 FileZilla,如下所示:
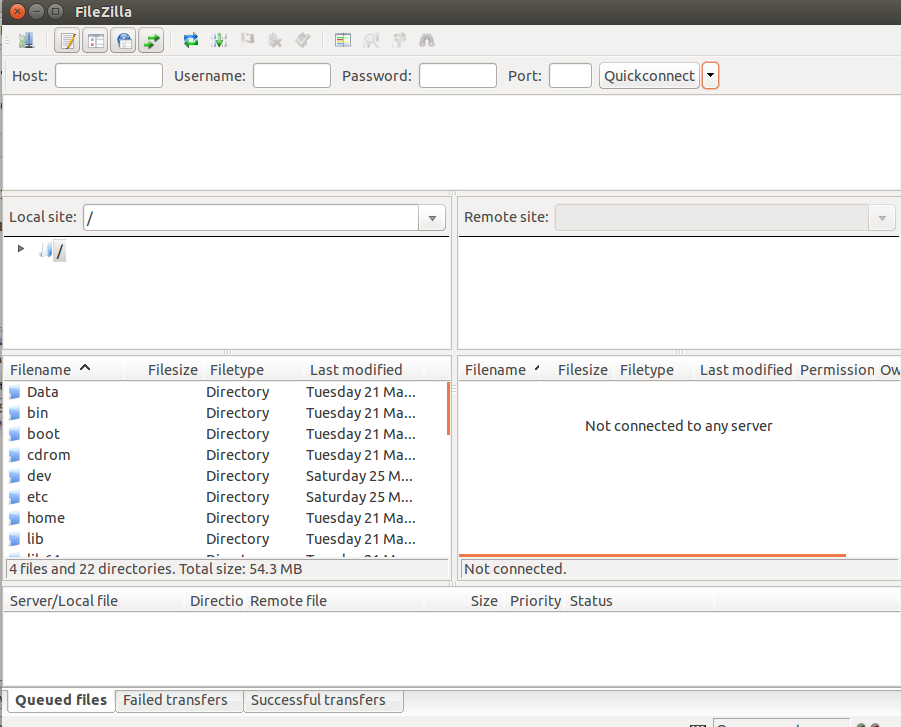
现在,单击左侧面板上的站点管理器并创建一个新站点。您应该会看到以下页面:
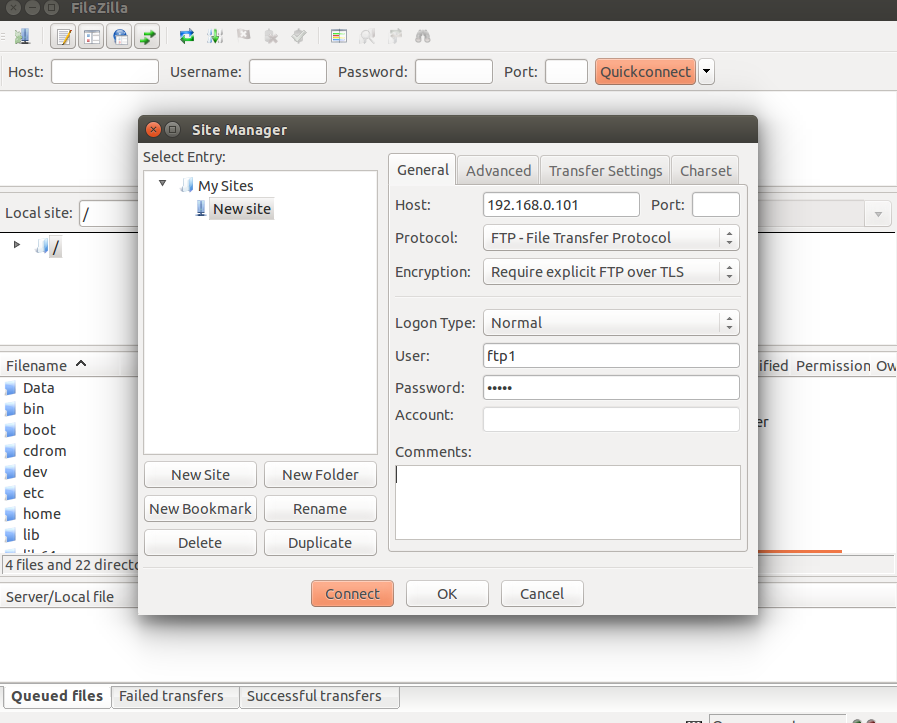
现在,提供您的 FTP 服务器 IP 地址,选择协议,选择加密,选择登录类型,提供用户名和密码。然后,单击“连接”按钮。您应该会看到以下页面:
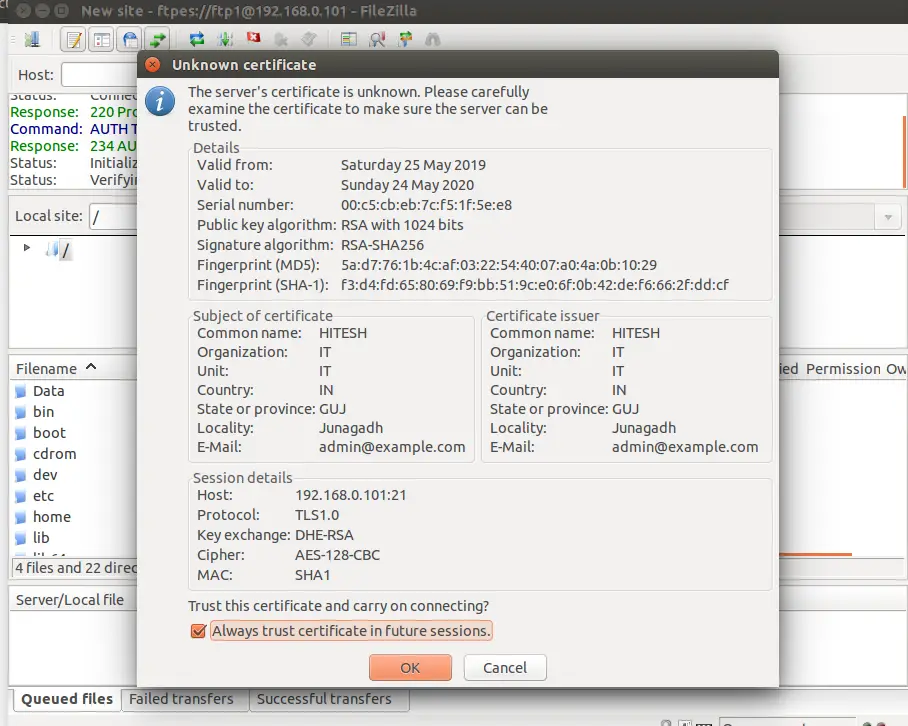
现在,接受证书,勾选“在以后的会话中始终信任证书”,然后单击“确定”按钮。登录成功后,您应该会看到以下页面:
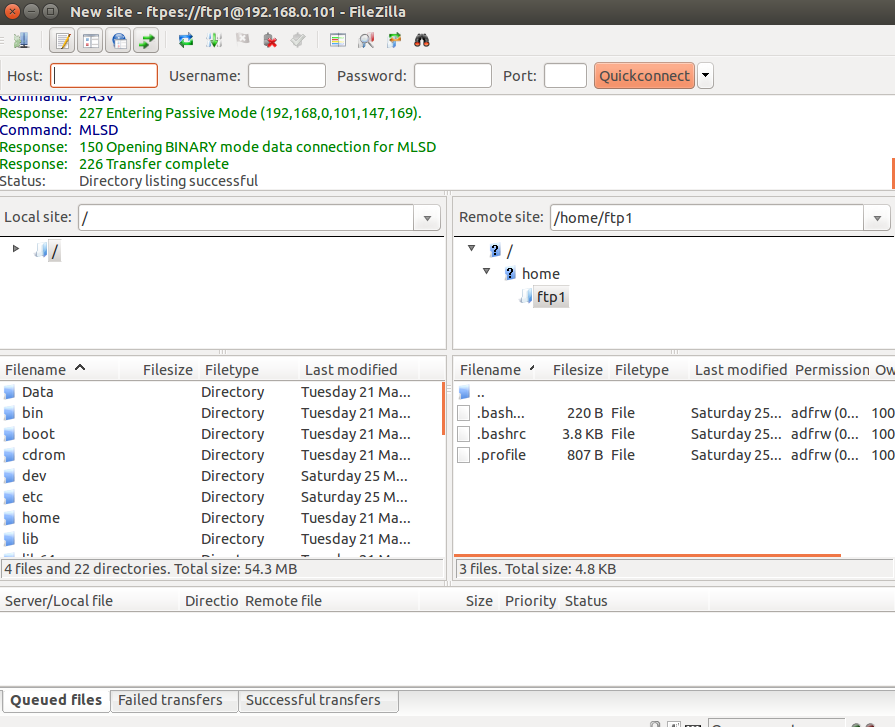
您现在可以通过 SSL/TLS 安全地传输文件。
恭喜!您已成功安装和配置 ProFTPD 服务器并使用 SSL/TLS 加密保护它。您现在可以使用安全加密轻松地将文件从本地计算机传输到 FTP 服务器。如果您有任何问题,请随时问我。