如何在 Ubuntu 18.04 LTS 上安装 ArangoDB NoSQL 数据库
在此页
- 要求
- 开始
- 安装ArangoDB3
- 使用 ArangoDB
- 访问 ArangoDB 网络界面
ArangoDB 是一个免费开源的 NoSQL 多模型数据库,它提供了现代 Web 应用程序所需的所有数据库功能。 ArangoDB 不像 MySQL 或 PostgreSQL 那样使用传统的数据存储系统。它是 container.style.width=100%;var ins=document.createElement(ins);ins.id=slotId+-asloaded;ins.className=adsbygoogle ezasloaded;ins.dataset.adClient=pid;ins.dataset.adChannel= cid;if(ffid==2){ins.dataset.fullWidthResponsive=true;}
在本教程中,我们将学习如何在 Ubuntu 18.04 服务器上安装 ArangoDB3。
要求
- 一台运行 Ubuntu 18.04 的服务器。
- 为您的服务器设置了静态 IP 地址 192.168.0.104
- 已为您的服务器设置根密码。
入门
在开始之前,您需要使用最新版本更新您的系统。您可以通过运行以下命令来执行此操作:
apt-get update -y
 apt-get upgrade -y
服务器更新后,重新启动服务器以应用更改。
安装 ArangoDB3
默认情况下,ArangoDB 在 Ubuntu 18.04 默认存储库中不可用。因此,您需要为此添加存储库。首先,使用以下命令下载并添加 GPG 密钥:
wget -q https://download.arangodb.com/arangodb34/DEBIAN/Release.key -O- | apt-key add -接下来,使用以下命令添加存储库:
nano /etc/apt/sources.list.d/arangodb.list添加以下行:
deb https://download.arangodb.com/arangodb34/DEBIAN/ /
完成后保存并关闭文件。然后,更新存储库并使用以下命令安装 ArangoDB3:
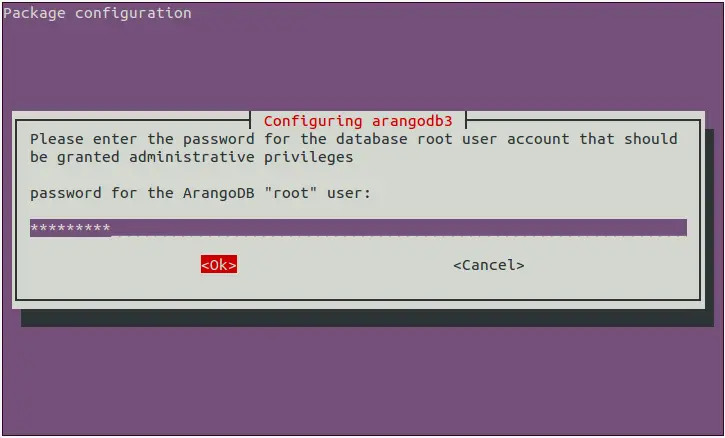
apt-get update -yapt-get install apt-transport-https arangodb3 -y在安装过程中,您需要回答一些问题:
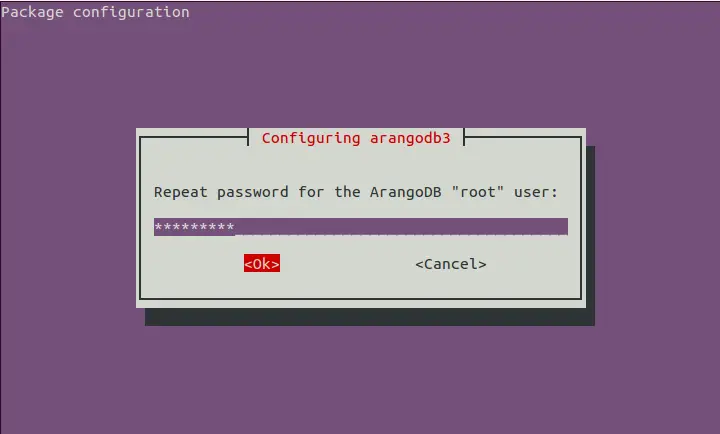
设置数据库root密码如下图:
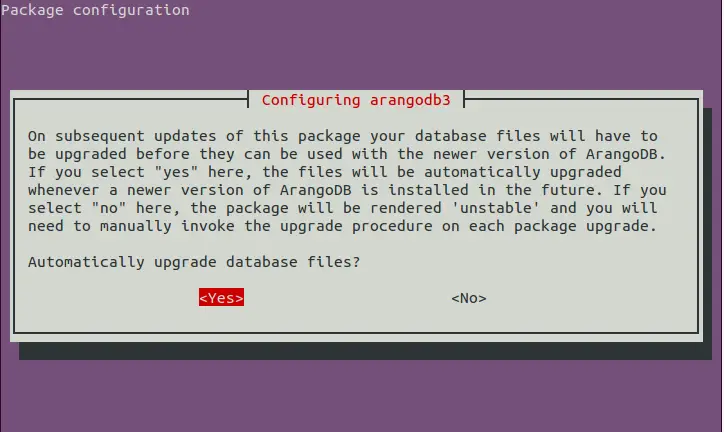
选择自动升级数据库文件如下图:
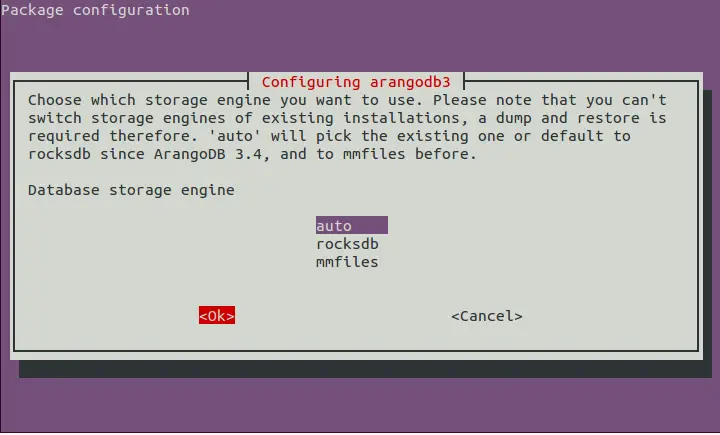
选择数据库存储引擎如下图:
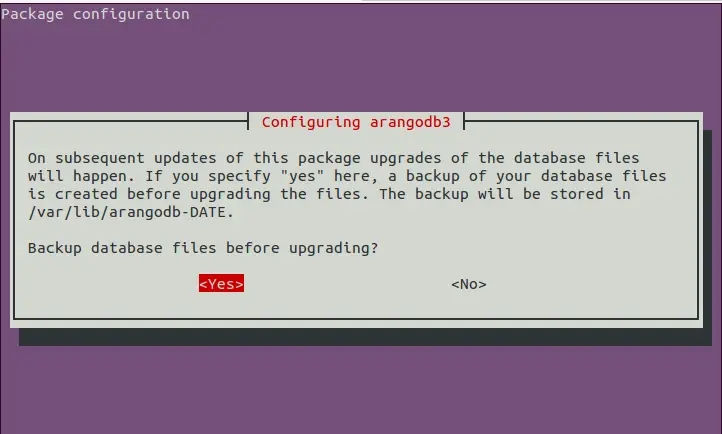
在进行升级之前备份数据库,如下所示:
安装成功完成后,启动 ArangoDB 服务并使用以下命令使其在启动时启动:
systemctl start arangodb3systemctl enable arangodb3您可以使用以下命令检查 ArangoDB 的状态:
systemctl status arangodb3您应该看到以下输出:
? arangodb3.service - ArangoDB database server
   Loaded: loaded (/lib/systemd/system/arangodb3.service; enabled; vendor preset: enabled)
   Active: active (running) since Tue 2019-05-07 16:00:21 UTC; 2min 57s ago
 Main PID: 14070 (arangod)
    Tasks: 18 (limit: 131072)
   CGroup: /system.slice/arangodb3.service
           ??14070 /usr/sbin/arangod --uid arangodb --gid arangodb --pid-file /var/run/arangodb3/arangod.pid --temp.path /var/tmp/arangodb3 --l

May 07 16:00:21 ubuntu1804 arangod[14070]: 2019-05-07T16:00:21Z [14070] INFO ArangoDB 3.4.5 [linux] 64bit, using jemalloc, build tags/v3.4.5-0-
May 07 16:00:21 ubuntu1804 arangod[14070]: 2019-05-07T16:00:21Z [14070] INFO detected operating system: Linux version 4.15.0-20-generic (buildd
May 07 16:00:21 ubuntu1804 arangod[14070]: 2019-05-07T16:00:21Z [14070] INFO {authentication} Jwt secret not specified, generating...
May 07 16:00:21 ubuntu1804 arangod[14070]: 2019-05-07T16:00:21Z [14070] INFO using storage engine rocksdb
May 07 16:00:21 ubuntu1804 arangod[14070]: 2019-05-07T16:00:21Z [14070] INFO {cluster} Starting up with role SINGLE
May 07 16:00:21 ubuntu1804 arangod[14070]: 2019-05-07T16:00:21Z [14070] INFO {syscall} file-descriptors (nofiles) hard limit is 131072, soft li
May 07 16:00:21 ubuntu1804 arangod[14070]: 2019-05-07T16:00:21Z [14070] WARNING {threads} --server.threads (64) is more than eight times the nu
May 07 16:00:22 ubuntu1804 arangod[14070]: 2019-05-07T16:00:22Z [14070] INFO {authentication} Authentication is turned on (system only), authen
May 07 16:00:25 ubuntu1804 arangod[14070]: 2019-05-07T16:00:25Z [14070] INFO using endpoint 'http+tcp://127.0.0.1:8529' for non-encrypted reque
May 07 16:00:27 ubuntu1804 arangod[14070]: 2019-05-07T16:00:27Z [14070] INFO ArangoDB (version 3.4.5 [linux]) is ready for business. Have fun!
您还可以通过运行 arango-secure-installation 脚本来保护 ArangoDB。
首先,使用以下命令停止 ArangoDB 服务:
systemctl stop arangodb3然后,使用以下命令保护 ArangoDB:
arango-secure-installation
 Please enter password for root user:
 Repeat password:
提供您的 root 并按 Enter,您应该会看到以下输出:
2019-05-07T16:03:53Z [14322] INFO {syscall} file-descriptors (nofiles) hard limit is 1048576, soft limit is 1048576
2019-05-07T16:03:53Z [14322] WARNING {threads} --server.threads (64) is more than eight times the number of cores (1), this might overload the server
2019-05-07T16:03:55Z [14322] INFO Password changed.
2019-05-07T16:03:55Z [14322] INFO {startup} server will now shut down due to upgrade, database initialization or admin restoration.
使用 ArangoDB
ArangoDB 现已安装并运行。您现在可以使用以下命令启动 ArangoDB shell:
arangosh
 Please specify a password:
提供 root 密码后,您应该会看到以下输出:
                                       _
  __ _ _ __ __ _ _ __   __ _  ___  ___| |__
 / _` | '__/ _` | '_ \ / _` |/ _ \/ __| '_ \
| (_| | | | (_| | | | | (_| | (_) \__ \ | | |
 \__,_|_|  \__,_|_| |_|\__, |\___/|___/_| |_|
                       |___/

arangosh (ArangoDB 3.4.5 [linux] 64bit, using jemalloc, build tags/v3.4.5-0-g648fbb8191, VPack 0.1.33, RocksDB 5.16.0, ICU 58.1, V8 5.7.492.77, OpenSSL 1.1.0j  20 Nov 2018)
Copyright (c) ArangoDB GmbH

Command-line history will be persisted when the shell is exited.
Connected to ArangoDB 'http+tcp://127.0.0.1:8529' version: 3.4.5 [SINGLE, server], database: '_system', username: 'root'

Type 'tutorial' for a tutorial or 'help' to see common examples
127.0.0.1:_system>
现在,使用以下命令创建一个名为 mydb 的示例数据库:
127.0.0.1:_system> db._createDatabase("mydb");接下来,使用以下命令创建数据库用户并设置密码:
127.0.0.1:",
 "active" : true,
 "extra" : {
 },
 "code" : 201
 }
接下来,使用以下命令授予对数据库的访问权限:
127.0.0.1:", "mydb");接下来,使用以下命令列出您的数据库:
127.0.0.1:_system> db._databases()输出:
[
  "_system",
  "mydb"
]
接下来,使用以下命令使用 myuser 连接到您的 mydb 数据库:
arangosh --server.username "" --server.database mydb
 Please specify a password:
提供您的用户密码并按 Enter,您应该会看到以下输出:
                                       _
  __ _ _ __ __ _ _ __   __ _  ___  ___| |__
 / _` | '__/ _` | '_ \ / _` |/ _ \/ __| '_ \
| (_| | | | (_| | | | | (_| | (_) \__ \ | | |
 \__,_|_|  \__,_|_| |_|\__, |\___/|___/_| |_|
                       |___/

arangosh (ArangoDB 3.4.5 [linux] 64bit, using jemalloc, build tags/v3.4.5-0-g648fbb8191, VPack 0.1.33, RocksDB 5.16.0, ICU 58.1, V8 5.7.492.77, OpenSSL 1.1.0j  20 Nov 2018)
Copyright (c) ArangoDB GmbH

Command-line history will be persisted when the shell is exited.
Connected to ArangoDB 'http+tcp://127.0.0.1:8529' version: 3.4.5 [SINGLE, server], database: 'mydb', username: ''

Type 'tutorial' for a tutorial or 'help' to see common examples
127.0.0.1:>
访问 ArangoDB Web 界面
现在已经安装并配置了 ArangoDB,是时候访问 ArangoDB Web 界面了。 ArangoDB Web 界面可用于管理数据库、集合、文档、用户、图形和检查服务器状态。
默认情况下,ArangoDB 配置为仅从本地主机访问。因此,您需要将 ArangoDB 配置为从远程位置访问。你可以通过编辑 /etc/arangodb3/arangod.conf 文件来做到这一点:
nano /etc/arangodb3/arangod.conf更改以下行:
从 :
endpoint = tcp://127.0.0.1:8529
到
endpoint = tcp://192.168.0.104:8529
完成后保存并关闭文件。然后,重启 ArangoDB 服务以应用所有这些更改:
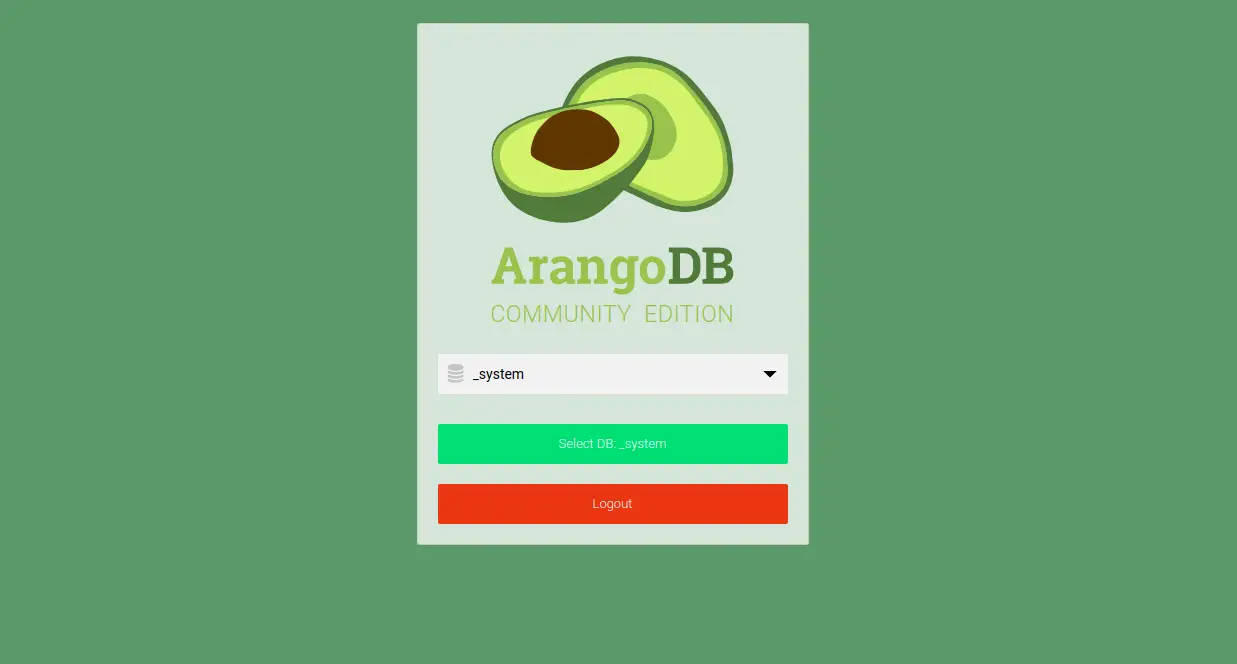
systemctl restart arangodb3现在,打开您的 Web 浏览器并输入 URL http://192.168.0.104:8529。您将被重定向到以下页面:

现在,提供您的根用户名和密码。然后,单击“登录”按钮。您应该会看到以下页面:
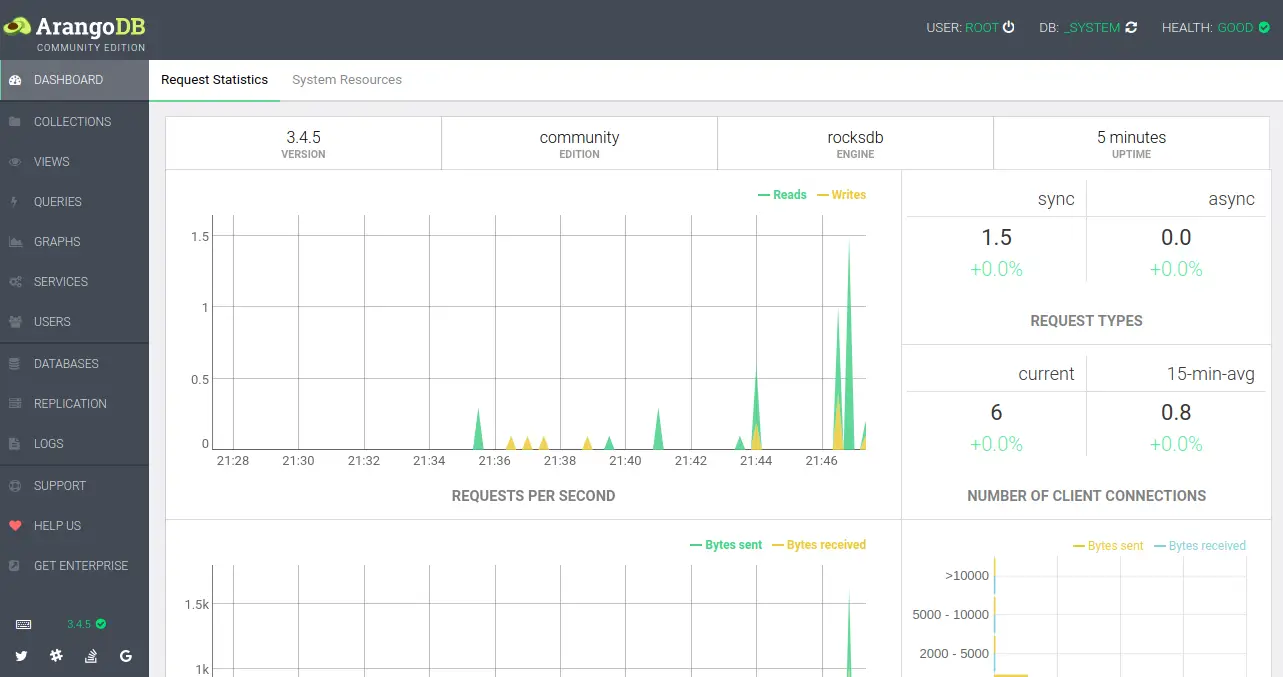
现在,选择数据库并单击“选择数据库”。您应该在以下页面中看到 ArangoDB 仪表板:
恭喜!您已经在 Ubuntu 18.04 服务器上成功安装并配置了 ArangoDB。如果您有任何问题,请随时问我。